Picture this: a week after cleaning up your flower beds, the weeds have already staged a comeback, the soil’s dried out, and your plants look more stressed than you do after a long day. Sound familiar? Gardeners everywhere know this struggle—it’s real, and it’s relentless.
Leaving your garden soil bare is a bit like stepping outside in winter without a coat. Plants lose moisture fast, weeds can invade overnight, and all your hard work gets undone quicker than you’d expect. If you’ve felt that sting of wasted effort, trust me, you’re not alone.
By the time you reach the end of this guide, you’ll know exactly which mulching method fits your needs and how to leverage garden mulching benefits types to create healthier, easier-to-maintain beds. Ready to reclaim your weekends from endless weeding? Let’s dig in.
Why Mulching Matters For Every Garden
You know that feeling when you pour hours into planting, only to watch weeds overrun your hard work or the soil turn hard as a brick after a rain? That’s the daily reality for countless gardeners—but what if there was one step that could radically shift the odds in your favor?
Here’s the thing: mulching isn’t just “something nice” for fancy landscapes. It’s the single most overlooked secret weapon for creating strong, resilient, low-maintenance beds. Mulch holds crucial moisture, shields roots from baking sun and freezing temps, and—best of all—reduces the time you spend on chores like weeding and watering. The University of California’s Division of Agriculture and Natural Resources actually lists mulching as the #1 sustainable practice for backyard growers.
💡 Pro Tip: Don’t mix mulch into your soil — just layer it on top. Mixing encourages nitrogen lock-up, which can stunt plant growth and frustrate even seasoned gardeners.
In practice:
Picture this scenario: two gardeners plant tomatoes on the same weekend. The first skips mulching. By July, they’re watering every day and battling crabgrass. The second spends an extra hour spreading straw around her plants. Come August, she’s barely weeding, her soil is cool and crumbly, and her harvest easily doubles. Not magic—just mulch.
| Benefit | How It Helps | Impact |
|---|---|---|
| Moisture Retention | Reduces evaporation from soil | Less watering needed—up to 50% less, per Colorado State University |
| Temperature Control | Insulates roots from heat & cold | Prevents frost damage, cools in heatwaves |
| Weed Suppression | Blocks sunlight to weed seeds | Fewer weeds—less competition, fewer chores |
And honestly? Most gardeners don’t realize just how many labor hours or lost crops they could avoid with the right mulch. The trick is knowing which type suits your climate and soil needs. But there’s one detail most owners completely overlook until it’s too late…
Top Benefits: Healthier Plants, Fewer Weeds, Better Soil
If you’re tired of your plants struggling or wish you spent less time on your knees weeding, you might wonder—what are the actual perks of mulching? Can a layer of mulch really transform your garden’s performance, or is it just another trend?
Here’s the truth: mulching delivers a suite of tangible benefits that touch nearly every aspect of plant health and soil quality. It’s not hype. The United States Department of Agriculture (USDA) has even published research showing that gardens with effective mulch application experience up to 85% fewer annual weeds and retain soil nutrients up to 40% longer.
- Healthier Plants: By controlling soil temperature swings and locking in moisture, mulch fosters stronger root growth—key for robust blooms and bountiful harvests.
- Fewer Weeds: A proper mulch layer deprives weed seeds of sunlight, curbing their growth and saving you hours each season.
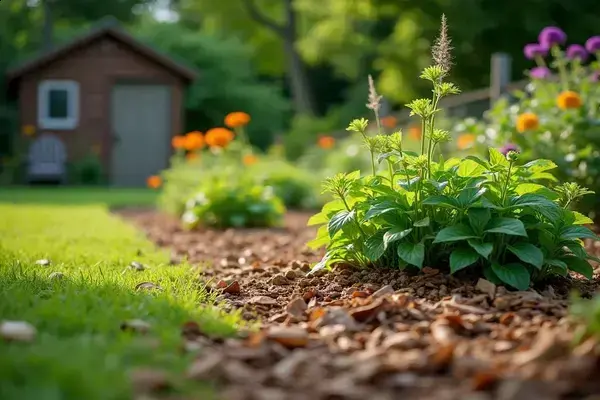
- Improved Soil: Organic mulches (like shredded leaves or bark) break down over time, enriching soil with vital nutrients and microbes your plants crave.
In practice: Last July, a first-year gardener mulched her tomatoes with leaf mold after seeing mulch recommendations from the Royal Horticultural Society. She noticed her watering needs dropped by nearly half, weeds barely made an appearance, and by fall, her sandy soil had a rich, crumbly texture—far better than the patch she left bare.
💡 Pro Tip: Always apply mulch after a heavy rain or thorough watering. Trapping in moisture gives your plants a major head start, especially during summer heatwaves.
| Benefit | What to Expect | Best For |
|---|---|---|
| Plant Health | Stronger roots, less stress | Fruit, veggies, ornamentals |
| Weed Control | Fewer weeds, less labor | All gardens |
| Soil Quality | Rich soil, more microbes | Long-term beds |
What actually works might surprise you…
Popular Mulch Types Explained: Organic And Inorganic
Choosing the right mulch can feel overwhelming—should you go organic for soil health, or pick inorganic for pure convenience? Let’s break down what actually sets these types apart and why each might make sense for your garden beds.
Organic mulches are made of natural materials that break down over time, slowly feeding your soil and boosting its structure. Inorganic mulches, by contrast, don’t decompose at all. They’re typically made from rock or synthetic materials and are chosen primarily for durability and low maintenance.
| Type | Main Pro | Consideration |
|---|---|---|
| Shredded Bark | Feeds soil as it breaks down | Needs regular top-up |
| Compost/Leaf Mold | Boosts nutrients/microbes | May attract bugs if piled deep |
| Straw | Excellent for veggies, suppresses weeds | Can blow away in wind |
| Landscape Fabric | Long-lasting, blocks weeds | Doesn’t enrich soil, can overheat |
| Rock/Gravel | Won’t decompose, low maintenance | Retains heat; tricky to remove/lift |
⚠️ Important Warning: Black plastic weed barriers may suffocate beneficial soil life and trap too much moisture, leading to rot. The University of Minnesota Extension always recommends careful planning before using plastic in home gardens.
In practice: A suburban gardener used straw mulch around tomatoes and shredded bark under his shrubs. The straw boosted yield but needed topping up midseason, while the bark kept weeds at bay all year. But in his rock-mulched beds, the soil underneath turned almost impossible to dig after two years—a classic inorganic risk if you swap plants often.
- Organic mulch: Invests in soil health, returns nutrients, but requires replenishing and may attract insects or mold if too thick.
- Inorganic mulch: Offers low-maintenance weed control and stays put longer, but can create heat buildup and doesn’t improve soil quality.
And this is exactly where most people make the most common mistake…
How To Choose The Right Mulch For Your Space
Ever stand in the mulch aisle, staring at fifty bags and wondering which one actually fits your beds? You’re not alone—choosing the right mulch means balancing plant needs, climate quirks, and even your maintenance routine. The right choice can unlock dramatic soil improvements and seriously lighten your gardening workload.
- Evaluate Your Plants: Are you mulching perennials, veggies, or shrubs? Some (like strawberries and tomatoes) love straw, while woody plants thrive with shredded bark.
- Assess Your Climate: Hot, dry regions do best with moisture-holding organic mulches like compost or leaf mold. In damp climates, gravel or stone often prevents slugs and mold issues.
- Set Your Maintenance Level: If you want low effort, opt for inorganic options like landscape fabric (under stone) or rubber mulch, which last for years but won’t feed your soil.
- Check Soil Needs: Poor, sandy soils benefit from nutrient-rich mulch like compost. For heavy clay, coarse bark improves drainage and structure.
- Consider Aesthetics (and HOA rules): Color and texture matter. Dark wood chips give a premium look but might fade in strong sunlight. Light straw glows in spring beds but can scatter on windy days.
- Estimate Your Budget: Free mulches (leaves, grass clippings) save money but require more replenishing. Store-bought bark or designer stones cost more up front but save labor season after season.
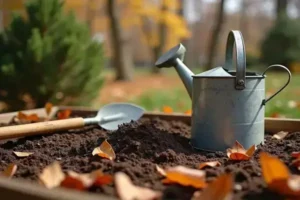
- Shovel
- Garden gloves
- Rake
- Compost, bark, straw, gravel, or fabric (as chosen)
Time needed: Most small beds take 30–60 minutes, while larger landscapes may require a weekend afternoon.
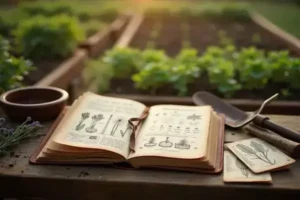
💡 Pro Tip: Test a small section first with the mulch you plan to use, especially if switching material types. Local ag extension offices—like those at state universities—often offer region-specific advice that’s surprisingly accurate.
In practice: One urban gardener went from weekly crabgrass battles to a weed-free, beautiful border just by swapping out dyed wood chips for a thick layer of compost. His soil is richer, his water bill’s lower, and his plants now produce more flowers every summer.
But there’s one detail most owners completely overlook until it’s too late…
Step-By-Step Guide: Applying Mulch Effectively
Worried you’ll make a rookie mistake mulching your beds? It’s simpler than you think—but the details really matter. Here’s a streamlined process to help your mulch do its very best work.
- Prepare the Area: Weed thoroughly, water the soil until moist (not soggy), and rake the surface flat. This gives your plants a stress-free foundation.
- Edge the Bed: Use a straight spade or edger to create a crisp border. Edging helps prevent mulch spillover and keeps grass from creeping in.
- Select and Measure: Buy enough mulch for a 2–4 inch layer. For most beds, that’s roughly one bag per 10 square feet. Fine mulches need less, chunky types need more.
- Apply Carefully: Spread mulch in an even layer, avoiding direct contact with stems and trunks. Leave at least an inch gap around each plant to prevent rot.
- Water it In: Lightly soak your new mulch after application. This settles it in and starts the breakdown process for organic types.
- Tidy and Maintain: Check in every few weeks. Fluff compacted mulch, top up bare spots, and watch for signs of mold in damp weather.
- Shovel or pitchfork
- Wheelbarrow
- Rake
- Gloves
- Measuring tape
- Mulch (your chosen type)
Time needed: Most home beds take an hour or less—larger landscape jobs may need a weekend. Think of it as an upfront investment for a season of savings.
💡 Pro Tip: For trees, create a donut-shaped ring of mulch—2 to 3 inches deep but never pressed against the trunk. According to the Arbor Day Foundation, this helps prevent disease and rodent damage.
Picture this scenario: You’ve followed every step, and suddenly your garden beds look like the glossy ones in premium gardening catalogs. Less weeding, healthier roots, and a steady rhythm—once this is in place, the rest of your routine falls into place naturally.
Your Garden, Mulched and Thriving
If you take just one thing from this guide, let it be: the right mulch has the power to protect your plants, enrich your soil, and save you hours of work—every single season. Using garden mulching benefits types truly can make gardening easier and more rewarding.
Maybe before, you were second-guessing every bag in the mulch aisle or stuck battling weeds that just wouldn’t quit. Now you’ve got the knowledge to choose smart, apply with confidence, and watch your soil transform. It’s not about being perfect—it’s about making little improvements that last. You’re ready for your best-looking beds yet.
Which mulch are you most excited to try, or do you have a tip we missed? Share your thoughts in the comments so other gardeners can learn from you too!

Ryan James Mitchell is a passionate gardener and plant care enthusiast dedicated to helping everyday people grow food, keep their plants thriving, and connect with nature — one garden at a time. With years of hands-on experience in vegetable gardening, indoor plant care, and seasonal garden planning, Ryan built 3sols to be the practical, honest gardening resource he always wished existed.