Ever picked up a bunch of spinach at the store only to wonder if it could be fresher? Growing spinach at home means you control the freshness and quality of those vibrant leaves, right from your kitchen or garden. It’s not just about having greens; it’s about having nutrient-packed goodness on hand whenever you want it.
Many folks give up on home gardening because they assume leafy greens like spinach are tricky to grow or require too much space. The truth is, with the right know-how, you can have a thriving little patch—even if your outdoor space is limited or you’re working with containers inside.
By the end, you’ll know exactly how to plant, nurture, and harvest your own spinach with confidence. It’s practical, straightforward, and—best of all—you’ll be enjoying fresh leaves straight from your personal garden bed. Ready to dig in? Let’s get growing.
Choosing The Right Spinach Variety For Your Space
Choosing the right spinach variety might seem straightforward — but did you know that it can drastically influence your harvest’s success and flavor? Not all spinach varieties thrive in every environment, so matching the plant to your specific growing conditions is crucial.
Here’s the thing: spinach varieties differ mainly in leaf type, growth habit, and season suitability. For example, smooth-leaf spinach like ‘Bloomsdale’ offers tender leaves with a mild flavor, while savoy-types boast crinkly, robust leaves that are a bit heartier.
In practice: imagine a small balcony gardener in a cooler climate trying to grow summer spinach. Choosing a heat-tolerant variety like ‘Tyee’ could be the difference between a bountiful crop and wilted disappointment. Spinach varieties such as ‘Butterflay’ perform better in warmer seasons due to their resistance to bolting (when the plant goes to seed prematurely).
💡 Pro Tip: According to the USDA Plant Hardiness guidelines, selecting varieties adapted to your local zone helps prevent common issues like early bolting and pests, improving your spinach’s yield and quality.
Popular Spinach Varieties Comparison
| Variety | Leaf Type | Best For |
|---|---|---|
| Bloomsdale | Smooth, Thick | Cool climates, early spring/fall |
| Space | Semi-savoy, Semi-smooth | Fast growth, disease resistance |
| Tyee | Smooth, Flat | Warm weather, bolt resistant |
Worth noting: if space is tight, consider baby leaf varieties. They don’t grow as large but can be harvested repeatedly, perfect for container gardening. Choosing the right seed supplier—preferably one certified organic or non-GMO—also plays into overall success.
But there’s one detail most owners completely overlook until it’s too late—the timing and environment suitability of the variety itself can make or break your spinach crop…
Preparing Soil And Containers For Optimal Growth
What exactly makes soil and containers so important when growing spinach at home? The truth is, your spinach’s health starts well before planting—it’s right there in the soil and the pot you choose. Poor soil or the wrong container can stunt growth or lead to weak, bitter leaves.
Preparing soil isn’t just about dumping some dirt in a pot. Spinach thrives in nutrient-rich, well-draining soil with a slightly acidic to neutral pH—typically between 6.0 and 7.0. Adding organic matter like compost improves texture and breathability, ensuring roots get enough oxygen while retaining moisture. Avoid heavy clay soils or overly sandy mixes that let water drain too quickly.
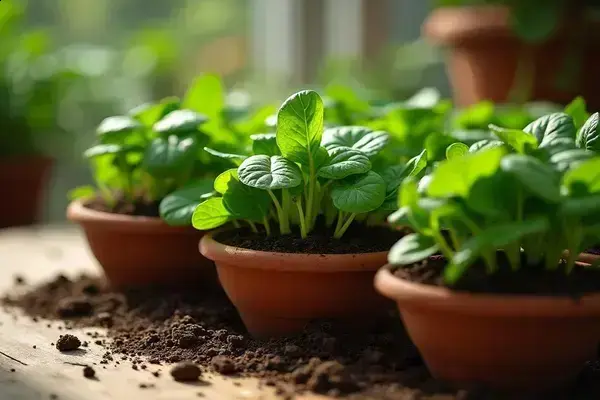
In practice: picture a city dweller with a sunny balcony trying container gardening. They start by mixing peat moss, compost, and a bit of vermiculite to create an airy, fertile blend. The container they picked isn’t just any pot—it’s a 12-inch deep planter with drainage holes, preventing waterlogged roots that could rot and kill their spinach crop.
💡 Pro Tip: According to the National Gardening Association, containers should have at least 6-8 inches of depth per the root system requirements, with holes at the bottom to avoid water pooling. Using a layer of gravel at the base also helps drainage without compacting the soil above.
Container Sizes and Soil Mix Options
| Container Size | Ideal Soil Depth | Notes |
|---|---|---|
| Small Pot (~6 inches) | 4-6 inches | Suitable for baby spinach, limited growth potential |
| Medium Planter (~12 inches) | 8-10 inches | Best for full-sized spinach plants, supports healthier roots |
| Large Container (>14 inches) | 10+ inches | Allows for multiple plants, ideal for longer growing seasons |
- Use high-quality potting mix rather than garden dirt to avoid pests and compaction.
- Pre-moisten soil before planting to help seeds germinate faster.
- Check container drainage regularly—water buildup is a silent yield killer.
Worth noting: adding a slow-release organic fertilizer tailored for leafy greens can give your spinach a steady food supply. But avoid overfertilizing—too much nitrogen can cause excessive leaf growth with poor flavor.
What actually works might surprise you—how you prep your soil and pick your container sets the stage for everything that follows, including watering and harvesting…
Step-By-Step Planting Guide For Healthy Spinach
Ready to get your hands dirty? Planting spinach might look simple, but each step really sets the stage for a healthy, vibrant harvest. You want those crisp, nutrient-packed leaves, right? Here’s exactly how to start strong and keep your spinach thriving.
Here’s the thing: spinach seeds are tiny, so spacing and soil conditions need careful attention. Overcrowding leads to weak plants, while poor soil prep can stunt growth. Timing matters too—spinach prefers cool weather, so aim for early spring or late summer plantings.
- Choose Your Container and Prepare Soil: Use a medium to large container with drainage holes, filled with a rich, well-draining potting mix enhanced with compost.
- Sow Seeds Correctly: Plant seeds about ½ inch deep, spaced 2 inches apart for baby leaves or 4 inches for mature leaves. Cover lightly with soil but don’t pack it tight.
- Water Gently and Consistently: Mist the soil right after planting. Keep soil moist but not soggy to encourage germination.
- Place in Partial Sun: Spinach loves 4-6 hours of sunlight daily. Too intense sun during warm months can cause bolting (going to seed early).
- Thin Seedlings: Once seedlings have grown their first true leaves, thin by snipping weaker ones so that stronger plants are spaced 4-6 inches apart.
💡 Pro Tip: The American Horticultural Society recommends planting spinach seeds every 10-14 days during the growing season for continuous harvest and to avoid crop failure due to pests or weather.
In practice: picture Jamie, a beginner gardener who planted seeds haphazardly and ended up with crowded, pale spinach that bolted early. On her second try, she followed this step-by-step guide, and within weeks, her leaves were lush, dark green, and perfect for salads.
| Step | What To Do | Why It Matters |
|---|---|---|
| 1 | Prepare Container and Soil | Provides nutrients and drainage necessary for roots |
| 2 | Sow Seeds ½ inch Deep | Avoids drying out and promotes germination |
| 3 | Water Gently | Keeps soil moist without washing seeds away |
| 4 | Provide Partial Sun | Protects from heat stress, prevents bolting |
| 5 | Thin Seedlings | Reduces competition, ensures strong growth |
But there’s one common mistake nearly every new grower makes—it’s the timing and spacing that really shape the quality of your spinach crop…
Caring For Spinach: Watering, Lighting, And Fertilizing
Wonder why your spinach leaves sometimes turn yellow or bolt early? The secret often lies in how you care for your plants—specifically, watering, lighting, and fertilizing. Each factor impacts plant health and flavor more than you might expect.
Here’s the thing: spinach loves consistent moisture but hates soggy feet. Too much water can suffocate roots, while too little stresses the plant, causing bitterness and reduced growth. Aim to keep the soil evenly moist by watering deeply but only when the top inch of soil feels dry.
Lighting is another puzzle piece. While spinach thrives in full sun, intense midday heat can cause premature bolting—when plants flower and go to seed quickly, ruining the leaves. Providing partial shade during hot hours helps maintain leaf tenderness and prolongs harvesting time.
Fertilizing spinach calls for a balanced approach. Excess nitrogen boosts leafy growth but can dull flavor or invite pests. On the other hand, too little nutrition leaves plants weak. Using a slow-release, nitrogen-rich fertilizer or organic options like compost tea every few weeks supports steady growth without overload.
💡 Pro Tip: According to the University of California Cooperative Extension, mulching around spinach plants helps retain soil moisture and regulates temperature, reducing watering frequency and stress from heat.
- Water Deeply but Infrequently: Check soil moisture regularly; water when the top 1 inch is dry to the touch.
- Provide Morning Sun and Afternoon Shade: Ideal lighting reduces bolting risk during warmer months.
- Apply Balanced Fertilizer Every 3-4 Weeks: Choose fertilizer labeled for leafy greens or use organic compost methods.
- Use Mulch to Retain Moisture: Organic mulch like straw prevents soil drying.
- Monitor Plants Regularly: Look for signs like yellowing leaves or stunted growth to adjust care accordingly.
In practice: imagine Sarah, a new gardener who kept watering daily even after soil was soaked, and her spinach struggled with mildew and weak leaves. After adjusting to a smarter watering schedule and adding partial afternoon shade, her spinach thrived with rich, deep green leaves ready for harvest.
| Care Aspect | Best Practice | Impact |
|---|---|---|
| Watering | Deep, infrequent watering when soil dries | Prevents root rot and supports healthy growth |
| Lighting | Morning sun with afternoon shade | Reduces bolting, keeps leaves tender |
| Fertilizing | Slow-release nitrogen fertilizer or compost tea | Encourages lush, flavorful foliage |
And this is exactly where most people make the most common mistake—neglecting the balance and timing in their care routine, which can cost them a great crop…
Harvesting And Storing Spinach For Maximum Freshness
Wondering when to pick your spinach for that perfect balance of flavor and nutrition? Timing your harvest right is crucial for enjoying fresh, tender leaves that pack a nutrient punch. Harvest too early, and you’ll miss out on full flavor; wait too long, and leaves can become tough or start to bolt.
Here’s the thing: spinach is best harvested when leaves are young and tender, typically 37 to 45 days after sowing. This window ensures leaves are full of vitamins like iron and vitamin K but haven’t become stringy or bitter. You can either cut the entire plant at the base or selectively pick outer leaves to encourage continuous growth.
In practice: picture Mia, who carefully snipped outer leaves every week from her container garden, enjoying a steady supply without sacrificing plant health. Her spinach stayed productive, and she avoided the waste that comes with cutting whole plants prematurely.
- Check Leaf Size: Harvest when leaves reach about 3 to 4 inches long—ideal for salads and cooking.
- Use Clean, Sharp Scissors or Garden Shears: This prevents damage to remaining plants and reduces disease risk.
- Pick Early in the Morning: Leaves are most hydrated and crispest before the day heats up.
- Store Properly: After harvesting, rinse leaves gently and dry thoroughly. Store in a breathable container or a paper towel-lined bag in the refrigerator.
- Use Quickly: Spinach is best consumed within 3 to 5 days of harvest for peak freshness and nutrients.
💡 Pro Tip: According to the Vegetable Growers Association, continuous harvesting by leaf picking extends the life and yield of spinach plants, making your growing efforts more rewarding.
| Harvest Method | Pros | Cons |
|---|---|---|
| Cut-and-Come-Again (Leaf Picking) | Continuous harvest, encourages regrowth | Requires regular monitoring and delicate handling |
| Full Plant Harvest | Simple, quick, ideal for total crop | Ends plant’s life, no successive harvests |
And honestly? The way you harvest and store spinach can make all the difference between limp leaves and vibrant meals packed with nutrients. But there’s one detail most owners completely overlook until it’s too late…
Your Spinach Garden Awaits
If you take just one thing from this guide, let it be: growing healthy, nutrient-rich spinach at home starts with choosing the right variety, preparing quality soil and containers, and caring carefully with watering, light, and fertilization. These steps make all the difference for a thriving crop.
Before reading this, you might have felt overwhelmed by where to begin or worried about common mistakes. Now, you’re equipped with clear, practical steps to plant, nurture, and harvest your own fresh spinach with confidence. You’ve got everything you need to turn a small space into a green oasis full of tasty leaves.
Which part of growing spinach are you excited to try first? Are you ready to pick your variety or start prepping your soil? Share your plans in the comments—we’d love to hear from you!

Ryan James Mitchell is a passionate gardener and plant care enthusiast dedicated to helping everyday people grow food, keep their plants thriving, and connect with nature — one garden at a time. With years of hands-on experience in vegetable gardening, indoor plant care, and seasonal garden planning, Ryan built 3sols to be the practical, honest gardening resource he always wished existed.