Ever opened your trash can and felt a twinge of guilt seeing banana peels, coffee grounds, and veggie scraps just going to waste? You’re probably not alone—throwing away food feels wrong, especially when it could be put to better use.
Here’s the thing: when kitchen waste piles up, not only does it take over your bin, but it also lands in landfills where it can’t really give back. That missed chance means lost savings, missed soil magic, and, frankly, a bit more climate guilt than any of us want. Composting is easier than you think, but the maze of tips and tricks online can get overwhelming fast.
By the time you finish this guide, you’ll have a clear, printable composting guide beginners printable with everything you need to get started, sidestep rookie mistakes, and actually enjoy the process. Ready to transform your kitchen scraps into garden gold? Let’s dig in—your greener lifestyle starts now.
Understanding The Basics Of Composting
Why do so many gardeners rave about composting as the ‘secret ingredient’? It’s not complicated science — it’s nature at work, and you’ll see the magic happen right in your own backyard. Composting is the controlled breakdown of organic materials like kitchen scraps and yard waste into nutrient-rich humus. This isn’t just about less trash; it’s a cycle that benefits your soil, your plants, and honestly, your bank account—less money spent on commercial fertilizers.
The basics come down to three main ingredients: browns, greens, and water. Browns are carbon-rich materials like dried leaves, cardboard, or straw. Greens bring the nitrogen — think veggie peels, coffee grounds, and grass clippings. And water keeps it all breaking down smoothly. The right balance means you get rich compost, not a soggy mess or a pile that never turns.
- Browns: Dried leaves, paper, wood chips
- Greens: Fruit/veggie scraps, lawn clippings, tea bags
- Water: Moisten regularly, but don’t drown it
💡 Pro Tip: The Environmental Protection Agency (EPA) recommends a ratio of about three parts browns to one part greens for most backyard compost piles—this keeps odors in check and speeds up decomposition.
Picture this scenario: You toss your morning coffee grounds and eggshells into a small bin on the counter. That night, you’re cleaning up outside, raking dry leaves into a bag. Instead of hauling everything to the curb, you layer the scraps and leaves in a pile, give it a bit of water—suddenly, you’re starting a transformation instead of just making trash.
| Material | Type | Composting Role |
|---|---|---|
| Fruit Peels | Green | Provides nitrogen, speeds up process |
| Dried Leaves | Brown | Adds carbon, balances moisture |
| Coffee Grounds | Green | Boosts microbial activity |
| Shredded Paper | Brown | Absorbs excess moisture |
But there’s one detail most beginners overlook until it’s too late—getting the mix wrong is the top reason home compost piles turn smelly or sluggish…
Essential Tools And Materials For Home Composting
What do you actually need to start composting at home—do you need fancy equipment, or can you get by with what you have? The truth is, the best composting setups blend the right materials with just a handful of essential tools. If you want your pile to break down quickly, stay odor-free, and give you top-quality compost, a little preparation goes a long way.
- Compost Bin or Pile: Choose between a premade compost bin, tumbling composter, or just a dedicated corner of your yard. Material, ventilation, and size matter.
- Pitchen Fork or Aeration Tool: Turning your compost lets oxygen in—vital for decomposition and avoiding bad smells.
- Kitchen Scrap Pail: Helps you collect food scraps easily, so composting fits your daily routine.
- Brown and Green Inputs: Stockpile dry leaves, shredded newspaper, or sawdust as carbon sources (browns); mix in kitchen scraps, grass clippings, and coffee grounds for nitrogen (greens).
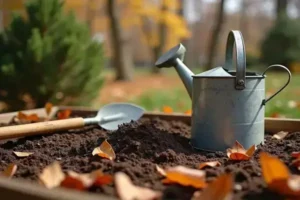
- Water Source: You’ll need a hose or watering can nearby to keep your pile just damp—think wrung-out sponge, not swampy.
💡 Pro Tip: The National Gardening Association highlights that stainless steel or ceramic kitchen scrap pails with charcoal filters keep smells in check and blend into modern kitchens effortlessly.
In practice: picture this scenario—a compact compost tumbler parked on your patio, a stainless countertop pail next to your sink (full of kale stems and spent tea leaves), and a stack of leaf bags by the garage. You dump, mix, and within weeks, you can see dark, crumbly compost forming. No mess, no mystery.
| Tool/Material | Function | Pro/Con |
|---|---|---|
| Tumbling Composter | Accelerates aeration and mixing | Efficient, but higher cost |
| Pile in Yard | Cost-free and customizable | Works well, but less tidy |
| Stainless Scrap Pail | Collects kitchen scraps indoors | No smell, but clean regularly |
But there’s one type of tool most beginners totally forget—yet it solves half of the odor and mess complaints before they even start…
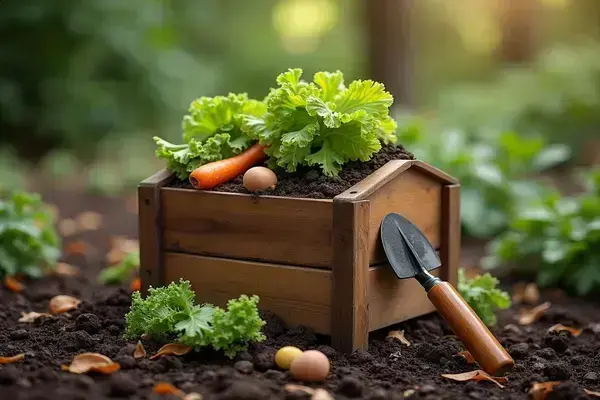
Step-By-Step Process: From Kitchen Scraps To Finished Compost
Ever felt unsure about what to do with your kitchen scraps once you decide to compost? Getting from banana peels to garden-ready compost is simpler than you’d expect, but there’s a rhythm to it—and a few critical details that make the difference between rich soil and a smelly pile. Here’s how you turn everyday waste into a garden hero:
- Pitchfork or sturdy stick
- Kitchen scrap pail
- Compost bin or pile
- Dried leaves or shredded paper (browns)
- Watering can or hose
- Gardening gloves (optional but smart)
- Collect and Prep Scraps: After each meal, toss fruit and veggie peels, coffee grounds, eggshells, and similar scraps into your kitchen pail. Avoid meat, dairy, and oily foods—these can attract pests.
- Layer Your Pile: Bring your pail out and add scraps to your outdoor bin. Immediately cover with a layer of browns—think dried leaves or shredded newspaper. This keeps down odor and balances moisture.
- Maintain The Balance: Alternate green (nitrogen) and brown (carbon) materials, aiming for roughly three parts browns to one part greens for optimal decomposition, according to the U.S. Department of Agriculture.
- Keep It Moist: Check your pile—if it’s dry, sprinkle with water until it’s about as damp as a wrung-out sponge. Too much water and you’ve got mud, too little and it stalls out.
- Aerate Regularly: Once a week, use a pitchfork or stick to mix the pile. Oxygen is necessary for good microbes to break things down fast and without odor.
- Monitor and Wait: The pile should heat up and then start to cool after a few weeks. When it looks dark and crumbly, smells earthy (not rotten!), you’ve got finished compost—usually in 2–4 months.
⚠️ Important Warning: Never add pet waste, chemically treated grass, or plastic-based materials. According to the Environmental Protection Agency, these can introduce toxins or pathogens to your compost and garden.
Picture this scenario: It’s Sunday morning. You open your bin and see last night’s veggie peels blended with last week’s leaves, already touching the heat phase. You scoop up a handful—dark, moist, no foul smell, just pure garden gold. The process works—you just have to follow it consistently.
And this is exactly where most people make the most common mistake…
Troubleshooting Common Composting Issues
What happens when your compost pile starts smelling funky or just sits there, stubbornly refusing to break down? Don’t worry—composting isn’t always flawless on the first try. Most common issues have quick fixes, and once you spot the root cause, you’ll get back on track without throwing away your hard work.
- Smelly Compost: If your pile reeks like rotten eggs or ammonia, it’s a sign there’s too much moisture or not enough air. Add dry browns (shredded leaves, straw) and mix to improve airflow.
- Dry, Slow Compost: A pile that’s stiff and dusty? Likely needs more green (nitrogen-rich) material and a good watering. Aim for the texture of a damp sponge.
- Pests or Flies: Notice fruit flies or raccoons getting a little too interested? Bury food scraps in the middle and always cover with a layer of browns.
- Not Heating Up: Temperature not rising? Your pile may be too small or need more greens for microbial action. Turn and add kitchen scraps or grass clippings.
- Matting or Clumping: Grass clippings and leaves can compress into a soggy mat. Tear apart, fluff, and add extra browns to prevent thick, soggy layers.
💡 Pro Tip: According to Cornell Waste Management Institute, the ideal compost temperature for rapid breakdown is 130–160°F. A simple compost thermometer helps you monitor this, but wearing gloves and feeling warmth at the pile’s core works in a pinch.
| Problem | Likely Cause | Solution |
|---|---|---|
| Rotten Smell | Too wet, low airflow | Add browns, turn often |
| Pile Won’t Heat | Lacks greens/small size | Add greens, build bigger |
| Pest Activity | Exposed food scraps | Bury and cover material |
| Dry + Stalled | Lacks moisture/greens | Water and add greens |
Picture this scenario: You open your compost lid in July, and the pile that should be cooking is just… cold. A quick check reveals a few too many twigs and paper bits, not enough kitchen scraps. Solution? Add a bucket of coffee grounds, mix well, and three days later, the center of the pile feels warm to the touch—problem solved.
What actually works might surprise you…
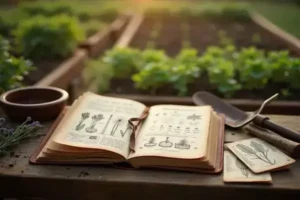
Handy Printable Guide And Checklist For Beginners
Ever wish you had an at-a-glance system so you’d never forget what to add, mix, or watch for in your compost? A printable composting checklist takes all the stress and second-guessing out of the process. With one on your fridge or garage wall, you’ll know exactly what step comes next—even on your busiest week.
- Compost Pile Setup: Date started, type (bin/tumbler/pile), initial material layers checked off
- Weekly Action Items: Add greens, cover with browns, water as needed, mix or aerate, check temperature (with a compost thermometer if possible)
- What To Avoid: Reminders to keep out meat, dairy, pet waste, treated grass, and non-biodegradables
- Troubleshooting Section: Quick reference for odors, dryness, and pests with space for your notes
- Compost Ready? Signs your pile has matured—color, texture, smell—plus a final “harvest” checklist
💡 Pro Tip: According to the U.S. Environmental Protection Agency, maintaining a weekly compost routine increases your success rate and produces finished compost up to 30% faster. Use your printable as a weekly accountability tool.
In practice: let’s say you pin your checklist next to the bin. On Saturday, the kids cross off “mix pile” and “add dry leaves.” You jot a quick note that the pile seems a bit dry, so you water it. When spring comes, your notes help you remember which methods sped up the process last year—saving you time and compost headaches.
| Checklist Section | Purpose | How Often |
|---|---|---|
| Setup Details | Record start for tracking | Once, at beginning |
| Weekly Actions | Reminds of main tasks | Every week |
| Troubleshooting | Quick problem-solving | As needed |
| Compost Readiness | Monitor harvest time | Final stage only |
The right habits in place now make everything easier from here.
Your Garden Gold Starts Today
If you take just one thing from this composting guide beginners printable, let it be: composting isn’t complicated, but consistency and the right steps make all the difference. You now know the basics, have the essential tools in mind, understand the step-by-step flow, and can troubleshoot with confidence.
Before, kitchen scraps may have seemed like waste—and composting felt like a messy mystery. Now? You have a simple plan, practical checklists, and the know-how to turn leftovers into rich, nourishing soil. It’s easier (and more rewarding) than you ever thought possible. Your plants—and wallet—will thank you.
Which part of your composting setup are you starting with first? Is it the bin, the checklist, or that very first kitchen scrap? Share your next step in the comments—we’d love to hear what you’re building!

Ryan James Mitchell is a passionate gardener and plant care enthusiast dedicated to helping everyday people grow food, keep their plants thriving, and connect with nature — one garden at a time. With years of hands-on experience in vegetable gardening, indoor plant care, and seasonal garden planning, Ryan built 3sols to be the practical, honest gardening resource he always wished existed.