You skip out to your backyard, armed with excitement and a few seed packets—only to realize you don’t have a clue where or how to start. Ever been there? It’s a small sting of disappointment that crops up every spring for new gardeners.
That blank slate of dirt quickly turns stressful, right? Without a plan, you find yourself wrestling with overcrowded carrots, wilting tomatoes, and way too many zucchini (let’s be honest—nobody needs that much zucchini). Frustration takes over, and all the fun drains from the process.
But it doesn’t have to be this way. By the time you finish reading, you’ll have a vegetable garden planner printable free that takes you step-by-step from seed shopping to harvest celebration. Ready to dig in and see just how simple—and satisfying—this journey can be?
Choosing The Right Spot And Layout For Your Garden
What’s the difference between a thriving vegetable garden and one that fizzles out by midsummer? It almost always comes down to where you plant and how you arrange your space. Too much shade or cramped layout sets you up for ongoing frustration.
Here’s the thing: sunlight is everything in the vegetable world. According to the National Gardening Association, most veggies need a minimum of six hours of direct sun daily—more for tomatoes, peppers, or squash. That means your first big decision isn’t about the seeds, but the location itself.
- Observe Sun Patterns: Spend a couple days watching where the sunlight falls in your yard from morning to late afternoon. South-facing spots get the most consistent exposure.
- Check Drainage: It’s not glamorous, but poor drainage turns beds into swamps. After heavy rain, see where puddles linger. Those spots are bad news for roots.
- Consider Proximity: Place your plot close to a water source—and where you’ll see it daily. Neglected corners invite weeds and pests.
💡 Pro Tip: Raised beds warm up faster and improve drainage, making them a favorite among first-time growers, warns the University of California Agriculture & Natural Resources.
Popular Garden Layouts (And Who Should Use Them)
| Layout Type | Best For | Downside |
|---|---|---|
| Rows | Large plots, easy tool access | Needs lots of room |
| Raised Beds | Poor soil, better drainage | Upfront material cost |
| Square Foot | Small yards, max yield/sq ft | Limits plant size |
In practice: Picture this scenario—Sarah has a modest backyard and dreams of fresh salads all summer. She experiments with a sunny, south-facing corner using two 4×8′ raised beds. The early heat helps her tomatoes ripen sooner, plus she can tend everything without stepping on the soil.
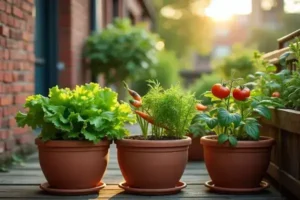
The truth is, there’s no single best layout—it’s about matching your space, sun, and habits. Don’t stress if all you have is a side yard or balcony; creative containers or vertical beds can work wonders. And this is exactly where most people make the most common mistake…
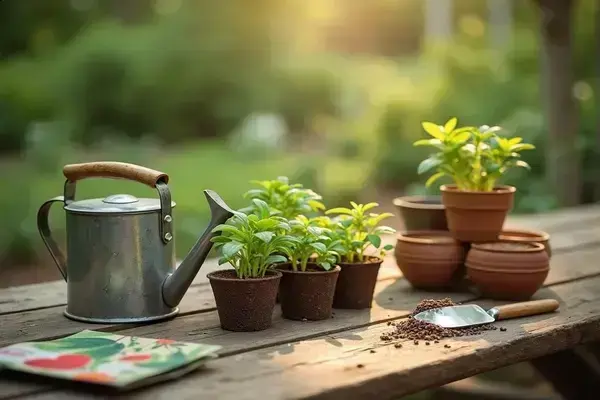
Essential Tools And Materials You’ll Need To Get Started
Ever found yourself staring at endless gardening aisles, completely stumped about which tools are truly essential versus which are just marketing fluff? Here’s the truth—starting your first vegetable garden shouldn’t drain your wallet or fill your shed with one-off gadgets.
- Hand Trowel: You’ll use this sturdy little workhorse for planting seeds, transplanting seedlings, and digging out stubborn weeds.
- Pruning Shears: Crucial for trimming back overgrown stems—go for a sharp, ergonomic pair that slices clean and won’t blister your hands.
- Gloves: Not just for looks. A good pair protects you from thorns, splinters, and the occasional surprise bug.
- Watering Can or Hose with Adjustable Nozzle: Precise watering means healthier roots—drippy old cans waste both water and your time.
- Garden Fork: Vital for turning soil and breaking up compacted earth before planting.
💡 Pro Tip: Invest in stainless steel tools—they last longer, resist rust, and save you money long-term. The National Gardening Association points out they’re especially worth it if you plan to expand your garden later.
Common Materials Needed
| Material | Purpose | Starter Alternative |
|---|---|---|
| Soil Amendments | Boost nutrients & drainage | Homemade compost |
| Mulch | Moisture retention & weed control | Grass clippings |
| Seed Trays | Organize early seedlings | Egg cartons |
In practice: Picture this scenario—a beginner named Eli skips the fancy stuff and starts with just a hand trowel, basic gloves, and a few recycled containers. He spends more time planting and less money on gadgets. By midsummer, his garden thrives while his neighbor, surrounded by unused specialty gear, wonders where she went wrong.
Choosing durable basics saves you headaches and cash. Look for comfort-grip handles and sturdy construction—those generic plastic sets barely last a season. What actually works might surprise you…
Step-By-Step Guide: From Seeds To Seedlings
Ever wondered why some gardeners seem to turn a handful of seeds into thriving, picture-perfect plants while the rest of us deal with straggly sprouts or total failure? The secret isn’t magic—it’s following the right steps, in the right order. You don’t need fancy equipment. You just need a little patience and some hands-on know-how.
- Organic seed starting mix
- Clean seed trays or recycled containers
- High-quality seeds (check expiration dates)
- Spray bottle for gentle watering
- Plastic dome or clear wrap (for humidity)
- Prep Your Containers: Wash and dry seed trays or containers thoroughly. Fill with pre-moistened seed starting mix—not regular garden soil, which can carry disease.
- Sow Seeds to the Right Depth: Press seeds into the mix according to the packet instructions. As a rule, plant seeds at a depth of about twice their width for best results.
- Add Moisture and Cover: Lightly spritz the surface with water and cover with a clear lid or wrap to hold in humidity. Place somewhere warm—most seeds prefer 65-75°F.
- Wait for Sprouts: Check daily. Once you see green shoots (usually in 5-15 days), remove the cover and move trays to a sunny windowsill or under grow lights.
- Keep Them Thriving: Water with a spray bottle whenever the top feels dry, and don’t let seedlings get leggy—rotate trays for even sunlight.
💡 Pro Tip: According to the Royal Horticultural Society, labeling your containers with plant variety and sowing date helps track germination and spot issues early on. Trust me, future-you will thank you during transplant season.
In practice: Picture this scenario—Ava, new to gardening, starts her tomatoes in egg cartons on her kitchen counter. She checks them every morning over coffee, watching tiny green shoots pop up faster than she expected. By tracking dates and keeping the mix damp but not soggy, she ends up with robust, ready-to-plant seedlings instead of last year’s weak spindly mess.
Little wins at this stage make a huge difference for your harvest later. But there’s one detail most owners completely overlook until it’s too late…
Scheduling Your Planting For Maximum Harvest
Ever plant your lettuce and tomatoes at the same time, only to have one bolt in the early heat and the other sulk along for weeks? Here’s the thing: timing isn’t just about tossing seeds in the soil after frost—it’s an essential piece of getting continuous, healthy harvests all season long.
💡 Pro Tip: The Old Farmer’s Almanac recommends creating a simple planting calendar—either digital or handwritten—that you update every spring, noting frost dates, moon phases, and key milestones for each crop. This keeps your efforts organized and helps you spot trends over time.
Sample Planting Schedule (Cool vs Warm Season)
| Crop | Sow Indoors | Transplant/Direct Sow |
|---|---|---|
| Lettuce | 4-6 weeks before last frost | 2 weeks before last frost |
| Tomatoes | 6-8 weeks before last frost | 1-2 weeks after last frost |
| Cucumbers | Not needed | 2 weeks after last frost |
Worth noting: cool-season crops such as spinach, kale, and peas can handle a little chill—even frost—while warm-season standouts like peppers and beans wait for the soil to truly warm. By grouping crops this way, you stagger harvests instead of getting everything at once (and desperately Googling new zucchini recipes).
- Find Your Local Frost Dates: Use state university extension resources or check reliable organizations like the USDA.
- Divide Crops Into Cool and Warm Groups: Mark down which veggies go in the ground before or after frost.
- Count Back From Harvest Goals: Want September tomatoes? Work backwards from your region’s average first frost date.
- Stagger Your Sowing: For cut-and-come-again crops such as lettuce, sow a few seeds every 2-3 weeks rather than all at once.
- Document Everything: Keep your schedule somewhere visible—inside a garden planner, on the fridge, or even in your phone’s notes app.
In practice: Picture this scenario—Maya uses a printable garden planner to color-code her spring peas, summer peppers, and late-season broccoli. She’s not scrambling with seed packets or guessing—her garden’s harvest naturally rolls out week after week, keeping both her table and morale full. And this is exactly where most people make the most common mistake…
Free Printable Templates To Organize Your Garden
Feeling overwhelmed by all the moving parts of a new vegetable garden—plant dates, harvest timelines, and daily tasks? That stress fades fast when everything’s laid out on paper, especially with thoughtfully designed printable templates.
- Garden Plot Diagram: Visually map where each veggie goes, making the most of sunniest spots.
- Planting Calendar: Keep sowing and transplanting dates at your fingertips—not buried in your phone.
- Harvest Tracker: Record what you planted, when, and how it performed. This builds real experience season after season.
- Weekly Task Checklist: Stop guessing about watering, feeding, and weeding—it’s all broken down, week by week.
How to Use and Customize Your Printables
- Print and Laminate: Use thicker paper and a home laminator or a clear sleeve. This protects against spills and lets you use erasable markers.
- Fill In Details Regularly: Update your calendar and tracker at least once a week. Take quick notes after every major garden session.
- Store Where You See Them: Keep templates on your fridge, shed wall, or tucked in your garden bag. Visibility turns plans into habit.
- Personalize for Your Needs: Color-code crops, add extra columns for weather notes, or create space for budget and supply lists.
💡 Pro Tip: According to the National Gardening Association, beginner gardeners who actively write down care routines and outcomes are 32% more likely to stick with their gardens for the full season. Visual tracking really is a game changer.
In practice: Picture this scenario—Ben, who struggled with half-finished beds last year, prints and customizes his planner kit. Now, when he forgets which row got fertilized, he just checks his laminated sheet. By summer, he’s not guessing—he’s harvesting. The right habits in place now make everything easier from here.
Your Garden Success Starts Here
If you take just one thing from this vegetable garden planner printable free guide, let it be this: a little planning goes a very long way. Picking the right garden spot, using just a handful of quality tools, and leaning on templates for timing and tracking can turn confusion into confidence.
Before, starting a garden felt overwhelming—raw dirt, endless options, and worries about missing steps. Now you know where and how to begin, how to nurture seeds right into healthy plants, and how simple it is to stay organized. Each choice builds momentum. You don’t have to be an expert to grow something delicious.
Which printable or tip are you most excited to try in your garden? Drop a comment and let us know—your next harvest could inspire someone else!

Ryan James Mitchell is a passionate gardener and plant care enthusiast dedicated to helping everyday people grow food, keep their plants thriving, and connect with nature — one garden at a time. With years of hands-on experience in vegetable gardening, indoor plant care, and seasonal garden planning, Ryan built 3sols to be the practical, honest gardening resource he always wished existed.