You know that lonely pot of basil you bought with high hopes? Fast forward a few weeks, and it’s wilted, faded, and forgotten on your windowsill—you’re definitely not alone. Almost everyone dreams of grabbing a handful of homegrown herbs while cooking, only to realize it isn’t always as simple as tossing some seeds in dirt.
When herbs refuse to grow or droop before you’ve had a chance to use them, frustration kicks in fast. Grocery store herbs never last, and those fresh flavors your favorite recipes call for become a constant guessing game—plus, who wants to waste money on another wilted bundle?
By the time you’re done here, you’ll have a herb garden guide beginners printable packed with practical advice, easy-to-follow steps, and a beautiful chart to keep by your side. Ready to pick, grow, and actually use your favorite herbs? The best part starts now.
Choosing The Right Herbs For Beginners
Standing in the garden center, you’ll spot a dizzying variety of fresh herbs — and it’s tempting to grab them all. But which ones actually thrive at home, especially if you’ve never kept plants alive past a week? The truth is: picking the right herbs from the start makes everything easier, saves money, and boosts your odds of harvesting flavorful leaves for months to come.
There’s a catch, though. Some herbs look easy but demand perfect conditions, constant trimming, or exact watering — while others all but grow themselves. Knowing which is which changes the game. According to the National Gardening Association, new gardeners succeed most when starting with species that are both forgiving and versatile in common recipes.
- Basil – Loves sun, needs regular picking to stay bushy. Perfect for everything from pesto to sandwiches.
- Chives – Tolerates small pots and grows fast. Mild onion flavor — snip into salads or eggs.
- Mint – Tough as nails and spreads quickly (keep it in a pot!). Great for teas, desserts, and cocktails.
- Parsley – Prefers moist soil, works indoors or out. Classic for garnishes and soups.
- Rosemary – Drought-tolerant, likes plenty of light. Essential with roasted veggies and meats.
💡 Pro Tip: Pick 2–3 favorites that you’ll actually use in daily cooking — it’s more satisfying to master a handful than to manage a dozen struggling pots at once. The Herb Society of America highlights that focusing on versatility over quantity boosts learning and prevents overwhelm.
| Herb | Best For | Ease Level |
|---|---|---|
| Basil | Sandwiches, sauces, salads | Easy |
| Mint | Drinks, desserts, rubbing leaves for scent | Easiest |
| Rosemary | Roasted dishes, breads | Moderate (needs light) |
Picture this scenario: You pick basil and mint for your windowsill but also grab cilantro (lured by taco night dreams). Two weeks later, the basil and mint look lush. The cilantro? Gone — it hates summer heat and bolts almost overnight indoors, leaving you empty-handed and frustrated.
Choosing smarter means more harvest, less hassle, and real flavor in your kitchen — but there’s one detail most new herb gardeners completely overlook until it’s too late…
Setting Up Your Herb Garden Indoors Or Outside
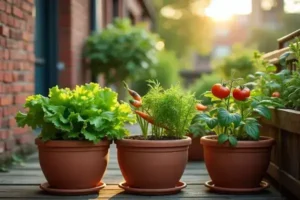
So you’ve decided to grow herbs—now the real question begins. Should you set up your little green haven inside the kitchen or let your plants soak up the sun outdoors? The answer isn’t one-size-fits-all. Your choice depends on climate, available space, and how hands-on you’d like to be.
If you live in an apartment or deal with harsh winters, indoor herb gardens are a game-changer. You get fresh leaves at your fingertips year-round, protected from pests and wild weather—plus, herbs like basil and parsley love a sunny windowsill. On the flip side, outdoor gardens offer stronger growth and bigger harvests for sun-loving herbs, but you’ll need to watch for frosty nights or hungry critters. According to the Royal Horticultural Society, six hours of direct sunlight is the sweet spot for most culinary herbs.
- Pick Your Spot: Find the brightest place—south or west-facing windows indoors, or a sunny patch outdoors.
- Select Containers: Choose pots with drainage holes. Clay pots breathe, while plastic holds moisture longer (each has pros and cons for watering routines).
- Prepare Potting Mix: Use high-quality, well-draining soil designed for containers. Add perlite if your area is humid—it prevents soggy roots.
- Plant The Herbs: Gently loosen root balls and plant at the same level as their nursery pots.
- Water Wisely: Herbs like moist—but never soaked—soil. Stick your finger an inch deep; dry means it’s time to water.
- Set Up a Feeding Schedule: Feed with a balanced organic liquid fertilizer every 3-4 weeks during the growing season.
- Pots and containers (with drainage)
- High-quality potting mix
- Herb seedlings or seeds
- Watering can or spray bottle
- Organic liquid fertilizer
⚠️ Important Warning: Never use garden soil in pots—it’s too heavy, drains poorly, and often harbors pests that thrive indoors. The University of California Agriculture and Natural Resources warns this mistake ruins more indoor gardens than anything else.
In practice: imagine you set up three pots of basil, mint, and chives on a sunny kitchen shelf. By two weeks, you notice the basil stretching for light and the mint sprawling wide. When watered properly and given room to grow, your indoor herbs become both a visual delight and a kitchen essential.
| Factor | Indoors | Outdoors |
|---|---|---|
| Light Needs | Sunny window (6+ hrs) | Full sun patch |
| Pest Risk | Low (indoors) | Moderate to High |
| Watering | Dries slower | Check daily in summer |
What actually works might surprise you…
Essential Care Tips To Keep Your Herbs Thriving
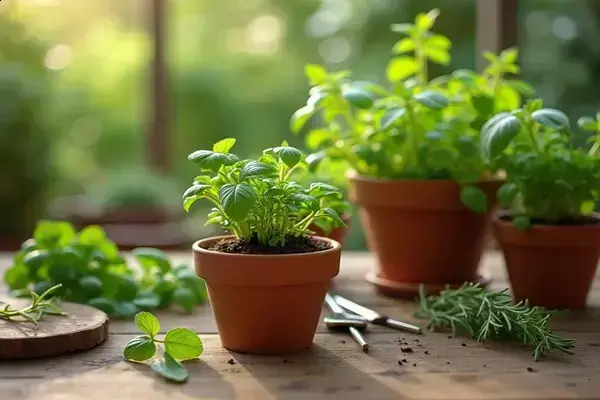
Why do some beginner herb gardens explode with lush, fragrant leaves, while others limp along with yellowing stems? The secret is consistent, targeted care that matches each herb’s real needs—no guesswork, no fuss. Here’s the thing: overwatering and inconsistent light do more damage than any pest ever will.
- Light: Most culinary herbs—like basil, rosemary, and thyme—demand six to eight hours of sunlight or strong grow lights. Rotate pots so every leaf gets its share. Herbs growing leggy or pale? They’re begging for more sun.
- Water: Don’t drown them! Let the top inch of soil dry before the next drink. Terracotta pots help roots breathe, while plastic pots hold moisture—each has upsides depending on your space’s humidity.
- Trimming: Pinch or cut just above a leaf pair to encourage bushy growth. Herbs like basil and mint thrive with regular pinching—making them productive all season.
- Feeding: Use a balanced, organic liquid fertilizer sparingly—every 3-4 weeks during growth. Too much, and you’ll have super-fast, weak stems.
- Pest Patrol: Indoors, inspect weekly for aphids or fungus gnats. Outdoors, check under leaves after rain. If trouble appears, rinse leaves and consider gentle neem oil sprays as recommended by The Herb Society of America.
💡 Pro Tip: Water early in the morning. This lets leaves dry during daylight—minimizing fungal problems and reducing risk of disease, according to the Royal Horticultural Society’s guidelines for home gardeners.
Picture this scenario: it’s a warm afternoon, and you check your window garden. The basil’s green, plump, and aromatic—the kind that makes your pasta pop. But one day, you spot tiny black bugs on the underside of the leaves. Instead of panic, you gently wash the basil under lukewarm water, trim back affected stems, and give it ample sunshine to recover. With just a little know-how, you’ve protected your harvest.
| Care Task | Frequency | Benefit |
|---|---|---|
| Watering | 1–3x/week (as needed) | Prevents rot & drought stress |
| Light Rotation | Weekly | Even growth |
| Pinching/Trimming | Every 2 weeks | Bushier, more productive plants |
And this is exactly where most people make the most common mistake…
Creative Ways To Use Fresh Herbs In Everyday Cooking
Ever stared at a bunch of fresh herbs in your kitchen and wondered what to do with them—beyond sprinkling on pasta or tossing in salads? The truth is, herbs can elevate even the simplest meal, turning weekday cooking into something unexpectedly vibrant. Most people underestimate just how easily a pinch of greenery can boost flavor and nutrition.
- Infused Oils: Add sprigs of rosemary, thyme, or basil to olive oil and let it steep—a quick flavor upgrade for drizzling over bread or roasted vegetables.
- Herb Butters: Mash soft butter with finely chopped parsley and chives. Use it straight from the fridge on fresh bread, steamed veggies, or grilled meats.
- Bright Finishes: Mint or cilantro stirred into a fruit salad. Dill mixed with Greek yogurt for a lively dip.
- Herb Ice Cubes: Chop your favorites and freeze them in olive oil or water. Pop a cube into soups or sauces whenever you need instant flavor.
- Homemade Pesto: Blitz basil, pine nuts, parmesan, and garlic together in a food processor. Try swapping basil for parsley or cilantro for completely new twists.
💡 Pro Tip: Always add soft herbs like basil, chives, and parsley at the end of cooking—not the start. According to Culinary Institute of America chefs, this preserves their delicate aroma and prevents bitterness.
Picture this scenario: you’re rushing dinner—plain pan-seared chicken and microwaved rice. Tear a handful of parsley, toss it with lemon zest, then sprinkle over both. Suddenly, your quick meal smells like something from a restaurant kitchen and you haven’t spent extra time or money. Simple, but it makes you feel like a kitchen pro.
| Herb | Best Uses | Pro Flavor Tip |
|---|---|---|
| Basil | Tomato sauce, pizza, caprese salad | Add just before serving for aroma |
| Rosemary | Roast potatoes, lamb, focaccia | Infuse in oil for subtle flavor |
| Mint | Lemonade, tabbouleh, fruit salads | Chop finely for cooling finish |
And honestly? What actually works might surprise you…
Printable Herb Chart And Companion Planting Guide
Ever wished there was a foolproof resource to track which herbs need sun, how to water them, or what to plant together in a single glance? Here’s the thing: a printable herb chart and companion planting guide does exactly that—organizing key info so you never have to rely on memory or guesswork.
- Quick Reference: Most printable charts feature spaces for the herb’s name, ideal light exposure (full sun, partial shade), watering schedule, harvest notes, and companion compatibility.
- Personalization: Fill in sowing dates, first harvests, and any surprises—like aphid attacks or flowering. Make it your garden’s personal log.
- Companion Guide: Knowing which herbs love being next to each other (e.g., basil with tomatoes, parsley away from mint) helps maximize yields and minimize pest problems.
- Update As You Grow: Hang your chart near your garden or fridge. Update every week during the growing season—it becomes both checklist and diary.
💡 Pro Tip: Keep a second laminated copy of your chart outside. The American Horticultural Society suggests using erasable markers for seasonal observations—this makes it easy to wipe clean and reuse next year.
In practice: Picture this scenario—your thyme keeps drying out while your mint is practically taking over the next pot. With a printed chart, you spot the problem at a glance: thyme needs less water, and mint shouldn’t be planted with most other herbs and will do best in its own container. You adjust, and both plants bounce back.
| Herb | Water/Sun | Companions |
|---|---|---|
| Basil | Moist, full sun | Tomato, parsley |
| Rosemary | Dry, full sun | Sage, thyme |
| Mint | Moist, partial shade | Best alone (in pot) |
The right habits in place now make everything easier from here.
Your Fresh Herb Garden Starts Here
If you take just one thing from this herb garden guide beginners printable, let it be: start simple and focus on the herbs you’ll actually use. Pick the right herbs, give them what they need, and use a printable chart to keep your garden thriving. The rest falls into place naturally.
Think about where you were before: guessing which herbs to buy, struggling to keep them alive, or not sure what to do with your harvest. Now you’ve got the step-by-step know-how and real-life tips that make growing—and using—herbs not just possible, but enjoyable. Little changes add up fast. You’re more capable than you think.
Which herb do you feel most excited to grow or cook with first? Let us know in the comments below!

Ryan James Mitchell is a passionate gardener and plant care enthusiast dedicated to helping everyday people grow food, keep their plants thriving, and connect with nature — one garden at a time. With years of hands-on experience in vegetable gardening, indoor plant care, and seasonal garden planning, Ryan built 3sols to be the practical, honest gardening resource he always wished existed.