Picture this: it’s early summer, you step outside, and your tomato plants are already weighed down with big, glossy fruit. But for many of us, growing tomatoes that well can feel like chasing a stubborn secret—those perfect red globes always seem just out of reach.
Most gardeners start off hopeful, but end up frustrated by yellow leaves, stunted growth, or bland, mealy tomatoes. The truth is, there’s nothing worse than putting in weeks of work only to watch your dreams for a killer BLT wilt away. It’s just plain discouraging when you can’t figure out what went wrong.
By the end of this guide, you’ll have a tomato growing guide tips printable you can use all season long—plus practical know-how on varieties, soil prep, problem-solving, and mastering that perfect harvest. Ready to grow tomatoes you’re truly proud of? Let’s dig in.
Choosing The Best Tomato Varieties For Your Climate
Ever wondered why your neighbor’s tomatoes thrive, while yours struggle or never ripen all the way? It’s not just luck—it’s all about choosing the right tomato variety for your local climate. This decision sets the entire stage for your success, affecting everything from flavor to yield to disease resistance.
Here’s the thing: tomatoes come in two main types, and each type fits some regions way better than others. Understanding whether to choose a determinate (bush type) or indeterminate (vining type) tomato isn’t just a gardening geek detail—it makes the daily care routine so much simpler, and your expectations more realistic.
💡 Pro Tip: The USDA Plant Hardiness Zone Map is a gold standard for gardeners in the United States. Always check your local zone, and cross-reference with catalog information before buying seeds or starts.
| Variety | Best For | Unique Advantage |
|---|---|---|
| Celebrity (Hybrid) | Most zones (3-11) | Heavy yield, disease resistant |
| San Marzano | Warm, long summers (8-10) | Rich flavor for sauces, drought-tolerant |
| Glacier | Short seasons (3-6) | Sets fruit in cool temps, early harvest |
Picture this scenario: It’s early spring in zone 5 and you’re dreaming of juicy red slicers, so you plant a heat-loving Roma out of habit. Weeks pass. The plant sulks, never fruits, and you’re left blaming the soil. The truth is, your climate simply needed a cold-hardy type—something like ‘Stupice’ or ‘Glacier’—for early success.
- Cool, short growing seasons (zones 3-6): Choose early-maturing or cold-tolerant types like ‘Glacier,’ ‘Siberian,’ and ‘Sub-Arctic Plenty.’
- Hot, dry climates (zones 8-10): Go for Mediterranean or drought-resistant varieties—’San Marzano,’ ‘Roma,’ or ‘Solar Flare.’
- Humid, disease-prone regions: Look for hybrids labeled ‘VFN’ (resistant to Verticillium, Fusarium, and Nematodes) such as ‘Celebrity’ and ‘Big Beef.’
According to the National Gardening Association, picking regionally appropriate varieties increases your odds of a successful, low-maintenance harvest—and makes organic gardening so much easier. Trust their zone-based planting guides; they’re based on decades of trials, and they’re updated yearly for changing weather patterns.
In practice: if you live in coastal Oregon, a cherry tomato like ‘Sweet Million’ might ripen reliably in damp, chilly summers, while Florida growers have better luck with thick-skinned types that don’t crack in the humidity.
But there’s one detail most owners completely overlook until it’s too late: matching your tomato variety to your exact season length—not just your average temperature…
Preparing Soil And Starting Tomato Seeds Indoors
If your soil feels sticky when wet or cracks hard during summer, you’re not alone—most home gardeners wrestle with less-than-ideal dirt. But here’s the truth: healthy tomatoes start with healthy soil, and skipping that prep step is the #1 reason plants never reach their full, juicy potential.
The soil’s texture, drainage, and fertility actually determine how strong your tomatoes grow. Too dense? Roots can’t breathe. Too sandy? Water runs right through. That’s why seasoned growers pay close attention to structure, nutrition, and starting conditions—especially if you want to move beyond stunted plants and bland fruit.
💡 Pro Tip: Mix in a 2-inch layer of high-quality compost and a sprinkle of slow-release organic tomato fertilizer before planting. According to the University of California Agriculture and Natural Resources, this simple prep ramps up both yield and flavor, all while making plants far less prone to blossom end rot.
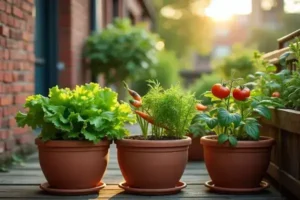
- Choose Your Container: Select seed trays or shallow pots at least 2 inches deep for even moisture and quick germination.
- Fill With Sterile Seed Starting Mix: Avoid outdoor soil to prevent fungi and dampening-off disease.
- Moisten The Mix: Use a spray bottle to add water until the soil is damp but not soggy—it should clump lightly in your hand.
- Plant Tomato Seeds: Sow each seed about 1/4 inch deep, gently covering without compacting the soil.
- Provide Bottom Heat And Light: Place trays over a heat mat (70–80°F works best) and put under bright, indirect light or grow lights for 14-16 hours daily.
- Thin Seedlings: Once seedlings have two true leaves, snip the weaker ones so the strongest thrives.
- High-quality seed starting mix
- Seed trays or shallow pots
- Spray bottle
- Tomato seeds (heirloom or hybrid)
- Heat mat (optional for cold rooms)
- Grow lights or a sunny windowsill
In practice: Imagine an early March morning—Emily fills a tray with loose, fluffy seed mix, barely tucks in her seeds, and keeps them under a desk lamp with a gentle fan moving the air. By week two, she has sturdy, green seedlings instead of thin, pale sprouts. It’s not magic—it’s method.
| Step | Time Needed | Crucial Detail |
|---|---|---|
| Soil Prep | 20 minutes | Blend compost & slow-release fertilizer in |
| Sowing | 10 minutes | Plant seeds shallow—deeper = slower germination |
| First Sprouts | 5-10 days | Keep moist, never drenched |
| Thinning | Day 14–18 | Only one seedling per cell for best roots |
The National Gardening Association recommends frequent checks during the first week—you don’t want anything to dry out or go moldy. Healthy starts now set every other stage in motion.
What actually works might surprise you…
Step-By-Step Guide To Planting And Early Care
So, you’ve got your seedlings ready and the soil feels perfect—now what? Planting tomatoes well isn’t about luck. It’s about knowing when to move, how deep to plant, and what those first few weeks really require if you want to see tough, healthy vines by summer.
- Wait for Warmth: Only transplant seedlings outdoors when nighttime temps stay above 50°F (10°C) for a full week. Cold snaps stunt roots.
- Harden Off Seedlings: Gradually expose your young plants to outdoor sun and wind over 5–7 days. Start with two hours in shade, increase to full sun by week’s end.
- Dig Deep, Plant Sideways: Pinch off lower leaves and plant ⅔ of the stem underground. Extra buried stem grows roots, creating a sturdier plant.
- Water In Gently: Use lukewarm water to settle soil around new roots—don’t flood, just moisten evenly.
- Mulch and Stake Immediately: Apply a 2-inch mulch layer to lock in moisture and set up a cage or stake while roots are still shallow.
- Monitor Moisture Daily: The top inch of soil should stay damp but not soggy. Water in the cool morning or late evening.
⚠️ Important Warning: Don’t add high-nitrogen fertilizer at planting—according to the University of California Agriculture and Natural Resources, it can cause lots of leaves, but few fruits. Slow-release, balanced fertilizer is better.
- Transplanted tomato seedlings with sets of true leaves
- Clean trowel or shovel
- Mulch (straw or wood chips)
- Sturdy tomato cage, stake, or trellis
- Access to gentle water spray
- Soil thermometer (optional but helpful)
In practice: Picture this scenario—Mike rushes his plants out too soon, skips hardening off, and they wilt the first afternoon. His neighbor Gina waits a week, gradually acclimates her seedlings, and buries the stems deep. Two months later, Gina’s plants are chest-high and loaded with fruit, while Mike’s limp along. It’s planning, not luck.
| Task | When? | Why It Matters |
|---|---|---|
| Harden Off | 7 Days Before Transplant | Reduces shock; builds resilience |
| Mulch + Stake | Planting Day | Root stability, moisture retention |
| First Water | At Planting | Boosts early root growth |
And this is exactly where most people make the most common mistake…
Solving Common Tomato Problems Before They Start
Ever watched healthy tomato plants suddenly wilt or spot strange blemishes on leaves and wondered, “What did I do wrong?” The truth is, most tomato disasters can be prevented if you know the warning signs and act before trouble hits. Early action really is everything in the tomato world.
Most problems trace back to three common issues: pests, diseases, and inconsistent watering. Getting ahead of these saves countless hours—and heartbreak. Here’s what seasoned growers wish new gardeners knew from the start:
- Early Blight & Leaf Spots: Appear as brown patches with yellow halos. Caused by excess moisture and poor airflow.
- Blossom End Rot: Black, sunken spots at the fruit’s base. Triggered by low calcium or uneven watering.
- Tomato Hornworms: Large green caterpillars that devour foliage overnight—look for missing leaves and dark droppings.
- Cracking & Catfacing: Deep splits around the stem or misshapen fruit from irregular watering or temperature swings.
| Problem | Prevention Tip | High-Value Product |
|---|---|---|
| Early Blight | Space plants 24–36 in. apart, stake early | Liquid Copper Fungicide (Bonide) |
| Blossom End Rot | Consistent soil moisture, add lime if needed | Tomato-tone Organic Fertilizer (Espoma) |
| Hornworms | Handpick daily, spray with Bt at first sign | Monterey BT Biological Insecticide |
💡 Pro Tip: Water at the base in early morning, not overhead, to prevent disease and keep leaves dry. The National Gardening Association recommends drip irrigation and mulch for the healthiest roots.
In practice: Picture this scenario—Ava sprays her tomatoes with a gentle stream every evening, soaking the leaves and stem. By July, leaves yellow and fruit split. Her neighbor Sam waters right at the soil line in the morning, uses straw mulch, and snips lower leaves. Sam’s tomatoes sail all season—Ava’s need rescuing. Small habits matter far more than expensive products.
But there’s one detail most owners completely overlook until it’s too late…
Harvesting, Storing, And Printable Growing Tips Checklist
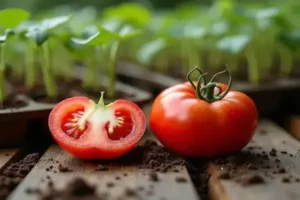
There’s a special kind of satisfaction in reaching for a tomato that’s sun-warmed, perfectly ripe, and gives just a little when you squeeze—never rock hard, never mealy. But did you know most backyard growers pick too soon or store their harvest the wrong way, losing out on top flavor and shelf life?
The truth is, timing and gentle handling are everything when it comes to harvesting and storing tomatoes for that market-fresh taste. It’s not just about the calendar date—you’ll want to keep an eye on color, firmness, and even the variety itself for perfect results every time.
- Look for Color Change: Harvest when your tomatoes reach full color (deep red, yellow, or orange, depending on type) and the skin turns slightly glossy.
- Test for Slight Give: Gently squeeze the tomato—it should be firm but give a little under pressure without feeling soft.
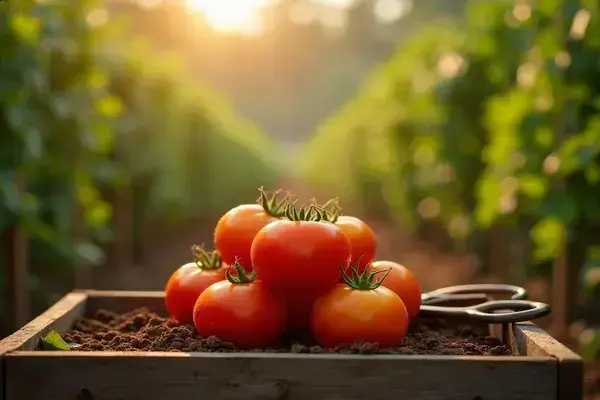
- Harvest in the Cool Morning: Pick with the stem attached to help fruit stay fresh longer and avoid bruising from midday heat.
- Store at Room Temperature: Keep ripe tomatoes out of the fridge (except cherry and grape types if overripe) to preserve flavor and texture.
- Inspect and Rotate: Lay tomatoes in a single layer, check daily, and use the ripest first to avoid spoilage.
💡 Pro Tip: Keep a small harvest basket or breathable cloth bag handy, and handle tomatoes gently—never stack more than two layers. According to the National Gardening Association, this approach minimizes bruising and maximizes shelf life so your freshest fruits last longer.
| Stage | Best Practice | Common Mistake |
|---|---|---|
| Harvest | Pick fully colored, slight give | Harvesting green or too early |
| Storage | Room temp, single layer | Fridge storage (bland fruit) |
| Inspection | Daily, use ripest first | Stacking or neglecting rotation |
Your Printable Growing Tips Checklist
- Record planting, fertilizing, and pruning dates in your garden journal each season.
- Print and post your favorite variety profiles near your seed-starting station.
- Check off key benchmarks: seed starting, transplanting, staking, first bloom, feeding, harvest.
- Update disease and pest notes right after each issue appears—memory fades fast during summer.
- Customize your own quick reference chart for harvest signs suited to your tomato types.
In practice: Imagine Sarah laminates her tomato growing checklist, then tapes it inside the potting shed. Not only does she remember crucial dates and care steps—she spots problems sooner and feels way less stressed tracking her progress, harvest after harvest.
The right habits in place now make everything easier from here.
Your Tomatoes Are In Good Hands
So much ground covered, but it all comes down to three things: pick tomato varieties that love your zone, give your soil and seedlings a strong start, and stay alert for issues before they snowball. If you take just one thing from this tomato growing guide tips printable, let it be: healthy plants are built on the choices you make early—and small changes multiply into big results at harvest.
Maybe tomatoes felt tricky or unpredictable before—so many moving parts, too many opinions. Now you can see the whole process laid out step by step, with practical checks and insider advice. You’re not guessing anymore. Every seed, every plant, every harvest starts and ends with you. That’s real progress.
Which part of your tomato-growing routine will you change first this season—seed selection, soil prep, or harvest timing? Share your plans below so we can cheer each other on! 🍅

Ryan James Mitchell is a passionate gardener and plant care enthusiast dedicated to helping everyday people grow food, keep their plants thriving, and connect with nature — one garden at a time. With years of hands-on experience in vegetable gardening, indoor plant care, and seasonal garden planning, Ryan built 3sols to be the practical, honest gardening resource he always wished existed.