You squeeze past that old patio chair, eyeing your cramped balcony and wondering—could you actually grow real vegetables out there? Maybe it’s the dream of picking your own tomatoes or just craving some control over what’s in your food. Either way, something about turning the tiniest patch of sunlight into something edible just sticks with you.
But every time you look it up, the advice seems made for people with lawns—and when you try winging it with random leftover pots, the results are never… lush. It’s easy to feel like homegrown food is only for folks with acres to spare, not city dwellers dodging neighbors on the fire escape.
By the end, you’ll have a container vegetable gardening guide that actually works for small spaces and real lives—not just magazine spreads. Get ready for tips, real-life hacks, and zero judgment about your lack of backyard. Ready? Here’s where your first pot goes.
Choosing The Best Containers For Your Space
Most gardeners think any old pot will do — but choosing the right container is make-or-break for fresh peppers or lush lettuces in small spaces. Materials, size, shape, even color affect root health and harvest quality. The perfect pot isn’t always pretty. In fact, sometimes the best choice is downright utilitarian but ultra-effective.
Ask yourself: how much sun does your balcony actually get? Will a bulky ceramic pot strain your railing, or should you opt for lighter fabric grow bags? Here’s the thing: a container’s depth and drainage matter just as much as where you set it. Too shallow, and roots stunt fast. No holes? Say goodbye to thriving tomatoes. To help you decide, here’s a quick rundown of top container options:
| Container Type | Pros | Cons |
|---|---|---|
| Ceramic/Clay Pot | Stable, natural look, good breathability | Heavy, can crack in frost, pricey |
| Plastic Planter | Lightweight, cheap, holds moisture | Can heat up roots, less durable long term |
| Fabric Grow Bag | Promotes healthy roots, folds for storage | Dries fast, flimsy without soil |
💡 Pro Tip: The University of California’s Master Gardener Program recommends at least 12 inches in diameter and depth for most veggies. Herbs and lettuce can get by with 6–8 inches, but root crops and tomatoes demand more space to thrive.
- Drainage holes: Non-negotiable for every container. No holes equals waterlogged roots and root rot in a matter of days.
- Material: Plastic for portability, clay for breathability, fabric for great root systems — each has its champion vegetables.
- Color: Lighter shades reflect sun, keeping roots cooler in summer. Dark pots can overheat soil, especially on concrete patios.
- Shape: Wide and deep pots allow for bedding plant combos, while tall, narrow options work for smaller vining crops.
In practice: Picture this scenario — Taylor picked up a stylish, tapered pot for their urban patio tomatoes. By midsummer, the bottom roots were bone dry and stressed. The shape had funneled all the water straight down, missing the areas where most roots clustered. The next season, Taylor swapped for a wide, squat pot with generous drainage holes. Suddenly, tomatoes flourished, and harvests doubled with no extra effort.
If you’re shopping, look for containers labeled as “food safe” and avoid anything with old paint or residues. According to the National Gardening Association, reusing buckets or tubs works great — just wash and drill holes first.
What actually works might surprise you… Think you’ve found the perfect pot? There’s one major pitfall almost every new gardener misses before planting.
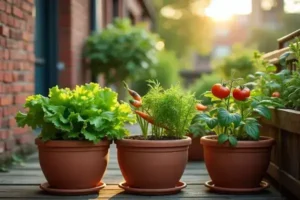
Selecting Vegetables That Thrive In Pots
When you’re short on space, picking the right crops is half the battle. Not every vegetable is built for container life. The truth is, some beloved garden classics fall flat in pots—while others absolutely thrive and deliver big flavor in small corners.
- Lettuce & Salad Greens: Fast, forgiving, and perfect for beginners. Shallow roots mean they don’t demand deep pots. Even a windowsill will do.
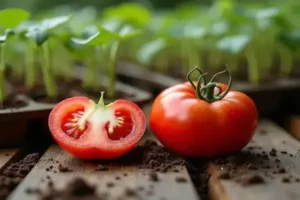
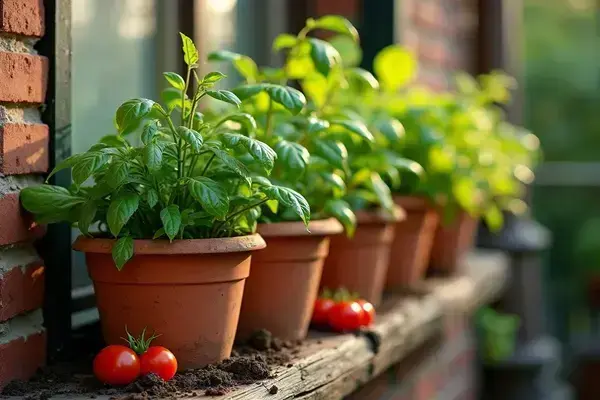
- Cherry Tomatoes: Compact, prolific, and SO much better than anything at the store. Look for bush (determinate) types like ‘Tiny Tim’ or ‘Patio Princess.’
- Peppers (Hot & Sweet): These love warmth and reward you with loads of fruit in surprisingly small containers. Jalapeño and baby bell peppers are tried-and-true patio stars.
- Radishes & Baby Carrots: Ready in a month or two, and you’ll have fun pulling them up straight from home. Just pick short, round varieties for best results.
- Herbs (Basil, Parsley, Chives): Grow them right outside your kitchen door—snip as needed, enjoy fresh all summer.
| Vegetable | Recommended Container Depth | Harvest Timeline |
|---|---|---|
| Lettuce | 6–8 inches | 30–45 days |
| Cherry Tomato | 12+ inches | 60–70 days |
| Jalapeño Pepper | 10–12 inches | 70–85 days |
| Radish | 6 inches | 25–30 days |
| Basil | 6 inches | 40–60 days |
💡 Pro Tip: The National Gardening Association recommends sticking with varieties labeled “container” or “patio” for the highest success. Compact bush types yield more per square inch and handle wind or crowding better than sprawling indeterminate plants.
Picture this scenario: Jamie spends weeks growing a full-size squash vine in a plastic tub—only to end up with yellow leaves and no harvest. Meanwhile, their neighbor’s little pepper bush bursts with fruit in the same spot. The right crop will make you feel like a genius, even if you’ve never had a garden before.
Don’t forget: leafy greens and herbs are unbeatable for constant “cut-and-come-again” harvests. If you love summer salads, try mixing several greens in one wide pot for a living salad bar. The Royal Horticultural Society suggests rotating crops between spinach, arugula, and kale for year-round flavor.
But there’s one clever trick that almost no one uses when growing veggies in containers—until they see the difference it makes…
Soil, Watering, And Fertilizer Basics For Containers
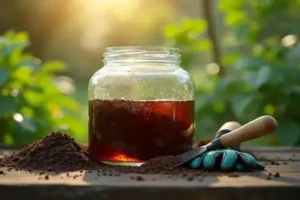
Think good garden soil will do in a pot? Here’s the thing: regular dirt cakes up tight in small spaces—leaving roots gasping for air and water a muddy mess. What you need is a well-aerated potting mix, usually marked “for containers,” sold at most garden centers. This blend stays fluffy, holds moisture, and lets roots breathe. Bags labeled “soil” often have compost, pine bark, peat moss, and perlite—each playing a role.
- Potting mix: Lightweight, drains well, mostly peat or coconut coir and perlite or vermiculite.
- Compost: Adds nutrients and life to the mix—just don’t go overboard or you’ll risk soggy soil.
- Slow-release fertilizer: Feeds plants gently for weeks. Look for products marked safe for edibles (check the Organic Materials Review Institute for certification).
💡 Pro Tip: Water deeply until you see it draining out the container’s bottom. Shallow sprinkles just tease the surface and never reach the deeper roots, warns the National Gardening Association.
- Fill pots with fresh mix, leaving two inches at the rim—packing too tightly is a common error.
- Top-dress with compost every few weeks for constant nutrition.
- Water early in the day so leaves dry before evening—cuts down on fungal diseases.
- Check soil by touch: poke your finger in up to the second knuckle. If it feels dry, water. If damp, wait.
- Add liquid fertilizer (like diluted seaweed or fish emulsion) every couple of weeks for heavy feeders like tomatoes and peppers.
In practice: Picture this scenario—Sam set up a balcony pepper garden last spring. He used basic bagged soil from the yard and watered every evening. By July, his pots had fungus gnats, crusty soil, and sad, yellowing leaves. After switching to quality container mix, adding a slow-release fertilizer, and letting the soil dry out slightly between waterings, those same pots exploded with healthy fruit the next season.
The University of California Agriculture and Natural Resources group confirms: consistent watering is crucial, but so is letting air reach the roots—never let pots sit in trapped water. And this is exactly where most people make the most common mistake…
Common Container Gardening Problems And How To Solve Them
Ever wonder why container veggies sometimes wilt, yellow, or simply don’t produce? Here’s what most manuals skip: small-space gardening has its own set of sneaky challenges. But with a bit of know-how, you can solve these problems fast—before your hard work goes to waste.
- Overwatering or underwatering: Plants in pots dry out quicker than those in the ground, but soggy roots rot just as fast.
- Yellow leaves or poor growth: Could be nutrient deficiency—container mixes don’t always hold enough fertilizer to last the season.
- Pests: Aphids, whiteflies, and fungus gnats love balconies. They multiply fast in crowded, confined spaces.
- Rootbound plants: When roots circle the pot, growth stalls and leaves look wilted despite plenty of water.
- Sunburn or uneven sunlight: Walls, railing shadows, or hot decks can scorch leaves or stunt one side of your plant.
⚠️ Important Warning: Always use food-safe containers for edibles and wear gloves when handling fertilizers, especially those not marked organic. The Environmental Protection Agency emphasizes safety first for home gardeners.
| Problem | Quick Solution | Expert Tip |
|---|---|---|
| Browning Leaves | Check moisture daily, move to partial shade | Mulch soil with straw or bark to keep roots cool |
| Pests (Aphids, Gnats) | Spray with soapy water or neem oil | Rinse leaves under water every few days |
| Stunted Growth | Repot with fresh mix, add slow-release fertilizer | Rotate pots weekly for even sun exposure |
In practice: Picture this scenario—Alex’s patio planters looked lush in May, but by July, the tomatoes had yellowing leaves, and little bugs buzzed everywhere. After adding an all-purpose liquid fertilizer and spraying plants with a simple homemade soap solution, growth bounced back and pests nearly vanished.
- Monitor soil by feel, not guesswork. Water only when the top inch is dry.
- Fertilize with a weak liquid feed every 10–14 days for heavy feeders.
- Prune dead leaves to boost airflow and spot issues early.
- Rotate containers every week if sunlight patterns shift.
- Check undersides of leaves for bugs—especially after heavy rain or heat waves.
Most people focus solely on watering schedules—yet a single shift in sun direction can throw off the whole system. And this is exactly where most people make the most common mistake…
Seasonal Tips To Keep Your Mini-Garden Producing
What’s the secret to a container garden that churns out veggies from spring to fall? It’s adapting your care—not just your crops—to follow the seasons. Most rookie gardeners try the same tricks year-round, but timing, sunlight, and even watering all shift as temperatures change.
- Early Spring: Start with hardy greens and herbs like spinach and parsley. Move pots outdoors gradually to harden them before warm weather arrives.
- Summer: Shift to heat-loving crops—tomatoes, peppers, basil. You’ll want to water more often, check soil moisture daily, and group thirsty containers together for easier care.
- Mid to Late Fall: Replace spent summer plants with frost-tolerant veggies. Try arugula, kale, or radishes for a fresh autumn crop. Bring tender herbs inside before the first frost.
| Season | Action Item | Special Note |
|---|---|---|
| Spring | Plant leafy greens; use row cover | Protects from cold snaps |
| Summer | Add mulch, increase watering | Prevents soil from drying out fast |
| Fall | Switch to cool crops, insulate roots | Try cloches or move pots near walls |
💡 Pro Tip: The Royal Horticultural Society recommends rotating your pots every few weeks so all sides get even sunlight—and don’t forget to clean containers thoroughly between seasons to prevent disease.
- Check weather weekly—move pots if storms or temperature swings threaten.
- Harvest regularly; picking mature veggies signals plants to keep producing.
- Fertilize lightly as days shorten, but back off in late fall—plants slow down and excess nutrients can harm roots.
- Shade pots with a white cloth on scorching days—overheated roots stop producing, even if leaves look fine.
- Swap out soil or refresh with compost at the start of each new season for better yields and fewer pests.
In practice: Picture this scenario—a neighbor’s balcony garden looks vibrant in May, scraggly by July, and barren come October. Next-door, an experienced gardener rotates crops, adjusts shading, swaps soil, and keeps basil and lettuce coming until the first snow. The right habits in place now make everything easier from here.
Your Tiny Garden, Big Results
You’ve just unlocked the keys to container vegetable gardening—even in the smallest spaces. The biggest takeaways? Smart container choices, crops that love pots, and paying close attention to soil and watering basics make all the difference. If you take just one thing from this container vegetable gardening guide, let it be: the right setup transforms even a balcony into a thriving, edible oasis.
Before, you might have worried you needed a yard or fancy tools. Now, you know a handful of simple techniques can turn pots into steady harvests and headaches into fresh salads. You don’t have to settle for store-bought anymore. One pot at a time, you’ll see just how much you can grow.
What’s the first veggie you’ll try in a container—or which tip are you most excited to put to use? Share your plans in the comments so everyone can cheer you on!

Ryan James Mitchell is a passionate gardener and plant care enthusiast dedicated to helping everyday people grow food, keep their plants thriving, and connect with nature — one garden at a time. With years of hands-on experience in vegetable gardening, indoor plant care, and seasonal garden planning, Ryan built 3sols to be the practical, honest gardening resource he always wished existed.