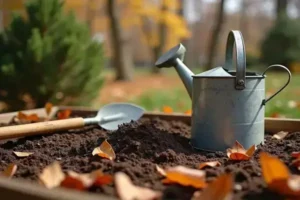
Imagine kneeling in your garden, only to realize the ground beneath your hands is as stubborn as day-old concrete. Or maybe it’s so loose, seedlings just won’t stand a chance. If you’ve ever battled tired, unproductive soil, you know how draining — and downright disheartening — that can be.
That nagging feeling of wasted effort creeps in when nothing grows quite right. The carrots stay stunted, tomatoes look sickly, and you find yourself doubting whether your thumb was ever green at all. Skipping proper soil prep? It’s like building a house on sand — you can’t expect it to last, no matter how much hope you pour in.
By the end of this article, you’ll know exactly how to prepare soil for planting so your garden’s roots strike gold from the get-go. Ready for stronger plants and bigger harvests? Let’s dive beneath the surface and jump right into what your soil’s been craving.
Signs Your Soil Needs Attention
Ever stood in your garden, running your fingers through the dirt, and wondered, “Is this really good enough for what I want to grow?” Soil isn’t just a background character — it’s the main stage for everything your plants do. Healthy soil delivers nutrients, stores moisture, and lets roots dig deep. If something’s off below the surface, your whole project can flop before it even begins.
So, how do you actually spot the red flags before your garden struggles? Let’s break down the most telling signs in everyday language, so you know exactly what to check.
- Stunted Growth: Plants seem stuck — growing slowly or smaller than expected, no matter how much you water or fertilize.
- Discolored Leaves: Yellowing, pale, or oddly colored leaves often point to nutrient imbalances or poor drainage.
- Hard, Crusty Surface: If your soil forms a tough shell after rain, it probably lacks organic matter and air pockets.
- Puddles or Rapid Drying: Water just sits on top or drains away immediately — both hint at poor structure.
- Weed Domination: Some weeds thrive in neglected or nutrient-poor spots, outcompeting your plants.
💡 Pro Tip: According to the US Department of Agriculture, a handful of healthy soil should feel crumbly and moist — not sticky mud or bone-dry sand. The ideal soil holds its shape loosely when squeezed, but falls apart with a gentle poke.
Picture this scenario: You plant tomatoes and sunflowers in the same patch. The sunflowers shoot up, lush and green, but the tomatoes turn yellow and barely grow. Surprise — the deeper tomato roots hit dense clay, while the sunflowers coast at the surface. This isn’t bad luck, it’s a difference in the underlying soil layer!
| Sign | Possible Cause | Quick Fix |
|---|---|---|
| Yellow Leaves | Nitrogen deficiency | Add compost or slow-release fertilizer |
| Puddles After Rain | Poor drainage, compacted soil | Loosen soil, mix in sand or coarse compost |
| Hard Surface | Lack of organic matter | Layer in mulch and well-rotted manure |
And honestly? Most failures start right here — by mistaking these early signs for “normal” soil behavior. But there’s one detail most owners completely overlook until it’s too late…
Tools And Materials For Soil Preparation
What do you really need for prepping soil — and what’s just clutter in the shed? The right tools and materials don’t just save your back, they give plants a genuine head start. The good news? It’s not about buying a dozen specialty gadgets. Quality trumps quantity, every time.
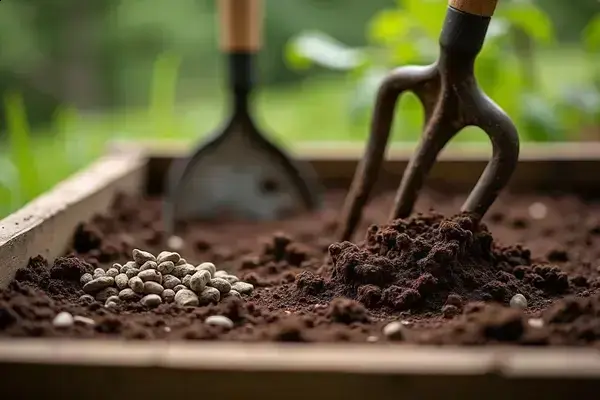
- Garden Fork or Spading Fork: Breaks up compacted soil and blends amendments without destroying soil structure.
- Shovel: Essential for digging, turning, and mixing — choose a heavy-duty, rust-resistant model for longevity.
- Rake: Smooths, levels, and helps incorporate compost or lime across larger areas.
- Wheelbarrow: Move heavy amendments or loads of soil in fewer trips, especially if you’re working a sizable plot.
- Hand Trowel: Perfect for close-up work, like integrating fertilizer around roots or spacing out seedlings.
- Compost and Organic Matter: Key ingredients for boosting nutrient levels, water retention, and overall soil texture.
- Lime or Sulfur: For pH adjustments based on your soil test results.
💡 Pro Tip: According to the Royal Horticultural Society, always clean and dry your tools after each use. Rust and residue dull blades and transfer diseases from plot to plot. High-carbon steel or stainless steel models stay sharper and outlast bargain alternatives.
Picture this scenario: You’re prepping a new vegetable bed on a sunny Saturday morning. Two neighbors show up — one with a dull, dented shovel and a cardboard box of random fertilizers; the other with a sturdy garden fork, premium compost, and a streamlined wheelbarrow. By noon, the second plot is perfectly tilled, well-mixed, and ready for planting. The first? Still fighting the same hard patch, frustrated. Quality gear isn’t about “fancy” — it’s about efficiency and a healthier garden from the roots up.
| Tool/Material | Primary Purpose | Best For |
|---|---|---|
| Garden Fork | Loosening, aerating | Clay & compacted soils |
| Shovel | Digging/moving soil & compost | All soil types |
| Hand Trowel | Precise digging & mixing | Raised beds, containers |
| Organic Compost | Amending/improving nutrition | Poor or sandy soils |
| Lime/Sulfur | pH adjustment | Acidic/alkaline soils |
The truth is, investing in a few solid tools now repays year after year. But what actually works might surprise you…
Step-By-Step Guide To Soil Improvement
Ever wonder why some backyards explode with growth while others fizzle out? Improving soil isn’t a guessing game — it’s a clear, step-by-step process. If you want roots to thrive and harvests to impress, here’s how you transform ordinary dirt into a garden powerhouse.
- What you’ll need:
- Garden fork or shovel
- Organic compost
- pH test kit
- Lime (if soil is acidic) or sulfur (if alkaline)
- Mulch (straw, bark, or leaves)
- Wheelbarrow
- Rake
- Test Your Soil: Use a test kit (available at garden centers or extension services) to check pH and nutrients. It takes 10–15 minutes and saves you months of frustration down the line.
- Clear Debris: Remove rocks, roots, and weeds. Don’t skip this — even small barriers can block young roots as they spread.
- Loosen Soil: Dig 8–12 inches deep, turning clumps gently. For dense or clay-heavy plots, break up larger chunks, but don’t pulverize — you want air pockets.
- Amend With Compost: Blend 2–4 inches of rich, well-rotted compost into the top layer. This boosts microbial activity, water retention, and nutrients.
- Adjust pH If Needed: Sprinkle lime to raise pH (if your test shows acidity) or elemental sulfur to lower it (for alkaline soils). Follow product guidelines diligently.
- Rake And Level: Smooth the surface, distribute amendments evenly, and mix everything lightly with a rake.
- Apply Mulch: Lay a 2-inch blanket of organic mulch. This prevents erosion, locks in moisture, and keeps weed seeds in check.
⚠️ Important Warning: According to the Cornell Cooperative Extension, never work overly wet or bone-dry soil — you’ll risk compaction or destruction of vital microbial life. Wait until soil is moist but crumbly for best results.
In practice: imagine prepping a tired garden bed in spring. You grab a shovel, feel resistance from old roots, and spot stubborn weeds tangled below the surface. By following this step-by-step approach, you transform patchy, depleted ground into loose, nutrient-rich earth ready to support tomatoes, beans, or even delicate salad greens. The payoff? Stronger plants, bigger yields, and less headache as the season unfolds.
And this is exactly where most people make the most common mistake…
Choosing The Right Amendments For Your Plants
How do you know which amendment actually makes a difference for your unique plants — or if you’re just wasting money? Soil amendments can be game changers, but only when matched to real needs. One-size-fits-all never works in gardening, especially with different crops eyeing different nutrients and textures.
There are three main types of amendments: organic (like compost or manure), mineral (such as lime or gypsum), and synthetic fertilizers. Each plays a unique role and brings distinct pros and cons. Here’s a closer look at how they compare for various garden goals:
| Amendment | Best For | Watch-outs |
|---|---|---|
| Compost | General soil health, most veggies | Can attract pests if unfinished |
| Lime | Raising pH (good for brassicas) | Overuse disrupts nutrient balance |
| Bone Meal | Phosphorus for root crops | Slow to break down, not for acid lovers |
| Gypsum | Breaking up clay; adds calcium | Ineffective in acidic soils |
| Synthetic Fertilizer | Quick boosts, high-yield annuals | Risk of salt buildup, short-lived |
Here’s the thing: It’s tempting to grab that “all-purpose” bag at the big-box store. But your garden’s needs are as specific as your home’s Wi-Fi password. Different plants want different things — tomatoes crave potassium and calcium, blueberries demand low pH and organic matter, carrots love sandy, loose soil.
💡 Pro Tip: According to the University of California Agriculture and Natural Resources, always start with a soil test before choosing amendments. This step not only prevents costly mistakes but also targets your dollars (and effort) where they matter most.
In practice: imagine adding sulfur-rich organic amendment to a blueberry bed, as the soil test revealed high alkalinity. Six weeks later, the bushes push out lush, dark foliage — and the fruit actually tastes sweet instead of bland. That’s the power of targeted soil improvement. Not sure which brands to trust? Look for OMRI-listed products if you’re going organic, or reference local extension service recommendations for your state.
And honestly? This is exactly where most people make the most common mistake…
Common Mistakes To Avoid When Prepping Soil
If you’ve ever felt like your plants are stalling—or mysteriously failing—it might not be about what you’re doing right, but what you’re overlooking. Soil prep invites more slipups than almost any gardening job, and the truth is, some of the worst mistakes come from good intentions gone sideways.
- Tilling When Soil Is Too Wet or Too Dry: A rookie error that crushes soil structure and leads to hard clumps or dense mud. Always wait until the soil is just moist enough to crumble in your hand.
- Adding Fresh Manure: Sounds like a great nutrition boost, but it can burn roots and introduce pathogens if not composted properly. Stick with well-rotted compost or aged manure.
- Over-Amending: Dumping in too much fertilizer or amendment can create toxic conditions and throw off your pH. Balance is everything—always follow soil test recommendations.
- Ignoring Soil Testing: Guessing rarely works. Without a simple pH and nutrient test (available at local extension offices or garden centers), you risk wasting labor and cash.
- Compacting the Bed: Stepping on freshly worked soil or planting before it’s settled crushes those vital air pockets roots depend on for growth.
| Mistake | Consequence | Easy Fix |
|---|---|---|
| Too much fertilizer | Root burn, weak growth | Test & dilute with extra soil |
| Overworking wet soil | Compacted, poor drainage | Wait, then loosen when crumbly |
| No soil test | Stunted, yellow, poor yields | Use a basic test kit or send sample to a lab |
⚠️ Important Warning: The Soil Science Society of America points out that misusing amendments or ignoring pH challenges can permanently affect your growing site. When in doubt, consult your local agricultural extension for personalized advice—professional guidance pays for itself in time and harvest.
Picture this scenario: You’re eager for a lush summer garden and till your new bed after a spring downpour, convinced a quick start means faster results. By June, seedlings are struggling—roots can’t push through the hardpan. A neighbor, who waited for the right soil texture and followed her test results, enjoys sturdy, healthy tomatoes and greens. That’s the difference experience and a little patience make.
Once this is in place, the rest of the routine falls into place naturally.
Your Garden’s Health Starts Here
If you take just one thing from this guide, let it be: great plants begin with healthy, cared-for soil. Spot trouble early, use the right tools, and match amendments to what your garden truly needs. When you focus on how to prepare soil for planting, everything above ground gets easier—and so much more rewarding.
Remember how uncertain preparing your beds used to feel? Now you know what signs to watch for, how to build real fertility, and which mistakes to dodge. That patchy, frustrating garden from years past? It’s about to become your best harvest ever—one confident step at a time.
Which soil tip from today are you most excited to try in your own backyard? Tell us in the comments—let’s compare results and help each other grow!

Ryan James Mitchell is a passionate gardener and plant care enthusiast dedicated to helping everyday people grow food, keep their plants thriving, and connect with nature — one garden at a time. With years of hands-on experience in vegetable gardening, indoor plant care, and seasonal garden planning, Ryan built 3sols to be the practical, honest gardening resource he always wished existed.