You know that restless itch when spring’s still a month away, but your gardening dreams can’t wait? Imagine seedlings stretching toward the window while it’s snowing outside—that’s the magic of starting seeds indoors.
Here’s the thing: skipping this step means surrendering to short growing seasons where tomatoes barely ripen and rare flowers never get a chance. Many gardeners give up early or buy expensive, sad-looking transplants that never really thrive.
By using a seed starting guide indoors printable, you’ll confidently sprout robust seedlings weeks before your neighbors even crack open a seed packet. Unlock an early, lush head start—let’s dig into the first essential choice right now.
Choosing The Right Seeds And Supplies
Grab any old packet of seeds and hope for the best? That’s a rookie mistake—choosing the right seeds and supplies is the single biggest predictor of your indoor garden’s success. The options can feel overwhelming, but it all boils down to what performs best in your specific setup, local climate, and growing goals.
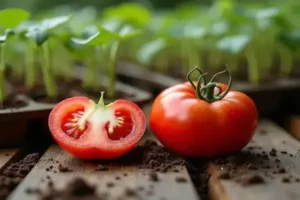
Which seeds actually thrive indoors? Focus on varieties known for transplanting well and early productivity—think tomatoes, peppers, brassicas (like broccoli), and annual herbs. Pay close attention to labels marked “recommended for indoor start” or “high germination rate.”
💡 Pro Tip: Purchase seeds from reputable companies such as Botanical Interests, Johnny’s Selected Seeds, or Burpee. These established brands frequently test for purity and offer detailed germination information, essential for consistent indoor results according to the National Garden Bureau.
Now, it’s not just seeds that deserve careful thought. Containers, growing medium, trays, and even lighting all play a huge role in how vigorously your seedlings grow.
Essential Supplies Checklist
- Seed Trays or Starter Pots: Choose biodegradable pots for easy transplanting, or sturdy plastic trays for reusability.
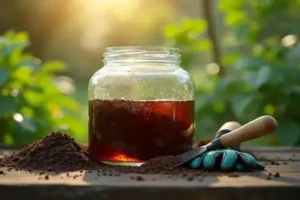
- Seed-Starting Mix: Use a sterile, soilless medium; avoid digging up soil from outside, which invites diseases.
- Humidity Dome or Plastic Wrap: Keeps moisture constant for faster, more even sprouting.
- Grow Lights (LED or Fluorescent): Essential for strong, compact growth if you lack 12+ hours of bright window light.
- Labels and Waterproof Marker: Trust me, you won’t remember which pot’s which two weeks later.
Picture this scenario: Sarah, a first-time gardener, bought discount seeds from a grocery rack and used soil from her backyard. Most seeds never sprouted, and the survivors grew weak and leggy. The following year, she switched to reputable seed companies, pro-quality mix, and a basic LED grow light. Suddenly—strong seedlings, no mystery illnesses, almost 100% germination. That’s not luck. That’s the power of choosing wisely up front.
| Seed Type | Best For | Special Supplies Needed |
|---|---|---|
| Heirloom Tomatoes | Flavor, preservation | Grow lights, deep trays |
| Hybrid Peppers | High yield indoors | Warm mat, humidity dome |
| Basil & Herbs | Fast success, culinary use | Pots, regular pruning |
But there’s one detail most new gardeners completely overlook until it’s too late—a missing or subpar supply can sabotage your seeds before you even get to the fun part…
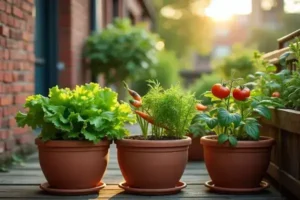
Setting Up Your Indoor Growing Station
What does it really take to set up an indoor growing station that delivers lush, healthy seedlings every season? It’s not just grabbing a sunny windowsill — the right foundation determines everything that follows. If you want results to make seasoned growers jealous, a little structure pays off tenfold.
- Grow Lights: LEDs that provide full-spectrum light mimic natural sunlight, supporting compact, vigorous growth even in the darkest winter.
- Sturdy Shelving or Stand: Adjustable shelves maximize limited space and let you tailor the height as seedlings grow taller.
- Warmth Sources: Seedling heat mats (like Hydrofarm’s Jump Start) hold steady temperatures around 70-75°F, making tricky seeds like peppers germinate days faster.
- Air Circulation: A small oscillating fan, gently moving air a few feet away, prevents mold and strengthens stems by mimicking outdoor breezes.
💡 Pro Tip: Place a thermometer and humidity gauge near your trays — the National Garden Bureau suggests aiming for 65–75°F and 50–70% humidity for optimal indoor seedling health. Environmental consistency beats wild swings every time.
Picture this scenario: Rachel, who grows specialty herbs to sell at her local farmers market, started out placing trays near her kitchen window. Results? Spindly, weak seedlings. The next year, she invested in an adjustable metal rack, a pair of 4-foot LED shop lights, seedling mats, and a clip-on fan. Suddenly, her basil and tomatoes sprouted thick stems — ready for transplant weeks ahead of schedule. The setup transformed her operation from hobbyist to micro-business.
| Component | Purpose | Affordable Option |
|---|---|---|
| LED Grow Lights | Stimulates photosynthesis | GE Lighting LED Grow Bulb |
| Shelving Unit | Organizes trays vertically | Home Depot 4-Tier Wire Rack |
| Seedling Heat Mat | Boosts germination rates | VIVOSUN Seedling Mat |
Still, what actually works might surprise you — even a tiny apartment can produce supercharged seedlings with one clever adjustment you likely haven’t considered yet…
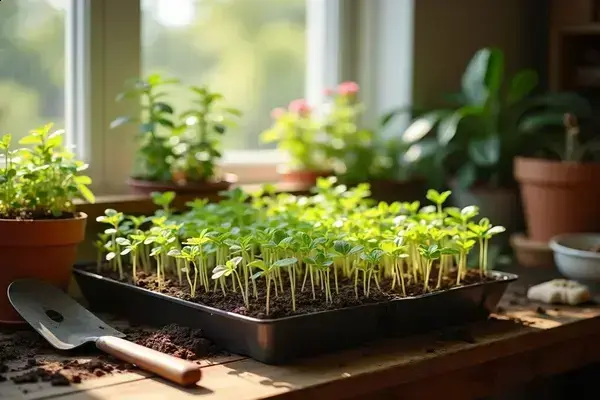
Step-By-Step Guide To Sowing Seeds Indoors
Ever feel like you do everything “right” and your seeds still refuse to sprout? The truth is, tiny missteps at sowing time easily undo weeks of patient prep—so let’s nail the basics first. Here’s your practical, no-guesswork indoor sowing routine.
- Biodegradable or plastic seed trays
- High-quality, sterile seed starting mix
- Spray mister with clean water
- Seeds (fresh, clearly labeled by variety and date)
- Humidity dome or clear cover
- Popsicle sticks or waterproof plant labels
- Fill Trays with Mix: Loosely fill each cell or pot with pre-moistened seed starting mix—don’t pack too tightly or roots will struggle.
- Sow Seeds Correctly: Follow packet depth instructions. Most seeds need 1/8″ to 1/4″—too deep or too shallow cuts germination in half.
- Mist Gently: Use a spray bottle to evenly moisten the top layer. Avoid flooding—the goal is damp, not soggy.
- Cover for Humidity: Snap on a humidity dome or drape with clear wrap to hold warmth and moisture for the first few days.
- Label Immediately: Mark each row with plant name and sowing date. You’ll thank yourself during transplant season.
- Place Under Light: Set trays under grow lights set 2-3 inches above the surface, or in a bright window, within a few hours of sowing.
⚠️ Important Warning: Avoid direct blasts from heating vents or leaving trays near drafty windows—fluctuating temperatures are the main cause of uneven or failed germination, according to the University of Minnesota Extension.
In practice: think of Jamie, who spent months planning her garden but skipped labeling trays. Two weeks later, she couldn’t tell the tomatoes from the peppers—her entire rotation was delayed. When she started labeling and controlling moisture, her seedlings grew strong and healthy, with zero mystery plants.
And this is exactly where most people make the most common mistake—not all seeds sprout at the same speed, so how should you adjust your care…
Common Mistakes To Avoid For Healthy Seedlings
Ever watched your carefully planted seedlings wilt or stretch up like ghosts and wonder, “What did I do wrong?” You’re not alone—it’s often the small, overlooked errors that cost gardeners weeks of work. Catching these early changes the game completely.
- Overwatering: Roots need oxygen as much as moisture; soggy trays suffocate young plants. Only water when the top half-inch feels dry.
- Neglecting Light Intensity: Weak or distant grow lights lead to “leggy” stems. Position LEDs just 2–3 inches above seedlings and adjust as they sprout.
- Skipping Air Circulation: Still air encourages fungal diseases (like damping off). A gentle fan makes stems stocky and disease-resistant.
- Transplanting Too Early: Seedlings are delicate; moving them before they have at least two sets of true leaves stunts roots and recovery.
- Poor Labeling: Mixing up varieties ruins planning—always label trays on day one.
⚠️ Important Warning: The University of Maryland Extension warns against using outdoor soil indoors—it’s loaded with pathogens that wipe out seedlings in days. Always start with sterile, bagged seed starting mix for best results.
Picture this scenario: Mike was thrilled with his sprouting peppers, but watered daily without checking moisture. When mold appeared and halfway through his tray flopped over, he realized his mistake—no airflow, too much dampness. The next round? He watered only when needed and used a $12 clip-on fan. The seedlings thrived.
| Mistake | Critical Impact | Prevention |
|---|---|---|
| Overwatering | Root rot; stunted growth | Let surface dry out between waterings |
| Low Light | Leggy, weak stems | Use strong, close grow lights |
| No Air Flow | Fungal disease risk | Run gentle oscillating fan |
But what actually works might surprise you—sometimes a simple checklist or printable system is all it takes to make healthy growth automatic…
Printable Seed Starting Checklist And Timeline
If you’ve ever lost track of when to start tomatoes versus basil—or missed a vital watering day—here’s the solution: a printable seed starting checklist and timeline. This isn’t just a list; it’s your garden game plan, in black and white, right where you need it most.
What exactly does a top-tier seed starting printable contain? At minimum, you’ll find a weekly timeline with tasks, columns for plant varieties and sow dates, checkboxes for watering, thinning and transplanting, and a notes section for tracking every micro-victory or learning curve. The best checklists let you personalize by adding your own target dates, tray locations, or grow light adjustments.
💡 Pro Tip: Print two copies: one for the fridge so you remember daily (believe me, out of sight equals out of mind!) and one on your growing station wall. Update with a waterproof pen after each task—the University of Vermont Extension recommends maintaining a record for every session to beat common pitfalls.
What’s Inside A Printable Checklist?
| Section | Purpose | Update Frequency |
|---|---|---|
| Seed Variety Table | Track which tray, date, germination | Each sowing session |
| Timeline Chart | List every weekly task by plant | Once per week |
| Watering/Light Log | Check off every action, note problems | Daily |
In practice: Imagine Amanda, who struggled to juggle multiple trays and seed packs without any central system. Scraps of paper just got lost. But after using a simple printable chart, she always knew when to thin, bump up, or transplant, and had clear evidence of what worked last season for her next round. Anyone juggling more than three trays or several plant types will especially benefit from having their own printable at a glance—no more costly mix-ups or wasted effort.
Once this is in place, the rest of the routine falls into place naturally.
Your Seeds Are Set Up for Success
This guide gave you the know-how to pick the right seeds and supplies, set up a real indoor growing station, and avoid the pitfalls that trip up most first-timers. If you take just one thing from this seed starting guide indoors printable, let it be: simple systems and clear checklists turn seed starting from guesswork into guaranteed growth.
Maybe you used to feel stressed about starting seeds, worried you’d mess up germination or waste expensive supplies. Now, you can track each tray, know when to water, and catch mistakes before they start. It’s a whole new season—full of confidence, healthy seedlings, and way less frustration. You’re more capable than you think.
What’s the very first seed you’re excited to start indoors this year? Share your pick or a question in the comments below—we’d love to hear about your next harvest!

Ryan James Mitchell is a passionate gardener and plant care enthusiast dedicated to helping everyday people grow food, keep their plants thriving, and connect with nature — one garden at a time. With years of hands-on experience in vegetable gardening, indoor plant care, and seasonal garden planning, Ryan built 3sols to be the practical, honest gardening resource he always wished existed.