You plant your first pepper seeds, dreaming of overflowing baskets—only to wind up with a few sad sprouts or, worse, nothing at all. Sound familiar? The journey from packet to pepper can feel like a gamble, especially if your seedlings stall or never show up. Not everyone talks about those frustrating gaps in the seed tray, but if you’ve stood in front of a sunny windowsill wondering what went wrong, you’re far from alone.
Growing peppers from seed isn’t just planting and hoping—they’re fussy and the process can easily get tripped up. When things don’t work, it’s discouraging and it can even make you wonder if you’ve got a green thumb at all. Maybe you’re sick of the store’s bland bell peppers or searching for a fiery hot variety you can’t find locally. There’s real disappointment in watching time and money go to waste on false starts.
By the time you finish reading, you’ll know exactly how to start, nurture, and transplant how to grow peppers from seed—and you’ll sidestep the missteps most gardeners make. Ready to grow peppers the right way? Let’s dive in and start with your seeds.
Choosing The Best Pepper Seeds For Your Garden
Choosing the right pepper seeds is where your entire pepper-growing journey begins — and it’s honestly the biggest factor in whether your harvest rewards you or leaves you wanting. It’s not just about picking something that sounds spicy or sweet. There’s more nuance here than most seed packets ever hint at.
First, you’ll face a dizzying array of options: sweet bell peppers, snappy banana peppers, bold jalapeños, and fiery habaneros. Each one brings something special to the table (literally). Some thrive in cooler gardens, others crave consistent warmth. The trick? Match variety to both your climate and your taste buds.
- Open-Pollinated: Best for seed-saving, these pass traits to the next generation reliably.
- Hybrid (F1): Bred for vigor, disease resistance, and yield — but don’t save seeds from these, as hybrids won’t come true.
- Heirloom: Old-school varieties selected for flavor, color, and uniqueness, often with fascinating histories.
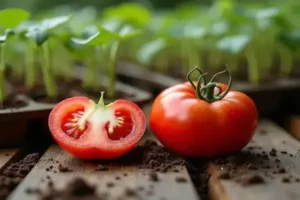
Picture this scenario: You buy generic grocery-store seeds, excited for a rainbow harvest. By midsummer, only a few stunted peppers appear, looking nothing like what you saw online. A neighbor with heirloom seeds from a trusted company? Their plants are loaded, colors popping, flavors off the charts. That’s not luck — it’s seed choice.
| Variety | Best For | Days to Maturity |
|---|---|---|
| California Wonder | Sweet, stuffed, or sliced | 70-75 |
| Early Jalapeño | Salsa, pickling, quick yields | 60-65 |
| Habanero Orange | Intense heat, sauces | 85-100 |
Wondering where to find trustworthy seeds? Go with specialists such as Baker Creek Heirloom Seeds, Johnny’s Selected Seeds, or seek varieties tested by the National Gardening Association. Official catalogs often highlight disease-resistant types, which can be a lifesaver if your garden’s seen wilt or viruses before.
💡 Pro Tip: Always check the days to maturity and match them to your local growing season. According to University of California Agriculture, late-maturing types may never fruit in shorter northern summers.
Consider local climate, disease risk, and your heat tolerance before clicking ‘buy.’ The right seeds do half the work for you — but there’s one detail most first-timers miss about where and how you start them…
Setting Up The Perfect Seed-Starting Environment
So, what really makes a “perfect” environment for starting pepper seeds? It’s not just tossing seeds on a sunny windowsill and hoping for the best — peppers demand more precision and care. The right setup transforms fragile seeds into strong seedlings that’ll thrive from the get-go.
- Seed-Starting Trays: These shallow containers let you control moisture and spacing better than using random pots, preventing rot and tangled roots.
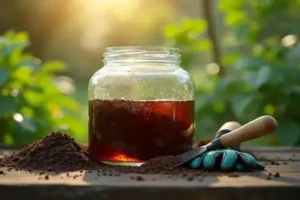
- Quality Seed Starting Mix: Not just any soil — use a sterile, fine-textured mix specifically for seed starting. It holds just enough water but won’t suffocate or bake tiny roots.
- Grow Lights: Regular window light isn’t enough for peppers. Full-spectrum LEDs (at least 16 hours a day) keep seedlings stout and green instead of weak and stretched.
Picture this scenario: You fill a tray with garden dirt, prop it near a chilly window, and check back in a week. The result? No sprouts or sad, spindly stems. Now, compare that to a neighbor who uses a heat mat under their tray, LED grow lights overhead, and a humidity dome to keep moisture just right. They’re seeing fat little seedlings, standing tall and healthy — sometimes within 7-10 days.
⚠️ Important Warning: Never use regular garden soil indoors. According to the University of Minnesota Extension, it can harbor diseases and pests that wipe out entire batches of young plants.
- Gather your items: Seed tray, humidity dome, seed-starting mix, spray bottle, heat mat, grow light, labels.
- Fill trays with moistened seed starting mix — don’t pack it down.
- Sow seeds about 1/4 inch deep, two per cell if you want backups.
- Set trays on a heat mat (80-85°F/27-29°C is ideal) until seeds sprout.
- Cover with a humidity dome or plastic wrap to hold moisture. Ventilate daily to prevent fungus.
- Switch on grow lights right after sprouts break through. Keep lights 2 inches above seedlings and adjust as they grow.
In practice: Starting seeds in your kitchen? Make sure temperatures stay consistently above 75°F. A heat mat makes all the difference — without one, germination can take weeks or fail entirely.
What actually works might surprise you…
Step-By-Step Guide To Sowing And Germinating Pepper Seeds
How do you make sure your pepper seeds actually sprout — fast and healthy — instead of sitting in silence for weeks? The trick is following a proven, detailed process. It’s more than “stick them in dirt.” Here’s how to nail it, every step of the way.
- Fresh, quality pepper seeds (hot or sweet)
- Seed-starting tray, sterile seed-starting mix, and clear dome
- Precision spray bottle (for gentle watering)
- Heat mat (optional but boosts success)
- Full-spectrum grow light or a very bright south window
- Labels and a clean pencil/marker
- Moisten the Seed-Starting Mix: Add warm water until it feels damp but not soggy—like a wrung-out sponge. Fill cells evenly.
- Sow Seeds Properly: Place seeds 1/4 inch deep. That’s not much! Sprinkle gently. If in doubt, plant two per cell for insurance.
- Cover and Label: Press soil lightly over seeds, cover with the clear dome or plastic wrap, and label each pepper type clearly.
- Provide Steady Warmth: Place tray on a heat mat set to 80-85°F (27-29°C). No mat? Choose the warmest non-drafty spot at home.
- Maintain Moisture: Mist the surface lightly once or twice per day, never letting the soil dry out or get swampy.
- Wait for Emergence: Peppers can take 7-21 days! Patience pays here. As soon as you see green, remove the cover and get those seedlings under light.
Picture this scenario: It’s February, and you’re itching to grow peppers for a summer salsa. You follow every step with methodical care. By the third week, all but one cell are bursting with tiny green arches — your future crop is alive and thriving.
💡 Pro Tip: If germination fails after 3 weeks, try soaking stubborn seeds overnight next time, or check the seed pack’s expiration.
According to the National Gardening Association, using a heat mat increases pepper seed sprout rates by over 30%, making this one garden upgrade truly worth the investment for both beginners and pros.
But there’s one detail most owners completely overlook until it’s too late…
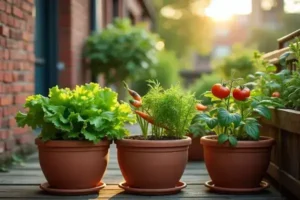
Caring For Young Pepper Seedlings Indoors
How do you turn delicate pepper seedlings into strong, transplant-ready plants? The answer isn’t just “water and wait.” These young plants need specialized care — and one wrong move can set them back for weeks or more.
- Consistent Lighting: Peppers demand at least 14-16 hours of bright, direct light daily. Full-spectrum LED grow lights work best, especially if natural sunlight is limited.
- Watering Wisely: Always water from the bottom by setting trays in a shallow pan so roots soak up what they need. Let the top dry slightly between waterings to prevent mold and “damping off” disease.
- Temperature and Air: Aim for 70-80°F during the day and keep air moving gently with a small fan. This prevents fungal issues and helps seedlings grow sturdy, not leggy.
In practice: Imagine you have a windowsill packed with pepper seedlings. You skip adding a fan, the air grows stagnant, and one week later, mold creeps onto the soil. Your neighbor, meanwhile, uses a dollar-store clip fan and sees their peppers develop thick stems and deep green leaves—ready for anything.
| Trouble Sign | Likely Cause | Quick Correction |
|---|---|---|
| Yellowing leaves | Over-watering or poor light | Reduce watering; increase light intensity |
| Leggy, floppy stems | Insufficient light | Move lights closer; add hours |
| Mold on soil | Humidity, stagnant air | Add airflow; let surface dry |
💡 Pro Tip: According to guidelines from the Royal Horticultural Society, gently brushing your hand over seedlings or providing a light breeze daily helps them build stronger, wind-resistant stems for outdoor life.
Here’s the thing: the first true leaves should look deep green and sit upright, not droop. If you notice yellow patches or stunted growth, pause and reassess—healthy roots and sturdy stems are the real markers of strong pepper starts.
And this is exactly where most people make the most common mistake…
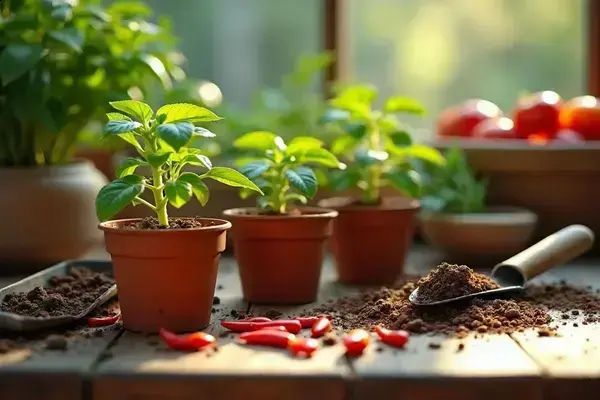
Transplanting And Troubleshooting Common Problems
How do you get your pepper seedlings safely from tray to garden—and what if something goes wrong along the way? Here’s the truth: transplanting can make or break your harvest, but a few smart moves (and knowing the classic pitfalls) set you up for lush, productive plants.
- Wait for the Right Time: Only transplant after all danger of frost is gone and your seedlings have at least two or three true leaves. Harden them off for 7–10 days by gradually exposing seedlings to outdoor conditions.
- Prep the Garden Bed: Work in high-quality compost and check for drainage. Peppers love soil that’s rich, loose, and moist—but never soggy.
- Transplant Carefully: Remove seedlings from trays by the leaves (never the stem). Plant them slightly deeper than they grew indoors—just to the first leaves.
- Water and Mulch: Water well right after transplanting and add a few inches of mulch to retain moisture and fend off weeds.
- Monitor Closely: For the first week, check daily for signs of wilt, pests, or yellowing leaves.
⚠️ Important Warning: According to the University of California Agriculture and Natural Resources, transplant shock is the leading reason for stunted or dying pepper plants. Protect roots from direct sun and wind during transplanting, and always harden off before moving outdoors.
Picture this scenario: It’s late spring, and you’ve babied your seedlings for weeks. On transplant day, you rush things—a cold snap surprises you, and every plant droops by sunset. A neighbor, though, waits for stable warmth and hardens their peppers off for a week. Their plants never skip a beat and take off strong, proving patience pays.
| Problem | Symptom | Solution |
|---|---|---|
| Transplant Shock | Wilting, slow growth after planting | Shade seedlings, water consistently, use root stimulator if needed |
| Pest Damage | Holes in leaves, chewed stems | Apply row cover cloth, inspect daily, remove pests by hand |
| Nutrient Deficiency | Pale or yellow leaves | Add balanced fertilizer, check soil pH (ideally 6.0-6.8) |
Once this is in place, the rest of the routine falls into place naturally.
Your Homegrown Peppers Start Here
If you take just one thing from this guide, let it be: starting with the right seeds and environment makes all the difference when it comes to how to grow peppers from seed. Picking strong varieties, nailing the indoor setup, and handling each step with care gets you closer to the bold harvest you actually want.
Before, growing peppers from seed might have felt like a guessing game — hoping something would sprout, then scrambling to fix issues later. Now you’ve got the actionable know-how for healthy starts, troubleshooting, and a smooth transition outdoors. Watching those first peppers ripen? That’s going to feel pretty amazing.
Which pepper variety are you most excited to try growing from seed this season? Let us know your pick (and any questions!) in the comments below! 🌶️

Ryan James Mitchell is a passionate gardener and plant care enthusiast dedicated to helping everyday people grow food, keep their plants thriving, and connect with nature — one garden at a time. With years of hands-on experience in vegetable gardening, indoor plant care, and seasonal garden planning, Ryan built 3sols to be the practical, honest gardening resource he always wished existed.