Ever glanced at your grocery greens and wondered if you could grow something fresher right on your windowsill? Microgreens are the answer to that craving—vibrant, tasty, and surprisingly easy to cultivate at home.
The problem is, many people think growing microgreens means complicated gadgets or a green thumb they don’t have. What ends up happening is wasted time, money, and dull salads. That’s a bummer when simple techniques can get you there fast and delight your taste buds.
By the end of this guide, you’ll know exactly how to get started with growing microgreens at home, from picking seeds to harvesting in just days. Ready to bring a fresh burst of green to your kitchen? Let’s jump right in.
Choosing The Best Seeds For Microgreens
Wondering which seeds will give you the best microgreens harvest? It’s a question that might seem simple but carries a lot of weight when you want great flavor, nutrition, and fast growth. Choosing the right seeds isn’t just about what looks good on the package—it’s about what suits your taste and growing setup.
The truth is, not all microgreen seeds are created equal. Some varieties sprout faster, while others pack more nutrients or flavors. For instance, radish seeds germinate quickly and offer a spicy kick, making them popular for beginners craving fast results. On the other hand, sunflower microgreens take a bit longer but deliver a nutty, crunchy texture that’s hard to beat.
💡 Pro Tip: When selecting seeds, opt for those labeled specifically for microgreens or sprouts to ensure better germination rates and food safety. The National Gardening Association recommends avoiding seeds intended solely for field planting due to possible chemical treatments.
In practice: imagine you’ve picked three seed packets—radish, basil, and broccoli. You want variety, but did you check their days to harvest? Radish generally takes 5-7 days while basil might take 10-14. Balancing quick hitters with slower growers lets you enjoy a steady microgreen supply without overwhelming your space.
So how do you decide? Consider these factors:
- Flavor profile: From peppery arugula to sweet basil, pick what excites your palate.
- Growth cycle: Quick growers satisfy impatience, longer cycles allow for more robust leaves.
- Nutrition density: Broccoli and kale microgreens are known for their high vitamin and antioxidant contents.
| Seed Type | Days to Harvest | Flavor Profile |
|---|---|---|
| Radish | 5-7 | Spicy, Peppery |
| Sunflower | 7-10 | Nutty, Crunchy |
| Basil | 10-14 | Sweet, Herbal |
Remember: freshness matters, so buy from reputable suppliers and store seeds in a cool, dry place. Organizations like the American Botanical Council emphasize seed quality as key to healthy microgreens.
But there’s one detail most growers overlook until it’s too late—the importance of seed purity and avoiding pesticides, especially if you’re growing edible greens indoors. Choosing organic, untreated seeds can make a significant difference in flavor and safety.
Setting Up Your Growing Space
Ever wondered what the perfect spot for growing microgreens at home looks like? It’s less about having a fancy greenhouse and more about creating the right conditions that fit your space and lifestyle. The truth is, microgreens thrive when you pay attention to light, temperature, and airflow—ingredients that don’t require a lot of fuss but do need care.
Here’s the thing: most beginners rush out and buy kits or large trays without prepping the actual environment. That’s where problems start. Poor light leads to leggy, weak microgreens, while lack of airflow can encourage mold growth. Your goal is to balance these factors to create a mini garden that feels just right.
Essential Requirements for Your Growing Space
- Light: Natural sunlight near a bright window is ideal. If that’s limited, invest in LED grow lights designed specifically for microgreens.
- Temperature: Most microgreens prefer 60-75°F (16-24°C). Cooler or hotter climates might need adjustments or indoor setups.
- Air Circulation: A small fan or open window can prevent stagnant air and reduce fungal risks.
💡 Pro Tip: According to the American Society for Horticultural Science, providing 12-16 hours of light daily—natural or artificial—significantly boosts germination and growth rates for microgreens.
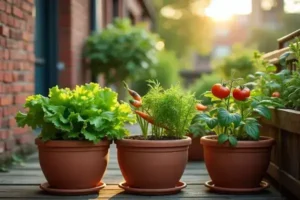
In practice: picture your kitchen counter by a south-facing window filled with trays bathed in sunlight during the day and supplemented with a simple LED panel at night. A small desk fan quietly hums nearby, keeping air moving just enough to keep molds away without drying out your delicate greens.
Choosing containers also matters — shallow trays with drainage holes or recycled seed-starting flats work best. Using organic potting mix or coconut coir as a base provides moisture retention without waterlogging roots.
Comparison Table: Growing Space Options
| Setup Type | Pros | Cons |
|---|---|---|
| Window Sill | Natural light, low cost, easy access | Limited space, inconsistent light |
| LED Grow Light Setup | Consistent light, faster growth, indoor-friendly | Initial cost, requires electricity |
| Indoor Greenhouse Kit | Controlled environment, good for large scale | Space-consuming, can be pricey |
But there’s one detail most owners completely overlook until it’s too late—humidity control. Microgreens need moisture but not sogginess. Too much water and you’re inviting mold, too little and seedlings wilt fast. Monitoring your space’s humidity is key to success.
Step-By-Step Guide To Planting Microgreens
Ever feel overwhelmed about where to start with planting microgreens? Here’s the thing: it’s simpler than you think, and getting the steps right makes all the difference between limp sprouts and vibrant greens. Let’s break it down so you can grow confidently from day one.
First off, you’ll need just a few basic supplies: quality seeds, a shallow tray, a growing medium like coconut coir or organic potting soil, and a spray bottle for watering. Having these at hand before starting ensures a smooth process without unnecessary stops.
Step-By-Step Guide To Planting Microgreens
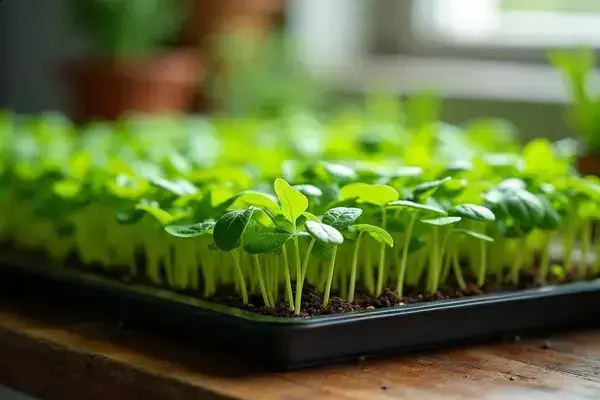
- Prepare Your Tray: Fill your tray evenly with 1-2 inches of moist growing medium. Not too wet—just damp enough to hold seeds in place.
- Spread Seeds Evenly: Scatter seeds densely but not overlapped. Each seed needs room to sprout without crowding – think of a beautiful tapestry of greens forming.
- Press Seeds Gently: Lightly press seeds into the medium to ensure good seed-to-soil contact which aids in germination.
- Cover Seeds: Depending on the seed type, cover with a thin layer of soil or leave them exposed. For example, sunflower seeds prefer being uncovered.
- Water Carefully: Use a spray bottle to mist seeds gently. Avoid flooding which can cause rot. Keep the growing medium moist but never soggy.
- Provide Ideal Conditions: Place the tray in a warm (65-75°F), well-lit area. LED grow lights or sunny windows work best.
- Maintain Moisture: Mist twice daily or as needed. Avoid standing water in the tray’s bottom.
💡 Pro Tip: According to the Specialty Crop Research Initiative, consistent moisture and light exposure during the first 7 days are critical for strong microgreen growth.
In practice: imagine Sarah setting up her first microgreen tray on a sunny kitchen counter. She follows the steps carefully and within a week, her radishes and broccoli sprouts have emerged with healthy, vibrant leaves ready for harvest.
Paying attention to these steps also saves you from common pitfalls like mold growth or poor germination. And this is exactly where most people make the most common mistake—neglecting gentle watering or overpacking seeds.
How To Care For Your Microgreens
How do you keep your microgreens thriving once they’re sprouted? It’s easy to underestimate the care they need in those crucial early days. Here’s the thing: proper maintenance can mean the difference between lush, flavorful greens and a disappointing harvest.
Watering is the first challenge. Microgreens need consistent moisture, but too much water can invite mold or root rot. Aim to mist your greens gently once or twice a day depending on the humidity and temperature of your space. Trust me, your microgreens will let you know—they’ll start to wilt or yellow if they’re thirsty or overwatered.
Key Care Tips for Healthy Microgreens
- Moisture Control: Use a spray bottle to mist; avoid soggy soil to prevent fungal problems.
- Light Exposure: Provide at least 12-16 hours of light daily—natural or with grow lights—to encourage compact, vibrant growth.
- Air Circulation: Keep air moving around your microgreens with a small fan or open a nearby window to reduce the risk of mold.
- Temperature Management: Maintain a steady temperature between 60-75°F (16-24°C) for optimal growth.
💡 Pro Tip: The University of Arizona’s Controlled Environment Agriculture Center highlights that balancing light intensity and airflow can increase microgreen yields by up to 30%.
In practice: picture Emily’s tiny indoor garden where her trays sit under LED lights on her kitchen counter. She uses a gentle misting technique every morning, and a small fan runs quietly in the background. The result? Deep green microgreens bursting with flavor and ready to harvest within two weeks.
Remember, patience and attention to detail pay off here. And this is exactly where most growers stumble—either they overwater in excitement or neglect airflow thinking it’s unnecessary. Both can stunt growth or spoil your crop.
Next, discover the exact moment and methods to harvest your microgreens for peak flavor and nutrition—timing can change everything.
Harvesting And Using Microgreens In Your Kitchen
Wondering when to pick your microgreens for the best flavor and nutrition? Timing is everything. Harvesting too early means you miss out on their full taste and vitamins, but waiting too long can make them bitter or tough. Here’s the truth: most microgreens are ready to harvest between 7 to 21 days after planting, depending on the variety.
Knowing exactly when and how to harvest ensures you enjoy the peak freshness and vibrant crunch of these tiny greens. Cut them just above the soil line using sharp scissors or a knife to keep the delicate stems intact. Avoid pulling them up by hand, which can damage roots and leave behind wasted greens.
Step-By-Step Harvest Guide
- Check readiness: Look for 1 to 3 inches tall greens with fully developed cotyledons (the first leaves).
- Prepare tools: Sterilize scissors or a sharp knife to avoid contamination.
- Cut carefully: Snip above the soil line to keep roots in place for easy cleaning.
- Rinse gently: Rinse cut microgreens under cool water to remove any dirt or seed hulls.
- Dry properly: Pat dry with paper towels or use a salad spinner to keep them crisp.
💡 Pro Tip: According to the USDA, microgreens retain higher nutrient levels when harvested just as their first true leaves emerge, making this the perfect window for maximum health benefits.
In practice: picture John harvesting his peppery arugula microgreens. He waits patiently until they reach two inches, then uses clean scissors to harvest, rinses them gently, and adds them fresh to his salad for that vibrant punch.
Using microgreens in your kitchen is where the fun begins. Toss them into salads, sprinkle atop soups, blend in smoothies, or use as a garnish on your favorite dishes for a fresh, flavorful boost.
And honestly? Their versatility and nutritional punch make them a staple ingredient for anyone serious about cooking and health. But there’s one detail most owners completely overlook until it’s too late—the best storage methods post-harvest to keep your greens fresh longer. That’s exactly what comes next.
Your Microgreen Journey Starts Now
If you take just one thing from this guide, let it be: growing microgreens at home is simple, rewarding, and quick when you choose the right seeds, set up a proper growing space, and care for them correctly. The magic really happens in those first days and weeks.
Before reading, you might have felt unsure where to start or worried about space and time. Now? You’re ready to plant confidently, nurture your greens, and harvest fresh, flavorful microgreens right in your kitchen. It’s about small steps that lead to fresh, healthy additions to your meals—without stress.
What microgreens are you excited to grow first? Share with us in the comments! We can’t wait to hear about your home harvest adventures.

Ryan James Mitchell is a passionate gardener and plant care enthusiast dedicated to helping everyday people grow food, keep their plants thriving, and connect with nature — one garden at a time. With years of hands-on experience in vegetable gardening, indoor plant care, and seasonal garden planning, Ryan built 3sols to be the practical, honest gardening resource he always wished existed.