Your backyard is overflowing—tomatoes, beans, squash—and now you’re standing in the kitchen, unsure what to do next. Sound familiar? The truth is, harvesting more than you can eat is a good problem to have, but letting those vibrant veggies and fruits spoil after all that work? That’s rough, and it happens more often than most of us admit.
I’ve lost count of the times I’ve turned away from a basket of sun-warmed cucumbers because I didn’t know how to keep them fresh through the seasons. Guilt, waste, regret—all buzzing in your mind each time you pass the wilting greens. No one wants their hard-earned harvest to slip away just because they missed the right technique or timing—especially when every jar and freezer bag holds a tiny slice of summer.
By the end of this guide, you’ll know exactly how to make your how to preserve garden harvest efforts count—with easy, proven methods for canning and freezing, tailored for real home gardeners like you. Ready for those shelves to start filling up?
Best Times To Harvest For Maximum Freshness
Ever picked a tomato that looked perfect on the vine—only for it to taste bland? Timing, believe it or not, is the secret ingredient that stands between unforgettable flavor and missed potential. When you tune into your garden’s rhythm, every picking basket promises peak taste and nutrition.
Think all veggies and fruits should be harvested at the same time of day? Not even close! Morning, when dew still clings and temperatures are cool, is ideal for leafy greens and most herbs. They’ll hold crispness longer. Root vegetables (like carrots or beets) are fine a little later, while tomatoes and peppers need the warmth—wait until midday for best results.
💡 Pro Tip: According to the University of California Agriculture and Natural Resources, harvesting in the coolest hours—usually early morning—helps most crops retain moisture, limiting wilting and nutrient loss.
What to Harvest When: Seasonal Guidance
| Crop Type | Best Time of Day | Harvest Signs |
|---|---|---|
| Leafy Greens | Just after sunrise | Crisp, no limp edges, vivid color |
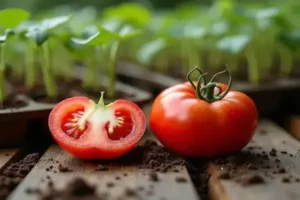
| Tomatoes | Late morning to midday | Uniform color, slight give to skin |
| Herbs | Early morning | Fragrant, before flowering |
| Root Vegetables | Anytime, avoid midday heat | Full-sized tops, vibrant greens |
| Peppers | Late morning | Firm skin, deep consistent color |
Picture this scenario: It’s a warm July morning. You stroll into the garden at dawn, snip basil leaves and harvest crunchy lettuce, both cool and brimming with essential oils. Now fast-forward to noon: you gather tomatoes, their sun-warmed skins at peak flavor, ready for canning or a fresh salad. That’s how chefs and master gardeners do it—and why their food always tastes so vibrant.
- Pick fruits and veggies at their full size, but before they start to soften or brown.
- Harvest over several days rather than all at once for less waste and best quality.
- Always use clean, sharp scissors or garden shears to prevent unnecessary bruising or tearing.
But here’s what most home gardeners overlook—timing the pick is only half the equation. How you handle and prep those just-picked treasures will ultimately decide their shelf life and flavor…
Essential Equipment You’ll Need To Get Started
Think you need a farmhouse kitchen and a closet full of gadgets to preserve your harvest? Not at all. Most home preservers start with just a few essentials—simple, sturdy tools that make the process both safe and satisfying.
If you’re planning to can, your main lineup looks like this:
- Water Bath Canner (for high-acid foods)
- Pressure Canner (for low-acid veggies and meats)
- Quart and pint-sized glass jars
- Two-piece sealing lids
- Jar lifter and wide-mouth funnel
- Ladle and bubble remover tool
For freezing, it’s even simpler—just airtight freezer containers, heavy-duty freezer bags, and labels you can actually read once frost sets in.
💡 Pro Tip: The National Center for Home Food Preservation recommends always using official, tested canning jars and lids from recognized brands (like Ball or Kerr) for food safety. Skipping on proper seals or containers is the #1 reason home canning fails.
Comparing Equipment: Canning vs. Freezing
| Item | Purpose | Must-Have? |
|---|---|---|
| Water Bath Canner | Jams, pickles, fruit | Yes (if canning high-acid food) |
| Pressure Canner | Vegetables, meats | Yes (for low-acid foods) |
| Freezer Bags/Containers | Frozen produce | Essential for freezing |
| Jar Lifter/Funnel | Safe jar handling | Yes (canning only) |
In practice: imagine standing at your kitchen counter, a crate of tomatoes beside you, a clean jar and funneled ladle ready to go. You don’t need a lot—the right tools just keep things moving, clean, and frustration-free.
- Choose gear from trusted brands whenever possible—no unmarked jars or old plastic lids.
- Keep tools exclusively for food prep to avoid cross-contamination.
- Check for chips or cracks in jars before every use.
And here’s where beginners usually slip up: not understanding which foods require a pressure canner for safety. That difference matters far more than most realize…
Step-By-Step Guide: Safe Home Canning
Home canning might sound intimidating, but with the right process, it’s really about routine, safety, and patience—much like baking your favorite bread. Getting started means knowing your method: water bath for high-acid fruits and pickles, pressure canning for low-acid vegetables and meats.
- Fresh produce, washed and prepped
- Verified canning jars with two-piece lids
- Water bath or pressure canner
- Jar lifter, wide-mouth funnel, ladle
- Towels and clean workspace
- Sterilize your jars and lids. Boil jars for 10 minutes to destroy microbes—don’t skip this step for shelf stability.
- Prep your recipe: cook jams, sauces, or pack raw veggies with brine, following a USDA-tested recipe for acid and heat safety.
- Fill jars using the funnel. Leave the correct headspace (space between food and lid)—usually ¼ to ½ inch—to allow safe expansion.
- Wipe rims and place lids to guarantee a proper seal. A speck of food can ruin the whole batch.
- Process jars in the canner for the times specified by the official National Center for Home Food Preservation charts. Elevation makes a difference—double-check!
- Cool on towels for 12-24 hours, then check the seal. A convincing ‘ping’ means you’re good. If not, refrigerate and eat soon.
⚠️ Important Warning: Never attempt to can low-acid foods (carrots, beans, meat) without a pressure canner. According to the USDA, failing to reach temperatures above 240°F allows botulism spores to survive—risking serious foodborne illness.
In practice: picture this scenario—your kitchen steams, jars in neat rows, and you hear that satisfying pop as each jar seals. Sure, it takes a Sunday afternoon and attention to detail, but you’ll taste July in every spoonful by February.
Most newcomers neglect headspace or overfill jars, which can lead to seal failure or spoilage, especially if they’re improvising with old family recipes versus tested ones. And this is exactly where most people make the most common mistake…
How To Freeze Fruits And Vegetables The Right Way
Think all you need to freeze produce is a plastic bag and a freezer? Not quite. Freezing fruits and vegetables the right way is all about preserving flavor, color, and—most important—nutrients. Skip the prep steps, and you’ll often end up with limp, tasteless results nobody wants to eat by winter.
- Wash and dry: Rinse your produce well, then let it dry thoroughly. Extra moisture is the enemy of good texture.
- Peel and chop: Slice veggies and fruits into bite-sized pieces. Uniform cuts help them freeze (and later cook) evenly.
- Blanch veggies: Drop cut vegetables into boiling water for 2-4 minutes, then plunge them into ice water. This step halts enzyme actions that cause loss of flavor, color, and vitamins—just like the National Center for Home Food Preservation recommends.
- Drain and pre-freeze: Pat dry, spread on baking sheets, and freeze in a single layer. This is what keeps everything loose and easy to grab, preventing a massive frozen clump.
- Package smart: Transfer to heavy-duty freezer bags or airtight containers, removing as much air as possible to avoid freezer burn. Label with date and contents—trust me, once things frost over, it’s nearly impossible to tell what’s what.
💡 Pro Tip: Don’t freeze potatoes, cucumbers, lettuce, or radishes—they turn mushy. For berries and chopped peppers, skip the blanching step and go straight from dry to freezer sheet.
In practice: picture this scenario—a Saturday morning, counters covered in corn, green beans, and overflowing berries. You blanch, cool, lay everything on trays. By afternoon, you’re tucking labeled bags into the freezer, ready for winter dinners and smoothies. No waste, no guesswork, and absolutely no ice-locked veggie bricks to pry apart later.
- Always use freezer-grade bags, not regular sandwich bags—otherwise, you’ll lose flavor and risk freezer burn.
- Chop and blanch in small batches for best color and texture control.
- Freeze produce as soon as it’s picked—quality drops quickly if you let things sit.
But here’s what most home preservers overlook—you’ve saved all these fruits and veggies, but how do you make sure flavor lasts and nothing goes to waste once frozen?
Storing Preserved Foods: Tips For Longer Shelf Life
So you’ve filled your pantry with glowing jars and stocked the freezer with colorful bags—but how do you keep everything tasting just as fresh months from now? The truth is, storing preserved foods well is more than just stacking jars in a cupboard. It’s a blend of careful prep, the right environment, and simple checks that pay off every single time you open something homemade.
- Cool, dark, and dry is your golden rule for canned goods. Aim for places away from sunlight and heat—ideally 50–70°F—to prevent discoloration and flavor loss.
- For frozen foods, temperature matters even more. Keep your freezer at or below 0°F (–18°C), check the seal, and open the door as little as possible—every defrost shortens shelf life.
💡 Pro Tip: According to the USDA, preserved canned foods can last up to a year if stored properly, and you should always rotate: eat the oldest stock first and label each container clearly with the date.
Shelf Life Guide: Canned vs. Frozen
| Preserved Type | Ideal Shelf Life | Storage Tips |
|---|---|---|
| Home-Canned Jars | Up to 12 months | Keep cool, label, check seal monthly |
| Frozen Fruits/Veggies | 8–12 months | Seal tightly, avoid frequent thaw cycles |
| Store-Bought Canned | 1–2 years | Follow printed expiration and store like homemade |
In practice: picture this scenario—it’s November, and you’re reaching for peach preserves in the back of your pantry. You notice the label says June, lid is still tightly sealed, and the color looks right. That’s shelf-life success—preventing waste and surprise disappointment at dinnertime.
- Inspect every jar/bag before using—look for bulging lids, odd colors, or ice crystals in frozen food.
- Store opened jars in the fridge and finish within a week.
- Keep an inventory list taped inside your pantry or freezer door to track use-by dates for peace of mind.
Once this is in place, the rest of the routine falls into place naturally.
Your Harvest Is In Good Hands
If you take just one thing from this guide, let it be: timing, prep, and storage make all the difference when you’re learning how to preserve garden harvest at home. From knowing when to pick, using the right gear, and choosing between canning or freezing, each step sets you up for real pantry success.
It used to feel overwhelming—so many jars, tools, and rules you weren’t sure where to begin. But now? You know exactly what to look for, what goes where, and how each step keeps your food tasting homegrown and safe all year. Honestly, you’re much more prepared than you think.
What’s the one harvest you’re most excited to preserve this season? Share it in the comments and let’s celebrate your next kitchen victory together!

Ryan James Mitchell is a passionate gardener and plant care enthusiast dedicated to helping everyday people grow food, keep their plants thriving, and connect with nature — one garden at a time. With years of hands-on experience in vegetable gardening, indoor plant care, and seasonal garden planning, Ryan built 3sols to be the practical, honest gardening resource he always wished existed.