Picture this: It’s the first warm weekend of spring, you’ve got a head full of garden dreams — but the yard still feels like a mystery. You’re not sure where to start, what goes where, or how to fit all your ideas together without turning your space into chaos. That doubt is enough to freeze any would-be gardener in place.
If you’ve ever wasted hours rearranging pots, lost a season’s worth of veggies to poor sunlight, or felt overwhelmed by all the advice out there, you’re not alone. The right plan can save you resources, backaches, and a ton of frustration — but winging it? That’s usually how you land with patchy beds and regretful plant choices.
Here’s the thing: by the time you reach the end of this guide, you’ll know exactly how to use a garden layout planner printable free to sketch, tweak, and actually build the garden that’s been living in your mind. Ready to turn all that potential into a blooming reality? Let’s get your hands dirty with real results.
Why Planning Your Garden Layout Changes Everything
Ever wondered why some gardens feel like a living masterpiece while others end up as a haphazard jumble? There’s one thing separating thriving backyard paradises from that patchy, disappointing plot — and it’s not just a green thumb. It’s smart, intentional planning.
Here’s the thing: skipping the garden layout stage often leads to wasted money, disappointments, and endless hours rearranging plants that just won’t thrive. You buy gorgeous seedlings with high hopes, only to watch them flounder because sunlight, water, and spacing are way off. And honestly? That’s an exhausting cycle even experienced gardeners get trapped in.
- Sun exposure: Place sun-hungry crops like tomatoes or peppers in consistently sunny zones.
- Water flow: Group moisture-loving plants near your hose, while drought-tolerant varieties get the drier spots.
- Access: Make sure you can easily reach every bed for pruning, harvesting, and maintenance — future you will thank you.
💡 Pro Tip: According to the National Garden Bureau, drawing a scaled plan (even a simple hand sketch) increases your harvest and helps pinpoint the best companion planting combos before you dig.
Picture this scenario: Sarah dreams of fresh salads from her backyard, so she fills her garden with lettuce, cucumbers, and squash — wherever there’s room. By midsummer, her squash has smothered the lettuce, and the cucumbers suffer from too much shade. If she’d mapped out plant sizes and growth habits first, she’d be swimming in veggies instead of regrets.
| Planning Level | Result | Common Pitfall |
|---|---|---|
| No Plan | Random growth, wasted space | Overcrowding, poor yields |
| Basic Sketch | Better organization, more productivity | Forgetting sunlight patterns |
| Detailed Grid | Optimal harvest, less rework | Time investment upfront |
According to The Royal Horticultural Society, designing your garden layout in advance also minimizes disease spread and maximizes success with crop rotation — essential for healthy, productive soil year after year.
But there’s one detail most owners completely overlook until it’s too late…
Key Elements Every Dream Garden Needs
What truly sets apart a dream garden from just another backyard? The answer might surprise you — it’s not expensive tools or endless hours. It’s arranging the right elements in harmony.
Every dream garden has must-have features that bring it alive, whether you’re an urban grower or have sprawling rural space. When you work these elements into your layout from the start, you unlock a space that feels welcoming, productive, and uniquely yours.
- Sunlight Zones: Identify which areas get morning sun, afternoon heat, or constant shade. Plants like tomatoes and zinnias crave full sun, while ferns or lettuce thrive in softer light.
- Soil Health: Healthy soil is the lifeblood of any garden. Test pH and texture, then amend with compost — the USDA National Institute of Food and Agriculture recommends annual soil tests for home gardens.
- Water Access: Plan for easy watering. Raised beds close to taps, drip irrigation, and rainwater barrels cut headaches and save resources.
- Paths and Access Points: Even narrow paths (just 18-24 inches wide) let you reach plants comfortably without compacting the soil or trampling roots.
- Zones for Seating or Reflection: A tucked-away bench or a log under a shade tree can turn routine garden chores into restful moments.
| Element | Why It Matters | Pro Tip |
|---|---|---|
| Sunlight Zones | Maximizes plant potential | Track sun patterns for a week |
| Healthy Soil | Boosts growth & disease defense | Compost improves fertility fast |
| Water Access | Prevents plant stress | Install soaker hoses under mulch |
💡 Pro Tip: Before you plant, spend a sunny afternoon just observing your yard. Notice wind flow, wildlife activity, and microclimates — investing this time up front gives you priceless clues.
In practice: Imagine Mia, a beginner who skipped mapping out her water source. By July, she dreaded carrying watering cans back and forth each evening — a problem she easily could’ve solved by placing raised beds nearer to her hose. The American Society of Landscape Architects stresses functional design as much as beauty; your knees, back, and harvest will thank you.
And this is exactly where most people make the most common mistake…
Step-By-Step: Mapping Out Your Perfect Garden Space
Feeling overwhelmed by a blank patch of yard? Don’t worry — mapping out your garden space is way less intimidating when you break it down. The truth is, every stunning garden starts with a plan that makes sense on paper first.
Ready to get practical? Here’s exactly what you’ll need before you start:
- Graph paper or printable planner sheet
- Pencil and eraser (for plenty of tweaks!)
- Measuring tape (at least 25 feet)
- Colored pencils or markers
- Sun tracking notes (jot them for a week)
- Plant tags or a seed packet for reference
- Measure Your Space: Pace out all garden boundaries and permanent features — fences, sheds, mature trees. Transfer the dimensions onto your paper, keeping everything to scale. This foundation saves tons of headaches down the line.
- Mark Sun and Shade Areas: Block out zones based on the sun’s path. Full sun? Part shade? Mark each zone with different colors for clarity.
- Add Water and Access Points: Draw in your water spigot, current irrigation system, and any main paths. If it’s a long walk with the watering can, tweak the plan now, not after planting.
- Draft Your Planting Beds: Map out vegetable or flower beds based on each plant’s space needs. Leave at least 18 inches between rows if you want to move comfortably.
- Visualize Extras: Note seating areas, tool storage, or compost bins. Balance practical needs with beautiful nooks for relaxation.
💡 Pro Tip: The University of California’s Master Gardener Program suggests sketching at least two versions of your layout—one for ultimate productivity, another for aesthetic flow. Mixing the best of both creates magic.
In practice: Imagine Alex, plotting his first raised beds. He second-guessed his design until he realized his “shortcut” path actually cut right through where his tomatoes needed sun. Paper planning saved him months of frustration and made watering a breeze.
What actually works might surprise you…
Common Layout Mistakes And How To Dodge Them
What separates a productive, inviting garden from a tangled disappointment? You guessed it — it’s usually a handful of common layout mistakes that even seasoned green thumbs make. The silver lining? Dodging these slip-ups doesn’t take a miracle… just a little foresight and a willingness to tweak your plan.
- Forgetting Sun Patterns: Placing sun-loving plants in partial shade leads to stunted growth. Always observe how light shifts across your yard throughout the day.
- Crowding Beds Too Tightly: It’s tempting to squeeze more in, but poor air flow encourages pests and diseases. Give each plant its fair share of breathing room — your tomatoes and roses will reward you.
- Inefficient Paths: Winding, narrow walkways can turn routine watering or harvesting into a chore. Design wide enough trails (about 18-24 inches) for comfy access.
- Neglecting Water Access: If you have to stretch hoses across awkward obstacles, you’ll procrastinate on watering. Position beds close to taps or plan simple irrigation in advance.
⚠️ Important Warning: Overlapping incompatible plants (for example, planting fennel near beans or tomatoes) can stunt growth for both. The Missouri Botanical Garden maintains a list of common companion planting mistakes for further reference.
| Mistake | Problem Caused | Quick Fix |
|---|---|---|
| Ignoring sunlight | Low yield, leggy stems | Map sun/shade for a week |
| Poor spacing | Disease, low harvest | Use mature plant widths |
| No path plan | Difficult maintenance | Mark paths first |
In practice: Picture this scenario—Carlos planted gorgeous dahlias and basil too close, then watched bugs and mildew attack the packed foliage by summer. If he’d used a printable planner and measured out space, he’d have avoided the frustration (and a phone call to his local extension office for rescue tips).
And this is exactly where most people make the most common mistake…
Download Your Free Printable Garden Planner Template
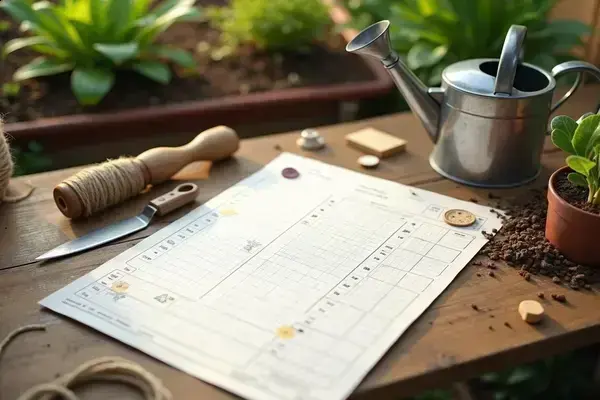
Here’s the thing: the easiest way to turn plans into results is to use a printable garden planner template. You don’t need fancy tech or an expensive app — just something tangible you can grab, sketch on, and update as your garden grows.
The best printable planner templates combine utility with clarity. You’ll typically find sections like planting grid, sunlight tracker, watering schedule, notes for plant companions, and a to-do checklist. Fill out details before the season starts, then update weekly as things change — your planner transforms into a living document for your space.
- Keep your printed planner in a weatherproof binder or folder near your back door or potting area for easy access.
- Personalize with colored markers: highlight beds for veggies, flowers, or pollinator-friendly plants.
- Adapt the checklist for your climate, planting dates, and tasks — no two gardens are the same.
- Refresh the planner at the start of every new growing season; this habit lets you track progress, successes, and what to tweak next time.
💡 Pro Tip: According to the Royal Horticultural Society, reviewing last year’s planner at the start of the new season is one of the simplest ways to boost yields and avoid repeating past mistakes.
| Template Section | How to Use | Tips |
|---|---|---|
| Planting Grid | Sketch out beds to scale | Label each bed by type |
| Sun Tracker | Log hours of sunlight per spot | Check weekly for seasonal change |
| Task Checklist | Plan key care tasks | Add reminders for fertilizing |
In practice: Imagine Olivia, a new gardener with two left thumbs. She printed a planner template, filled it out in pencil, and updated it each week. Suddenly, she noticed patterns — like how her zucchini loved more water, or when her basil bolted early. This low-tech approach gave her the clarity that fancy software never managed.
The right habits in place now make everything easier from here.
Your Garden Vision Is Closer Now
Planning truly does change everything. You’ve seen how mapping sun, organizing zones, and learning from mistakes lead to a thriving, joy-filled garden. If you take just one thing from this garden layout planner printable free guide, let it be: a simple plan on paper often means the difference between struggling and success out in the dirt.
Before, planting felt overwhelming—guesswork, lost seeds, and all those tangled hoses. Now you have a clear path, with tools and templates to make progress step by step. You can fix what didn’t work last year and bring your dream garden to life. Confidence really blooms with each bed you lay out.
What’s one change you’ll make this season with your new plan—more sunlight, smarter spacing, or something completely personal? Share your next gardening move in the comments. Can’t wait to see what you grow!

Ryan James Mitchell is a passionate gardener and plant care enthusiast dedicated to helping everyday people grow food, keep their plants thriving, and connect with nature — one garden at a time. With years of hands-on experience in vegetable gardening, indoor plant care, and seasonal garden planning, Ryan built 3sols to be the practical, honest gardening resource he always wished existed.