Imagine stepping out to your garden, only to realize you’ve left the trowel somewhere—or worse, bought the same hand rake for the third time. Sound familiar? It’s almost comical, except for the frustration that creeps in each time you misplace or forget a tool you need right now.
That moment when you’re ready to dig or prune, but your shed is chaos? That’s more than a minor inconvenience—it slows projects, eats up valuable time, and sometimes means another unnecessary trip to the store. Honestly, small obstacles like these chip away at the joy of gardening.
By the end of this guide, you’ll have a garden tools checklist essential printable tailored to real-world gardening, plus expert tips for choosing—and keeping track of—the tools that actually matter. Ready to never scramble for your favorite spade again?
How To Quickly Organize Your Gardening Space
Ask any seasoned gardener what slows them down most, and you’ll hear it’s not the weeds—it’s wasted minutes hunting for tools hidden in chaos. A cluttered shed throws off momentum and turns fun projects into chores. Organization isn’t just about aesthetics; it directly affects how much you get done and how much you enjoy it.
Here’s the thing: your garden space reflects your routine. A well-ordered zone means more time spent planting, less time searching. The Royal Horticultural Society points out that a tidy workspace reduces the risk of tool damage and garden injuries—two problems no one wants. So, how do you get your gardening nook, garage, or backyard shed under control fast?
- Empty Everything: Pull all your garden tools and supplies out. You need a blank slate to really see what you own and what’s gathering dust.
- Sort and Purge: Group items by type—pruners with pruners, gloves with gloves. Discard any duplicates, broken pieces, or rusted-out gadgets you haven’t used in a year.
- Clean Surfaces: Sweep your shed or workspace. Wipe shelves. An overlooked step, but clean spaces discourage pests and keep tools safer.
- Set Up Zones: Dedicate shelves or bins for soil, seeds, hand tools, and large implements. Use clear labels or color-coded bins if you have lots of small things.
- Hang and Display: Install pegboards or sturdy hooks for tools with handles (rakes, spades, hoes). Keep daily-use tools at eye level and less-used gear higher up.
💡 Pro Tip: Store pruners and shears with blades open, not locked, and coated lightly with machine oil—University of California Division of Agriculture and Natural Resources recommends this for preventing rust and accidental dulling.
In practice: picture this scenario—Jamie spends 10 minutes every Saturday morning looking for her watering can in a jumble of bags and broken pots. One weekend, she sets up a wall organizer and bins. By the next week, she finds every tool instantly and even discovers space for a new set of gloves she forgot about. The difference? Her Saturdays feel lighter, and her projects stay on track.
| Zone | Items to Store | Ideal Storage Solution |
|---|---|---|
| Hand Tools | Trowels, pruners, gloves | Pegboard with labeled hooks |
| Bulk Supplies | Soil, mulch, fertilizer | Sturdy waterproof bins |
| Seed Packets | Seeds, labels, markers | Clear plastic boxes with dividers |
What actually works might surprise you…
Essential Tools Every Gardener Should Own
Ever wondered if you really need all the gadgets at the hardware store, or just a core set that never lets you down? The truth is, a handful of essentials can handle nearly every garden task efficiently—and save you both money and storage headaches.
According to the National Gardening Association, focusing on durable, multipurpose tools reduces frustration and supports better long-term results. When your trowel cuts smoothly into tough soil or your pruners fit comfortably in your hand, every project flows a little easier. But which options are truly non-negotiable for hobbyists and seasoned growers alike?
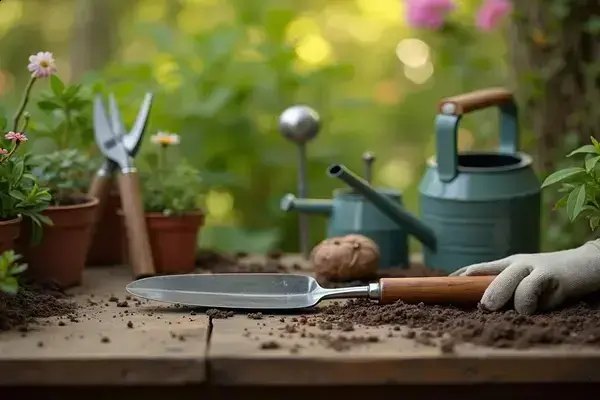
- Hand Trowel: Use it for digging, transplanting, or mixing soil. Stainless steel models with ergonomic handles last longest and resist rust.
- Pruning Shears: Also called secateurs, these trim stems, flowers, and small branches. Bypass-style blades make clean cuts on live growth. The American Horticultural Society recommends sharpening blades once every season.
- Garden Fork: For breaking up dense earth, aerating beds, or lifting clumps of plants without damaging roots. Look for forged steel with a textured grip.
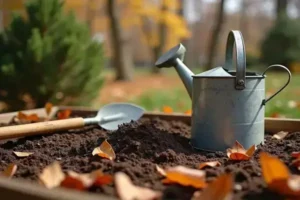
- Watering Can: Not all cans are created equal—choose a sturdy metal or thick plastic model with a removable rose (nozzle) for adaptable flow.
- Gloves: Durable gloves protect your hands from blisters, thorns, and soil-borne irritants. Breathable, reinforced materials (like goatskin or nitrile-coated fabric) offer top protection.
💡 Pro Tip: Invest in quality over quantity. One reliable pair of shears or a solid trowel outlasts three cheap versions—and prevents repetitive strain injuries, as noted by the University Extension horticulture programs.
Comparison Table: Essential Garden Tools
| Tool | Best For | Upgrade Tip |
|---|---|---|
| Hand Trowel | Digging, planting, weeding | Pick all-metal construction for durability |
| Pruning Shears | Cutting stems, pruning small branches | Bypass style for live wood, anvil for dead stems |
| Garden Fork | Loosening soil, compost turning | Cushioned handle reduces hand fatigue |
In practice: imagine Sarah—a beginner gardener—started with just a trowel and hand rake. She quickly realized she needed tough gloves for weeding, a sturdy can for watering, and sharp pruners as her plants matured. Her investment in these basics meant less frustration and no need to constantly upgrade or replace tools season after season.
But there’s one detail most owners completely overlook until it’s too late…
Choosing Quality Tools: What Really Matters
Wondering why some garden tools break after a season, while others become trusty companions for years? It’s more than just price tags—it’s about paying attention to construction, materials, and design fit for real-world use. Smart gardeners know that investing in quality up front saves money, time, and hassle in the long run.
Let’s talk specifics. According to the University of Minnesota Extension, tools with forged stainless steel blades and solid ash or hickory handles have the best long-term durability. Plastic handles crack and cheap mystery metal rusts fast—don’t fall for bargain bin impulses. The way a handle feels matters, too—test grip and weight before you buy, especially if you have arthritis or smaller hands.
💡 Pro Tip: Always check for a steel tang (the part of the blade that continues through the handle) in trowels and pruners. This single design feature is what separates breakage from resilience when digging into tough soil or roots.
- Material Quality: Stainless steel resists rust, stays sharp, and cleans easily. Carbon steel is super strong but needs regular oiling to prevent corrosion.
- Ergonomics: Look for molded, cushioned, or rubberized grips. The Arthritis Foundation points out that ergonomic handles reduce strain and fatigue for gardeners of all ages.
- Warranty: Established brands often offer lifetime or multi-year warranties—real peace of mind when you’re weighing price vs value.
Picture this scenario: Frank, a weekend gardener, bought a discount set with plastic handles last spring. By summer, the trowel was snapped and the shears rusted solid. When he switched to stainless steel and wood, his replacement cycle ended—and gardening actually got easier because the tools felt better in his hand.
| Criteria | Low-Quality | High-Quality |
|---|---|---|
| Material | Plastic, thin metal | Forged stainless steel, hardwood |
| Durability | 1 season or less | Multiple years |
| Comfort | Slippery, rigid | Ergonomic, cushioned grip |
And this is exactly where most people make the most common mistake…
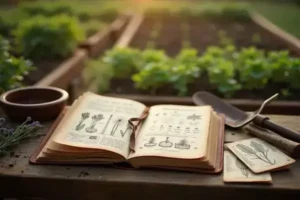
Printable Checklist: Never Forget A Garden Tool Again
Ever get halfway through planting only to realize your gloves are missing—or you need pruners that vanished somewhere last week? A printable checklist isn’t just a piece of paper; it’s the secret weapon top gardeners use to stay organized and save time. Whether you garden daily or just on weekends, a structured checklist keeps projects smooth and stress-free.
How To Use Your Printable Garden Tools Checklist
- Download & Print: Print a fresh copy at the start of each gardening season or big project. Laminate it if you want to use a dry erase marker for repeated use.
- Customize: Add or remove tool categories so it fits your exact garden and style.
- Pre-Work Check: Mark each item before heading outdoors. This prevents the classic re-entry for missing tools halfway through a task.
- Weekly Refresh: After each session, use the checklist to spot tools that need cleaning or repair, and add any restock items (like fertilizer or plant stakes).
- Store For Access: Keep your checklist inside a clear sleeve, right on your shed wall or by the back door—where you’ll actually see it before you garden.
💡 Pro Tip: The Royal Horticultural Society recommends using specific checklists for different gardening tasks (planting, pruning, pest control) to save even more time and prevent costly tool loss.
In practice: picture this scenario—Maria always misplaced her hand fork and pruners, sometimes losing a full hour locating them. But once she pinned a laminated checklist in her potting shed, she caught herself grabbing everything needed before stepping outside. No more wasted steps, no more missing tools. That little list changed her entire gardening flow.
- Update Frequency: Adjust your checklist once a season or when you buy new tools.
- Who Benefits Most: Ideal for busy gardeners, families sharing a tool shed, or anyone with limited storage.
- Extra Customization: Add columns for cleaning, sharpening, or oiling so maintenance isn’t forgotten.
What actually works might surprise you…
Smart Storage Tips To Keep Tools At Their Best
If you’ve ever opened your shed and found rusty pruners tangled with a forgotten watering can, you know the frustration—why do good tools wear out so quickly? The answer usually isn’t just use; it’s how (and where) they’re stored. Smart storage transforms tool longevity, usability, and even safety, saving you money and hassle over the years.
- Hang, Don’t Heap: Install heavy-duty hooks or a dedicated pegboard. Hanging prevents blades from dulling and keeps handles clean of ground moisture.
- Avoid Dampness: Never rest wooden-handled tools directly on concrete floors. Use raised pallets or racks—moisture wicks upward and triggers early rot or mildew. The University of California Agriculture & Natural Resources recommends wall mounts for this exact reason.
- Oil the Works: After cleaning, run a lightly oiled cloth over any steel surface. It reduces rust and makes maintenance quicker the next time around.
- Group by Function: Keep cutting tools together, soil tools together, and watering gear near the door. This speeds up projects and reduces accidental damage.
⚠️ Important Warning: Always store sharp implements (like pruners and loppers) with blades closed and pointed away from walkways—especially if children ever enter your garden shed.
Simple Step-By-Step Guide: Prepping Tools For Storage
- Clean off dirt and sap with a stiff brush and gentle soap.
- Dry tools thoroughly—don’t rely on air-drying alone.
- Apply a thin layer of mineral or linseed oil onto both metal and wood.
- Check bolts and screws for tightness before hanging.
- Hang tools at eye level for easy access and improved airflow.
In practice: Steve reorganized his workbench and started wiping down each tool before hanging it. Six months later, even his previously rust-prone cultivator looked (and felt) brand new. No wasted dollars, no surprise repairs—just a sense of order and lasting quality each weekend.
| Problem | Old Habit | Smart Storage Fix |
|---|---|---|
| Rusty metal tools | Pile in crates | Oil, then hang on hooks |
| Warped wood handles | Lean against wall | Store off floors, use oil |
| Misplaced gloves/tools | Random drawers | Dedicated shelf or bin |
The right habits in place now make everything easier from here.
Your Garden, Your Perfect Tools
It’s easy to forget how transformative a little planning can be. If you take just one thing from this garden tools checklist essential printable, let it be this: a simple system—quality tools, smart storage, and a foolproof checklist—keeps gardening a joy, not a stress. You don’t need every gadget—just the right ones, cared for in the right way.
Before, your shed was a jumble and your projects stalled or got messy. Now? You can walk into your space, grab what you need, and move straight into the fun part—actually gardening. Small steps like routine checklists and organized zones make a world of difference. You’re set to enjoy your best gardening season yet.
What’s the one tool you always used to misplace (or wish you had)? Share your story in the comments—your insight might help another gardener!

Ryan James Mitchell is a passionate gardener and plant care enthusiast dedicated to helping everyday people grow food, keep their plants thriving, and connect with nature — one garden at a time. With years of hands-on experience in vegetable gardening, indoor plant care, and seasonal garden planning, Ryan built 3sols to be the practical, honest gardening resource he always wished existed.