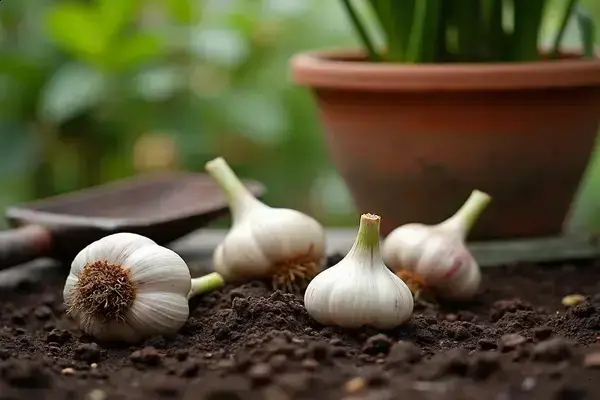
Ever sliced into a clove of garlic only to find it’s dry or sprouting green? You’re not alone — supermarket garlic just never seems to hit that pungent, juicy sweet spot.
It’s easy to think growing garlic at home is complicated or space-intensive. What if you get it wrong and waste months waiting for tiny, flavorless bulbs? That frustration can hold folks back for years, leaving them stuck with bland store-bought options.
But here’s the thing: by following a few clear steps, you’ll master how to grow garlic at home — right down to harvesting plump, aromatic bulbs. You’ll never look at garlic the same way again.
Best Time And Place To Plant Garlic
Timing matters more than most home gardeners realize. Wondering whether you can plant garlic right now — or if you missed your window? Here’s the thing: garlic is a bit picky, but not impossible to please if you stick to its natural cycle.
Most varieties produce their biggest, most flavorful bulbs when planted in the fall, several weeks before your first hard frost. Why? Garlic needs a cold period, called vernalization, to trigger clove formation. According to the University of California’s Master Gardener Program, planting in October or early November lets roots develop while keeping shoots dormant until spring warmth signals growth.
💡 Pro Tip: In climates with mild winters (like USDA zones 8-10), try planting garlic cloves in late November or December for healthy spring harvests. For cold regions (zones 3-7), aim for mid-October. Check your local extension office for last frost dates — they’re the gold standard for region-specific planting advice.
But let’s talk place — because where you plant affects everything from disease resistance to bulb size. Garlic thrives in loose, well-drained soil rich in organic matter. Heavy clay or soggy patches? They’ll stunt growth and invite rot. If you’ve got raised beds or can amend your soil with compost and sand, you’ll be way ahead of the curve.
Key Factors for Choosing Your Garlic Bed
- Sunlight: Garlic needs at least 6-8 hours of direct sun daily — morning light is ideal.
- Soil Drainage: Avoid areas prone to puddling. Raised beds or mounded rows make a huge difference.
- Previous crops: Don’t plant garlic where onions or other alliums grew last year — minimizes disease carryover.
In practice: Picture this scenario — it’s mid-October, and you’re eyeing two garden spots. One gets strong sunlight but holds water after rain, the other drains fast but only gets morning light. Always choose the drainage first with garlic. A slightly shaded, dry spot beats a sunny swamp every time.
| Region | Best Planting Month | Soil Temp (°F) |
|---|---|---|
| Cold Climates (Zones 3-7) | Mid-October | 50-60 |
| Mild Climates (Zones 8-10) | Late November | 50-65 |
| Warmest Regions | December | 55-70 |
But there’s one detail most new growers completely overlook until it’s too late…
Choosing The Right Garlic Variety For Your Climate
Ever stare at that rack of garlic bulbs at the nursery and wonder: which one actually grows best in your microclimate — or is there really a difference? The truth is, variety choice can make or break your harvest. Garlic comes in two main types: hardneck and softneck, and each handles temperature, disease, and storage completely differently.
Hardneck garlic produces a thick flower stalk (called a scape) and tends to thrive in regions with harsh, cold winters. Softneck varieties skip the scape and instead focus their energy on bigger, more plentiful cloves — making them favorites for warmer climates. According to Oregon State University’s Extension Service, hardneck types like ‘Music’ and ‘German Red’ love USDA zones 3-7, while softneck stars like ‘California Early’ and ‘Silverskin’ shine in zones 8-10 (where winters rarely dip below 20°F).
💡 Pro Tip: If your area sees wild spring temperature swings or unpredictable snows, choose at least one hardneck and one softneck variety. That way, no matter the weather, you’ll get something to harvest.
Let’s break it down for quick comparison. Timing, flavor, and storage potential can all shift based on your choice. Don’t let a mouthwatering seed catalog fool you into planting a type that just won’t handle your soil and weather.
| Type | Best for Zones | Flavor & Storage |
|---|---|---|
| Hardneck | 3–7 | Robust flavor, easier to peel, stores 4-6 months, sends up edible scape |
| Softneck | 8–10 | Mild to rich flavor, longer storage (up to 9 months), more cloves per bulb |
| Creole & Asiatic | 7–10 | Unique flavors, great for specialty dishes, moderate storage |
In practice: Picture this scenario — two neighbors, one in chilly Vermont, the other in sunny California, swap seed cloves. The northern gardener’s softneck barely survives the freeze, while the Californian’s hardneck won’t bulb up at all. Matching variety to your climate isn’t just smart; it saves months of work (and frustration) down the line.
- If you’re unsure of your zone, use the USDA Plant Hardiness Zone Map as your reference.
- High humidity? Opt for disease-resistant strains recommended by your state’s agricultural extension office.
- Flavor your priority? Hardneck is rich and spicy, softneck tends toward mild and sweet — but both can surprise you based on soil and weather.
And this is exactly where most people make the most common mistake…
Step-By-Step Guide: Planting Garlic Cloves At Home
Ready to plant, but not sure where to start—or what order really matters? The process is surprisingly straightforward, and when you follow each stage, you set yourself up for plump, flavorful cloves come harvest. Here’s what you’ll need before you dig in:
- Seed garlic bulbs (organic or locally sourced if possible)
- Garden trowel or small shovel
- Compost or well-rotted manure
- Mulch (straw, leaves, or pine needles)
- Measuring tape or ruler
💡 Pro Tip: Use only healthy, firm cloves for planting—avoid any that are shriveled or showing mold. The National Gardening Association recommends breaking bulbs apart just before planting to prevent them from drying out.
- Separate Cloves: Gently break your garlic bulb into individual cloves, keeping the outer “skin” intact on each clove.
- Prepare The Soil: Loosen soil to a depth of 8 inches, mix in compost, and clear away old plant roots and stones.
- Set Spacing: Use your tape to space holes 4 to 6 inches apart in rows that are at least 12 inches apart. This guarantees every bulb has room to size up.
- Plant Cloves: Place each clove pointed side up, flat side down, about 2 inches deep for mild winters—up to 4 inches for harsher climates.
- Backfill And Water: Cover cloves with soil, lightly tamp down, and water deeply so moisture reaches the base.
- Mulch Generously: Add a 2-4 inch layer of straw or leaves to insulate and suppress weeds through winter.
In practice: Picture this scenario—one grower rushes and forgets the mulch, only to find their rows frozen solid when January winds hit. The neighboring gardener, who followed each step and mulched heavily, digs through soft straw in spring and finds eager green shoots already off to the races.
According to Cornell University, consistent watering during dry spells (especially in spring) helps bulbs reach their full size. Don’t let the bed dry out right as things are taking off!
What actually works might surprise you…
Watering, Fertilizing, And Troubleshooting Common Issues
How much water is too much? When do you start feeding garlic, and what do you do if leaves turn yellow or spotty? The reality is, garlic’s care needs shift as the seasons roll—and timing is everything for a hardy, productive crop.
- Watering: Garlic needs steady moisture, especially during spring’s rapid growth. Soak deeply once weekly—aim for 1 inch of water—until the last few weeks before harvest. Cut back as bulbs mature; overly wet soil risks rot.
- Fertilizing: At planting, mix compost or a balanced slow-release fertilizer into the soil. In early spring, side-dress with a nitrogen-rich amendment to power leaf growth. Stop fertilizing by late May so bulbs develop well.
💡 Pro Tip: Mulching with straw helps hold moisture and cuts down on weeds—a true lifesaver in dry or windy climates. The National Gardening Association notes that mulch also keeps soil temperatures steady, which prevents stress that stunts bulbs.
Common Problems & Real Solutions
What if you see yellow tips, drooping stems, or soft bulbs? Some issues pop up for nearly every gardener. Here’s how to spot—and solve—the big ones.
| Symptom | Likely Cause | Solution |
|---|---|---|
| Yellow Leaves | Nitrogen deficiency or overwatering | Add blood meal or reduce water; check for soggy roots |
| Leaf Spots | Fungal disease (rust or white rot) | Remove affected leaves; rotate crops; avoid overhead watering |
| Soft/Mushy Bulbs | Wet soil or poor drainage | Harvest early; improve drainage next season |
In practice: Picture this scenario—you miss a rainstorm, skip watering for two weeks, and suddenly growth stalls. A neighbor, who mulched and tracked weekly rainfall in a notebook, pulls up bulbs the size of golf balls in July. That’s no accident—routine care really does add up over time.
- Over-fertilizing late in the season can create lots of leaves, but small bulbs. Less is more after May.
- Consistent watering during dry periods = fatter cloves come harvest.
And this is exactly where most people make the most common mistake…
How And When To Harvest And Cure Garlic Bulbs
When’s the right moment to pull those buried bulbs—and how do you even know they’re ready? Garlic signals its ripeness more with leaf color and texture than a specific calendar date. Most types mature 7–9 months after planting, typically in early to mid-summer for both hardneck and softneck varieties.
- Watch for lower leaves to turn yellow and begin drying; the top five or six leaves should remain green. Too green, and the cloves won’t separate well. Too brown, and protective skins break down.
- Dig, don’t yank. Use a fork or trowel to loosen soil 4–6 inches from the base, then lift gently—intact bulbs store longer.
⚠️ Important Warning: Never wash fresh garlic bulbs after harvest. Water encourages mold and shortens shelf life. Just brush off loose dirt and leave the roots and stems on for now. The University of Minnesota Extension stresses this point for long-term quality.
- Harvest: Pick a dry, overcast day, when soil is crumbly but not hard.
- Bundle: Tie 6-10 bulbs together by the stems or spread in a single layer on a ventilated tray.
- Cure: Hang bundles or lay trays in a well-ventilated, shaded place with steady air movement (garage, shed, or attic). Avoid any direct sun exposure.
- Wait: Let garlic cure for 2-4 weeks—outer skins will dry and parchment, inner flesh remains plump and firm.
- Clean: Once fully dry, trim roots and cut stems to about 1 inch above the bulb. Gently peel away the dirtiest outer layers, but don’t overclean or expose cloves.
In practice: Imagine the satisfaction of plaiting a hefty braid of golden-skinned garlic and hanging it in your kitchen, knowing you grew, harvested, and cured it all yourself. Fresh homegrown bulbs can last six months or longer when properly cured and stored.
- Use wire racks or mesh for airflow if space is tight.
- Label harvest dates and varieties—a simple marker saves confusion later, especially if curing several types together.
The right habits in place now make everything easier from here.
Your Garlic Growing Journey Begins
If you take just one thing from this guide, let it be: growing flavorful garlic at home is about timing, variety, and steady attention—anyone can do it, you just need the steps. From picking the best planting window and ideal spot, to choosing the right variety, planting, caring, and curing—each move builds toward a satisfying, homegrown harvest. Don’t forget—the phrase how to grow garlic at home is now something you can actually answer for yourself.
Maybe getting started used to feel overwhelming or messy. But now? You know how to spot ripe bulbs, what mistakes to avoid, and how to keep each clove happy right through to your kitchen. Grown, harvested, and cured by your own hands. It really does change the taste—and the sense of pride.
Which part of the garlic-growing process are you most excited (or nervous) to try for yourself? Let us know in the comments—we can’t wait to hear your plans!

Ryan James Mitchell is a passionate gardener and plant care enthusiast dedicated to helping everyday people grow food, keep their plants thriving, and connect with nature — one garden at a time. With years of hands-on experience in vegetable gardening, indoor plant care, and seasonal garden planning, Ryan built 3sols to be the practical, honest gardening resource he always wished existed.