Ever stared at that droopy plant, roots tangled around its old pot, and thought—should I be doing something about this? It’s a moment every plant parent eventually hits, usually with a mix of hope and hesitation. Repotting sounds simple until you’re surrounded by crumbling soil and nervous leaves.
Here’s the thing: putting off repotting doesn’t just leave your plant cramped but can stunt its growth, drain its color, and slowly turn it from lively to lackluster. Many people wait too long out of fear they’ll make things worse. The truth? Most houseplants are counting on you to act before it’s too late.
By the end of this guide, you’ll have a clear, no-nonsense approach to every step listed in the how to repot a plant guide steps—from picking the perfect pot to making sure your plant re-roots happily. Stick with me: you’ll soon see repotting as a relief, not a risk.
Gathering The Right Tools And Potting Mix
Ever try to repot a plant with the wrong trowel and end up with dirt everywhere except where it’s supposed to be? The secret to a smooth—and stress-free—repotting day starts with having the right tools lined up. Not sure what to grab? That’s actually one of the top reasons plants suffer root shock, according to The Spruce and the Royal Horticultural Society. You don’t need a full gardener’s arsenal, but skipping the basics can leave your plant struggling from the start.
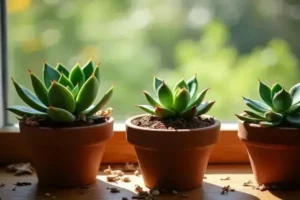
💡 Pro Tip: Choose a pot with drainage holes that’s only 1-2 inches wider than your plant’s current home. Too big and your plant’s roots may rot from excess moisture—one of the most common beginner mistakes.
Here’s what you’ll need for a standard repotting session:
- Clean, sharp trowel or large spoon (for safe root lifting)
- Gloves (protects hands and roots from contamination)
- Fresh potting mix (never reuse old, compacted soil—more on this below)
- New pot (with proper drainage holes, not just a pretty cover)
- Watering can (for gentle, even watering after transplant)
- Soft brush or old toothbrush (for loosening stubborn root balls)
Picture this scenario: it’s a Saturday morning, you’re ready to give your thriving pothos a new home, but halfway through, you realize the only thing you have is leftover dirt and an old soup spoon. That’s when messes happen—and plants pay the price. The difference between a thriving plant and a sulking one often comes down to preparation, not luck.
| Tool | Purpose | Pro’s Pick |
|---|---|---|
| Trowel | Lifting and transferring soil cleanly | Fiskars Ergo Transplanter |
| Potting Mix | Supplying nutrients and proper drainage | Miracle-Gro Indoor Potting Mix |
| Pot with Holes | Preventing water-logging and root rot | Costa Farms Decorative Planters |
The American Society for Horticultural Science points out that the best potting mix is tailored to your plant type—some thrive in cacti blends, others need moisture retention. If you’re unsure, most local garden centers are happy to offer tailored advice.
What actually works might surprise you…
How To Choose The Best Time For Repotting
Ever wonder if there’s actually a “right time” to repot your favorite plant—or if that’s just something pros say to make us nervous? The reality is, timing isn’t just about your schedule. Your plant goes through real-life cycles, and the best moment to repot can make all the difference between a healthy comeback and weeks of limp, stressed foliage.
According to the American Horticultural Society, the sweet spot for most houseplants is late winter through early spring, just as they’re waking from dormancy and gearing up for a growth spurt. Moving your plant during this phase means it’s ready to stretch new roots into fresh soil, bouncing back from repotting stress much faster than at other times of year.
| Season | Best For | Risks |
|---|---|---|
| Early Spring | Most tropicals and foliage plants | Lowest root shock risk |
| Mid-Fall | Cacti, succulents | Growth slows, but less heat stress |
| Winter | Emergencies only (root rot, pests) | High stress, slow recovery |
💡 Pro Tip: Avoid repotting during the flowering stage—plants often drop blooms or go into decline from the stress, as explained by the Royal Horticultural Society.
Picture this scenario: It’s June, your flowering peace lily starts wilting, and you’re tempted to repot right away. But the plant’s already using all its energy for blooms, so repotting now could risk all those flowers. Waiting a few weeks, until blooming slows, gives the plant a better chance to adjust.
- If your plant’s roots circle tightly at the bottom (root bound), it’s a call for help—regardless of season.
- Sudden yellowing or soil that dries instantly after watering are key distress signals.
- Urgent problems like visible pests or root rot? Emergency repotting is better than losing the plant.
The Missouri Botanical Garden suggests monitoring your plant for these cues, but if you’re just planning routine care, embrace the growth spurt months. Knowing this timing gives you an edge—and helps your plant thrive after the big move.
But there’s one detail most owners completely overlook until it’s too late…
Removing Your Plant Safely From Its Old Pot
Worried you’ll snap roots or traumatize those precious leaves while wrestling your plant loose? You’re not alone. Removing a plant from its old pot isn’t just a brute-force job—it’s about gentleness, patience, and knowing when to pause (especially if the roots are clinging for dear life). Timing and the right moves save your plant a world of stress.
- Water the plant lightly a few hours in advance. Moist soil slides out more easily, making the root ball less likely to crumble or tear unexpectedly.
- Turn the pot sideways or upside-down. Support the base of the plant with your hand, tap the pot rim with the heel of your palm, and let gravity help detach stubborn roots from the sides.
- Gently squeeze or tap the pot. For plastic pots, squeezing loosens the root ball. For terra cotta, gentle tapping along the rim breaks the soil’s grip.
- Wiggle (never yank!) the plant free. If roots are really stuck, use a clean spatula or butter knife to loosen the edges all around, taking care not to sever key roots.
- Inspect and untangle the root ball. Carefully tease apart circling roots with your fingers or a soft brush—look for signs of rot or overly soggy roots and prune with sterilized scissors.
💡 Pro Tip: Don’t ignore stuck roots at the bottom—teasing them loose can prevent long-term “root bound” issues, according to research from the University of Florida IFAS Extension.
Picture this scenario: you’ve watered, tapped, and wiggled—but nothing. Instead of yanking, slip the whole pot (plant and all) into a shallow tub of lukewarm water for a few minutes. The soil will loosen, and you’ll be able to free even the most stubborn houseplant with minimal damage.
- Tools you may need: Small trowel, chopstick, old butter knife, soft brush, or your hands.
- Time required: Plan for 10–20 minutes, especially on your first try.
- Prerequisite: Sterilize any cutting tools before use to protect against hidden bacteria or fungal infections.
And this is exactly where most people make the most common mistake…
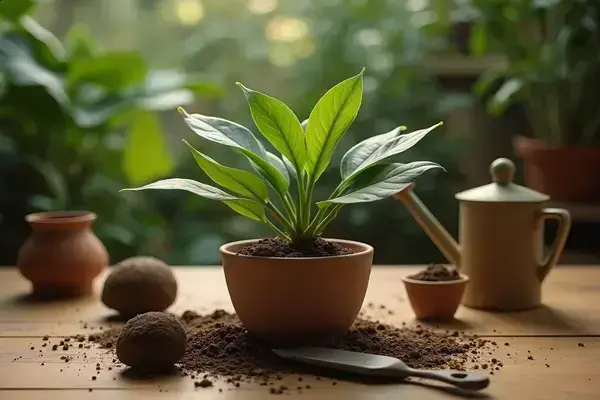
Placing And Settling Your Plant In The New Pot
So your plant is finally free, roots loosened, and you’re staring at that pristine new pot—now what? Setting a plant in its new home isn’t just a matter of dropping it in with some soil and hoping for the best. There’s an art (and science) to positioning, filling, and making sure roots establish without future trouble.
- Add a base layer of fresh potting mix. Make it about 1–2 inches deep—enough to lift the root ball so the plant sits at the same height as before. Use a specialized blend if your plant requires it; for example, consider Miracle-Gro Indoor Potting Mix or Espoma Organic Potting Mix for extra nutrients.
- Settle the plant gently in the center. Hold your plant upright, then slowly fill around the root ball. Don’t press or compact the soil too hard—roots need air and room to grow.
- Rotate for best orientation. Want fuller growth? Point any “bare” side toward the brightest light source. Plants will naturally fill out toward the sun.
- Backfill and gently firm the soil. Add mix a handful at a time. Tap the pot or jiggle the sides to encourage soil to settle evenly. Stop when soil level sits one inch below the pot rim (so water won’t overflow).
- Water thoroughly, but stop at damp—not soggy. All trusted sources, including the American Horticultural Society, advise waiting until excess drains before moving the pot to its final spot.
- Avoid covering the crown (where stem meets roots) too deeply.
- If your plant tends to tip, use a stake or decorative rock as gentle anchors until new roots set.
💡 Pro Tip: If you hear air pockets crackling as you water, that’s actually good—you’re helping roots reach into empty spaces quickly. Use a chopstick to pop big bubbles for extra root contact.
In practice: after a messy morning, Zoe finishes placing her snake plant in a chic ceramic pot. She rotates it so the healthiest side faces her kitchen window, then carefully waters it until she sees drops coming from the drainage holes. Simple, but that step secures the roots faster than any fertilizer could. The Royal Horticultural Society emphasizes this method as the foundation for lush, stress-free regrowth.
What actually works might surprise you…
Post-Repotting Care For Happy, Healthy Growth
So, you’ve got your plant nestled in its new pot—what happens next? This is the moment most people slack off, but truthfully, what you do (or don’t do) now can mean the difference between a bountiful recovery and a slow fade.
- Water carefully: Right after repotting, water thoroughly to settle the soil, but don’t drown the roots. Allow excess water to drain, and hold off on the next watering until the top inch of soil feels dry—root systems need air as much as moisture.
- Find the right spot: Keep the plant out of direct sun for at least a week. Indirect, filtered light is ideal while it recovers from the transplant shock—the American Horticultural Society highlights gradual transition as best practice.
- Watch for stress signals: Yellowing leaves, droopiness, or leaf drop can happen (don’t panic). Some stress is normal, but keep an eye out for anything severe or persistent; this could indicate root damage or overwatering.
⚠️ Important Warning: Don’t fertilize right away! Give your plant at least 4-6 weeks to establish new roots before adding any plant food—fertilizing too soon can burn roots and slow recovery, according to the Royal Horticultural Society.
Picture this scenario: After repotting his pothos, Marcus resists the urge to place it by the sunny kitchen window. Instead, he tucks it on a shelf with bright, indirect light and skips fertilizer until the first new leaf pops up. Within a month, his plant looks fuller and more vibrant—proof that a gentle touch goes a long way.
| Action | Why It Matters | When to Do It |
|---|---|---|
| Water | Settles roots, prevents shock | Immediately after repotting |
| Move to shade | Reduces transplant stress | First 7-10 days |
| Delay fertilizer | Prevents root burn, helps new growth | 4-6 weeks later |
The right habits in place now make everything easier from here.
Your Plant, Happier Than Ever
You’ve learned all the essentials for stress-free repotting: gathering the right gear, timing it just right, and giving smart post-move care. If you take just one thing from this how to repot a plant guide steps, let it be: your plant’s success starts with patience—never force the process.
Before, repotting might’ve felt intimidating, with worries about hurting your plant or doing something wrong. Now you know exactly what to do at every stage. With these practical tips, you can swap anxiety for confidence and watch your leafy friend thrive in its new home. Every plant parent starts somewhere—and now, that “somewhere” is a lot less scary.
What step are you most excited (or nervous) to try on your next plant? Tell us how it goes in the comments below!

Ryan James Mitchell is a passionate gardener and plant care enthusiast dedicated to helping everyday people grow food, keep their plants thriving, and connect with nature — one garden at a time. With years of hands-on experience in vegetable gardening, indoor plant care, and seasonal garden planning, Ryan built 3sols to be the practical, honest gardening resource he always wished existed.