You walk by your once-beautiful plant and wince—droopy leaves, brown tips, maybe a stubborn stem or two clinging to life. Wondering if there’s hope, or if it’s finally time for the dreaded goodbye?
When a plant starts declining, it’s not just about a yellow leaf here and there. It can feel like you’re losing a tiny companion. Left unchecked, the problem snowballs—wasting money, draining your confidence, and giving guilt a comfy seat in your home.
By the time you finish this guide, you’ll spot the warning signs, tackle the core problems, and actually see results using how to revive dying plant strategies. Get ready—the turnaround starts right now, and yes, your plant can bounce back.
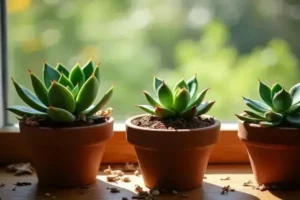
Spotting The Signs: Is Your Plant Really Dying?
How do you know if your plant’s truly on the brink — or just having a rough week? It’s a real worry. That yellow leaf could mean almost nothing, or it could be the first sign of trouble brewing below the surface. Here’s the thing: not all sad-looking plants are dying, but certain symptoms are loud cries for help.
First, check for obvious physical changes: shriveled leaves, dry stems, and roots that look brown or mushy instead of firm and white. If you notice falling leaves that aren’t replaced by new growth, your plant might be struggling for survival.
- Yellowing Leaves: Can signal overwatering, poor drainage or a nitrogen deficiency.
- Wilting or Drooping: Often caused by underwatering or sudden drafts, but can also mean root rot.
- Brittle, Brown Edges: Usually linked to low humidity or salt buildup from fertilizer.
- Spots or Mold: That’s a red flag for fungal or bacterial infection.
- Root Troubles: Soft, brown, and smelly roots usually mean rot—healthy roots are firm, white, and earthy-smelling.
💡 Pro Tip: According to the Royal Horticultural Society, gently slipping your plant out of its pot to look at the roots is one of the quickest ways to check for serious underlying problems.
In practice:
Picture this scenario: a tired old peace lily in the corner starts dropping leaves by the day. Its owner figures it just needs more water, but the soil stays soggy, still no new growth. Only after inspecting the roots — black, mushy, and foul-smelling — does the real problem show itself: root rot, not neglect. A little detective work changed everything.
| Symptom | Possible Cause | Severity |
|---|---|---|
| Yellow Leaves | Overwatering or nutrient deficiency | Medium |
| Brown, Crispy Edges | Low humidity, salt buildup | Low |
| Wilting Stems | Underwatering or root rot | High if persistent |
| Mold on Soil | Poor airflow, excess moisture | Medium |
| No New Growth | Severe stress, pest infestation | High |
Think spotting plant trouble is just about looks? Not quite. Smell, feel, and even gently probing roots all play a role. But there’s one detail most owners completely overlook until it’s too late…
Common Causes Behind Plant Decline
Ever wonder why some plants seem to give up the ghost almost overnight? The truth is, most plants don’t just “suddenly” start to decline—there’s always a root cause lurking in the background. Spotting those causes early can make all the difference between a quick save and a total loss.
Let’s break down the common reasons your plant might be struggling:
- Overwatering: When roots are constantly wet, they can’t breathe, leading quickly to root rot. It’s the number one culprit behind most houseplant deaths, according to the National Gardening Association.
- Underwatering: On the flip side, letting soil dry out for too long stresses the plant’s vascular system, causing crispy leaves and stunted growth.
- Poor Drainage: Soil or pots that hold onto too much moisture can choke roots, even if you’re watering carefully.
- Insufficient Light: Most indoor plants need bright, indirect light. Too little light leads to pale, leggy growth—too much sun scorches the leaves.
- Nutrient Deficiency: Without enough essential minerals like nitrogen, potassium, or magnesium, plants can’t produce healthy foliage or fight off disease.
- Pest Infestation: Insects like spider mites, scale, or aphids aren’t just a nuisance; they rob your plant of vital sap and can spread fungal infections.
💡 Pro Tip: Always use a potting mix designed for your specific plant type. According to the University of Florida IFAS Extension, tailored soil blends help prevent both overwatering and nutrient imbalances.
In practice:
Picture this scenario: you notice your pothos drooping and its leaves tinged with yellow. Maybe you thought it was thirsty, but after feeling the soil, it’s swampy—classic sign of overwatering, not neglect. Turns out, the decorative pot had no drainage hole, trapping excess water for days. Only after repotting into a container with proper drainage did new growth appear.
| Problem | Typical Sign | Quick Fix |
|---|---|---|
| Overwatering | Yellow, mushy leaves | Let soil dry, improve drainage |
| Underwatering | Brittle, brown edges | Water thoroughly, check weekly |
| Lack of Light | Pale, stretched stems | Move to a brighter spot |
| Pest Infestation | Sticky residue, spots | Treat with insecticidal soap |
And this is exactly where most people make the most common mistake—misdiagnosing the problem, treating the wrong issue, and watching things get worse instead of better…
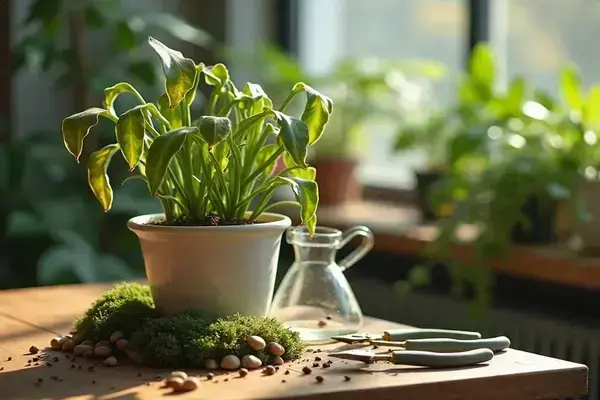
Immediate Rescue Steps For Fading Plants
So, you’ve spotted the warning signs—and now your plant’s droopy, yellow, or crispy. What’s next? Most owners freeze up or try a bunch of fixes at once, but here’s the truth: rapid, targeted action saves more plants than any miracle fertilizer ever could.
- Time required: Set aside 20–40 minutes for this rescue. Don’t rush. Gather everything first.
- What you’ll need:
- Clean, sharp pruning shears
- Fresh potting mix (suited for your plant type)
- A container with drainage holes
- Distilled or filtered water
- Soft cloth or paper towels
- Protective gloves
- Remove the Plant from Its Pot — Gently lean the pot sideways and slide the plant out, supporting its base. Tap the pot if it’s stuck, but don’t yank on stems.
- Inspect Roots Thoroughly — Healthy roots are white or tan and firm—black, brown, or mushy? Snip them off with sterilized shears.
- Trim Damaged Leaves and Stems — Cut away anything yellow, brown, or soft. Leave as much healthy green as possible for recovery.
- Refresh and Repot — Fill a new pot (or the original, after deep cleaning) with fresh soil. Replant so roots spread naturally, then water lightly to settle the mix.
- Clean Plant Surfaces — Wipe dust and residue from leaves with a damp cloth to improve light absorption and reduce pest risk.
- Rehydrate Cautiously — Water the soil until moist but not drenched, and avoid letting the pot sit in standing water.
- Find the Ideal Spot — Place the plant somewhere with bright, indirect light and keep it away from drafts or harsh sun.
⚠️ Important Warning: Never fertilize a plant right after a rescue repot. According to the University of California Agriculture & Natural Resources, roots need time to heal before absorbing nutrients safely.
In practice: a friend’s fiddle leaf fig lost nearly every leaf after a chilly night near an open window. With careful trimming, root checks, and a gentle return to warmth, new buds started showing after a couple of weeks—not instant results, but proof that patience and the right technique pay off.
What actually works might surprise you…
Long-Term Care To Encourage Recovery
What makes a once-wilted plant not just survive, but genuinely thrive for months to come? It’s all about building consistent habits—because plants bounce back best when their environment stays stable and nurturing. Think of it like health insurance for your greenery.
- Consistent Watering Schedule: Let soil dry out slightly between deep waterings, but don’t ignore the unique needs of each species. Use a moisture meter for precision or simply finger-check two inches below the surface.
- Proper Fertilizer Regimen: Once a plant starts showing new leaves, you can begin low-dose feeding. Look for a balanced, slow-release fertilizer; the American Society for Horticultural Science notes a 10-10-10 blend suits most indoor plants.
- Regular Pruning and Deadheading: Snip faded blooms and yellowing leaves as soon as you spot them. This refocuses the plant’s energy where it matters and keeps air moving for pest and disease prevention.
In practice:
Picture this scenario: after saving a battered calathea, its owner sets a Monday morning “plant check” alarm. Every week, she cleans leaves, checks soil, and inspects for pests. That little routine? It turns an occasional emergency into steady, healthy growth—a tangible difference over months.
💡 Pro Tip: Rotate your plant a quarter turn each week. According to Royal Botanic Gardens, rotating ensures even light distribution and prevents lopsided, leggy growth over time.
| Care Habit | Frequency | Purpose |
|---|---|---|
| Watering (deep soak) | Every 1–2 weeks | Hydration and nutrient delivery |
| Leaf Cleaning | Monthly | Photosynthesis and pest reduction |
| Fertilizing | Monthly (growing season) | Steady growth support |
| Pruning | Biweekly | Directs energy, prevents disease |
And honestly? Consistency is the secret weapon. But there’s one detail most owners completely overlook until it’s too late…
How To Prevent Future Plant Problems
Can you actually make sure your next plant never suffers the same fate? Here’s the thing: prevention isn’t just wishful thinking—it’s a series of proactive choices grounded in proven horticultural principles. When you invest a bit more care upfront, plant crises become a rarity, not a given.
- Right Plant, Right Place: Match each plant to the amount of sunlight, temperature, and humidity it naturally craves. This is the approach the Royal Horticultural Society recommends for long-term success.
- Drainage Insurance: Always use pots with drainage holes and well-aerated soil. It’s the “health insurance” of the plant world.
- Routine Monitoring: Weekly check-ins catch tiny issues before they spiral. This is where a simple checklist shines.
In practice:
In practice: imagine a new plant parent bringing home three fresh houseplants—one snake plant, one pothos, one peace lily. They create a care chart:
| Plant | Light Needed | Water Routine |
|---|---|---|
| Snake Plant | Low to bright | Every 2–3 weeks |
| Pothos | Medium, indirect | Once weekly |
| Peace Lily | Low, indirect | When leaves droop |
💡 Pro Tip: Don’t skip pest checks—spider mites and mealybugs hide under leaves. The Missouri Botanical Garden recommends using a magnifying glass once a month for a closer look.
- Use self-watering planters for busy weeks.
- Keep plants away from HVAC vents (drastic air shifts equal stress).
- Store your fertilizer, pruners, and moisture meter in a visible place so care stays top-of-mind.
Small steps, repeated consistently, make the biggest difference over time.
Your Plant’s Comeback Starts Here
If you take just one thing from this guide, let it be: spotting issues early gives you the power to revive almost any plant. Don’t overthink it—consistency, observation, and acting fast work wonders. The main keyword? That’s right: mastering how to revive a dying plant isn’t about luck, it’s about steady care.
Before today, you might’ve felt lost or frustrated every time a leaf turned yellow. Now, you’ve got the confidence to decode symptoms, fix roots, and build habits that actually bring your plants back to life. Small actions add up. Recovery isn’t magic—it’s the result of smart, simple steps you know you can repeat.
Which new habit or rescue step will you try first with your plant? Share your plans or questions in the comments—we’re all rooting for you!

Ryan James Mitchell is a passionate gardener and plant care enthusiast dedicated to helping everyday people grow food, keep their plants thriving, and connect with nature — one garden at a time. With years of hands-on experience in vegetable gardening, indoor plant care, and seasonal garden planning, Ryan built 3sols to be the practical, honest gardening resource he always wished existed.