Ever noticed how the tips of your favorite houseplant brown no matter how gently you water? That crispiness isn’t bad karma—it’s your plant begging for a bit more humidity.
It’s frustrating, right? You can do everything by the book and still end up with sluggish, stressed greenery. Dry air sneaks in more than you think, especially with heaters or AC running, causing leaves to curl, growth to stall, and your prized monstera to look downright miserable. Not a great feeling for anyone who actually cares about their plants.
By the time you finish reading, you’ll know the most effective ways to increase how to increase humidity naturally at home—methods that fit into real life and keep leaves lush. Ready for a little fresh, happy air? Let’s get your plants thriving.
Understanding Plant Humidity Needs
Ever wondered why two plants in the same room can look totally different? Here’s the thing: plants experience the world in ways we don’t. While you might just feel a little dryness in the air, your green friends can go into full-on stress mode if humidity isn’t quite right.
Plants use a process called transpiration—they release water vapor through tiny pores called stomata. When humidity dips too low, these pores overwork, the plant loses moisture faster than it can take it up, and you’ll spot crispy edges, droopy leaves, and stalled growth in no time.
💡 Pro Tip: According to The Royal Horticultural Society, most tropical houseplants thrive best when relative humidity stays above 50%—your bathroom and kitchen usually hit these sweet spots compared to living rooms with central heating or air conditioning.
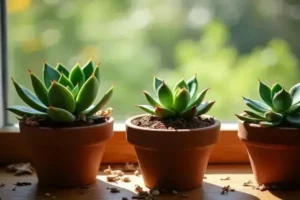
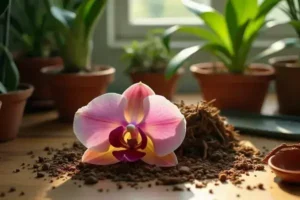
So what does ‘ideal humidity’ actually mean for your houseplants? For ferns, orchids, and calatheas—think rainforest: 60–80% relative humidity. For succulents, below 40% is often perfect. Want to measure this? You’ll need a simple hygrometer, which can be found at most garden centers or ordered online. It shows you the current humidity, helping you keep conditions just right without guessing.
How Humidity Impacts Plant Health
- High Humidity: Encourages lush growth but can invite fungal issues if unchecked.
- Low Humidity: Leads to leaf browning, curling, and slow recovery from repotting or pests.
- Stable Humidity: Reduces stress, helping your plants bloom and set new leaves more reliably.
Picture this scenario: You buy a gorgeous maidenhair fern, place it near a sunny window, and water it religiously. But without enough humidity, the feathery fronds crisp up within days. With a pebble tray or a humidifier, though, your fern stays perky and green.
| Plant Type | Ideal Humidity | Symptoms of Mismatch |
|---|---|---|
| Tropical (Monstera, Fern) | 60–80% | Browning tips, limp growth |
| Desert (Cactus, Succulent) | <40% | Soft stems, rot risk in high humidity |
| Flowering (Peace Lily, Orchid) | 50–70% | Leaf drop, buds shriveling |
According to research from the University of Florida IFAS Extension, matching plant humidity needs boosts both appearance and resilience—especially in challenging indoor climates.
But there’s one detail most owners completely overlook until it’s too late…
Simple Home Methods To Raise Humidity
So, you know your plants need more humidity — but what can you do without buying a bulky or expensive humidifier? Good news: several tried-and-true methods can help you boost humidity using what you already have at home.
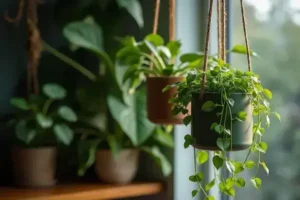
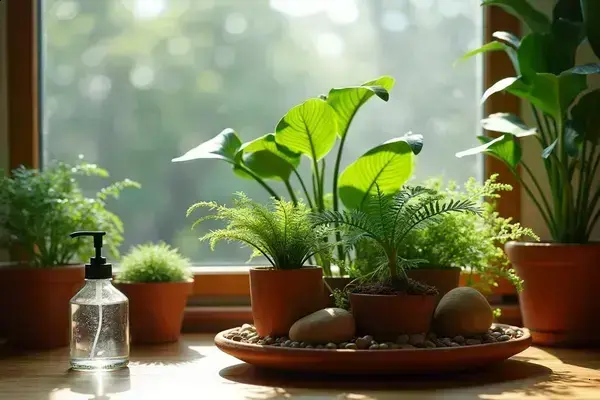
- Group your plants together. Plants naturally release moisture through transpiration. When you cluster them, they create a mini microclimate, raising the local humidity.
- Set up pebble trays. Fill a tray with pebbles, add water up to just below the tops, and rest your plant pots on top. As water evaporates, it hydrates the air directly around your plant. It usually lasts a day or two before refilling.
- Regular misting. A fine mist from a spray bottle lifts humidity for a few hours. Best done in the morning so leaves can dry before dark—reducing any risk of fungal issues. Focus on the air, not just leaves.
- Place plants in naturally humid rooms. Bathrooms and kitchens are winners since boiling water, dishwashing, and showering all boost ambient moisture.
- Let laundry air-dry indoors. It’s not glamorous, but drying wet clothes on a rack nearby provides a slow, steady increase in humidity as the fabric releases water vapor.
Here are a few household items you’ll need to try these:
- Spray bottle with fine mist
- Clean pebbles or gravel
- Shallow tray or dish
- Drying rack for clothes
- Group of small plant pots
💡 Pro Tip: According to the University of Maryland Extension, fans and open windows lower humidity dramatically. If you’re boosting moisture, keep windows closed, and run fans sparingly—especially near your plant corner.
In practice: Picture this scenario: You’ve clustered your pothos and pothos cousins on a shelf, their leaves close enough to almost touch. Below, a shallow dish filled with smooth river stones shimmers with a thin film of water—by sundown, the edges of your fiddle leaf fig start to perk up. The shift isn’t massive, but it’s definitely there.
It’s worth noting, none of these methods will flood your home with rainforest-level humidity, but together they create a healthier, more stable environment—especially crucial during dry winter months or when the heater’s running nonstop.
But what actually works for the long run, and how do you maintain those subtle increases? That’s where natural materials come into play…
Natural Materials That Boost Moisture
Ever wondered if it’s possible to increase humidity for your plants—without fancy gadgets or endless misting sessions? Here’s the truth: the materials you choose for your indoor setup can quietly transform the air around your leafy favorites.
Some items naturally hold and release moisture, creating a buffer zone of humidity just where your plants need it most. Let’s break down which ones actually make a difference:
- Moss (sphagnum or sheet): Serves as a living ‘humidifier’ if placed over soil or tucked into decorative bowls.
- Expanded clay pebbles (LECA): These round balls soak up water and slowly evaporate it, subtly raising local moisture. Just keep a shallow layer at the base of plant trays and refill with water as needed.
- Coconut coir: A fibrous material that holds lots of water—great for mixing into potting soil where it gradually lets moisture off.
- Natural wood chips: Wood mulch or bark can trap extra water after watering, giving off a gentle humidity as it dries.
⚠️ Important Warning: Organic materials like moss or wood chips should be monitored for mold. The American Phytopathological Society warns that over-wetted organic matter, especially in closed terrariums, can encourage fungal growth. If you spot any unpleasant odor or fuzzy spots, remove or replace the material quickly.
Moss vs. Pebbles vs. Coir: What Makes the Difference?
| Material | Humidity Capacity | Best For |
|---|---|---|
| Sphagnum Moss | High (up to 20× weight in water) | Terrariums, tropical plant pot covers |
| Clay Pebbles (LECA) | Moderate (steady evaporative effect) | Pebble trays, hydroponic pots |
| Coconut Coir | Moderate to High (slow release) | Mixing into soil, semi-hydroponics |
Picture this scenario: You cover the top of your peace lily’s pot with a layer of sphagnum moss, lightly misted in the morning. As the day warms, moisture rises from both the moss and pot. Later, you notice the plant looking refreshed—leaf edges smooth, not curled or brown.
Natural materials aren’t just earth-friendly, they blend beautifully with your décor and continuously support stable humidity. What actually works best sometimes depends on your space, so experiment to see which one feels right for your home—or mix a few!
And this is exactly where most people make the most common mistake…
How To Monitor And Maintain Humidity Levels
If you’ve ever tried to “feel” the air around your plants, you know guessing rarely works. So, how do you actually keep tabs on humidity and make sure your plants stay in their comfort zone?
- Get a digital hygrometer. These handy devices show real-time humidity and temperature—no more guessing! Place it right at plant level, not across the room.
- Check readings twice daily. Look in the morning and evening, since humidity can swing as temperatures rise and fall.
- Track your numbers. Jot down daily values in a small notebook, or use a simple spreadsheet. Patterns will emerge over a week or two.
- Adjust your routines. When readings dip, bump up misting, refill pebble trays, or move plants closer together to compensate. If numbers go too high (over 80%), back off to reduce risk of fungus and rot.
- Be mindful of outside factors. Heating and air conditioning will lower humidity quickly. Weather changes can matter, too, so peek outside before you panic about a sudden drop.
Here’s a quick comparison of ways to monitor and control humidity:
| Method | Cost | Accuracy |
|---|---|---|
| Digital Hygrometer | Low to Moderate | High (real-time data) |
| Manual Observation | Free | Low (subjective – leaf feel, browning) |
| Wireless Sensor Systems | High | Very High (app-based, tracks trends) |
💡 Pro Tip: According to the National Gardening Association, humidity levels below 40% can slow plant growth dramatically, but levels above 80% boost mold and pests. Aim for your specific plant range, even if it means adjusting room-by-room.
In practice: Imagine you check your digital hygrometer and see humidity at 36%—way too low for the prayer plant by your window. You add some water to your pebble tray, mist gently, and by evening, readings hit 55%. Your plant perks up. A restless night is avoided, and you avoid overwatering by relying on the numbers, not just your gut.
And this is exactly where most people make the most common mistake…
Common Mistakes And How To Avoid Them
How many times have you tried to fix a humidity problem, only to see your plants looking just as droopy days later? The truth is: even well-intentioned owners fall into common traps—often without realizing.
- Over-misting the leaves: Giving your plants a heavy mist every few hours? It seems helpful, but this can cause water to sit on foliage, inviting fungus or rot—especially in the evening.
- Poor air circulation: Too much humidity in a stagnant environment fuels mold outbreaks. Always balance humidity boosts with a bit of gentle airflow, like a fan set to low in another part of the room.
- Forgetting to monitor humidity changes: Heating or cooling your home can drop levels overnight. Relying on the “feel” of the air instead of a real hygrometer is a recipe for confusion—and sad, stressed plants.
- Using hard tap water in humidifiers or trays: This can leave mineral stains and damage sensitive roots. Filtered or distilled water is the safer choice, according to The American Horticultural Society.
- Letting organic materials get soggy: Materials like moss and wood chips boost moisture, but overwatering creates a breeding ground for pests.
Mistake vs Solution—A Quick Reference
| Mistake | Risk | How To Fix |
|---|---|---|
| Over-misting | Fungal/disease outbreaks | Mist lightly in early hours only |
| No humidity checks | Random, unhealthy swings | Use a digital hygrometer, track numbers |
| Hard tap water | Mineral build-up, leaf burn | Switch to distilled or filtered water |
💡 Pro Tip: Don’t crowd plants directly against each other or windows. According to The Spruce, this reduces air flow and makes it easier for mold, mildew, or insects to spread.
In practice: Picture this scenario: You lovingly group your plants, mist daily, add a moss layer—and overnight wake to fuzzy white patches. On investigation, you realize the window stayed shut and the room was stifling. With a quick window crack or by spreading your pots out, things bounce back fast—leaves clear, humidity more stable, and your plant friends smiling again.
Small steps, repeated consistently, make the biggest difference over time.
Your Plants Will Thank You
If you take just one thing from this guide, let it be: meeting your plants’ humidity needs naturally is simpler than you think, and it’s worth every effort. Understand their unique needs, use natural materials and home methods, and keep a close eye on humidity levels. That’s how to increase humidity naturally in a way that really lasts.
Before, your plants may have struggled with dry, brown leaf tips or seemed stuck no matter what you tried. Now, you know the signs to watch for, the tools to track changes, and the easy steps that keep those greens lush and lively. It doesn’t have to be complicated. With just a few changes, you’ll see brighter, happier plants—and feel far more in control.
What’s the first humidity-boosting trick you’re excited to try for your plants? Share your plans or questions in the comments below! 🌿

Ryan James Mitchell is a passionate gardener and plant care enthusiast dedicated to helping everyday people grow food, keep their plants thriving, and connect with nature — one garden at a time. With years of hands-on experience in vegetable gardening, indoor plant care, and seasonal garden planning, Ryan built 3sols to be the practical, honest gardening resource he always wished existed.