Have you ever found yourself staring at your orchid, wondering if those tangled roots and tired-looking leaves mean it’s time for a change? If so, you’re not alone—many plant lovers hesitate, worried they’ll do more harm than good.
Letting an orchid struggle in the same old pot can stunt blooms, cause root rot, or make your plant just plain miserable. I’ve seen people wait too long, watching beautiful flowers fade for good—all because repotting feels intimidating or mysterious.
After reading this blooming guide, you’ll know exactly how to tackle how to repot orchids—with clear steps, real-world advice, and a few insider tricks to give your plants their best shot at thriving. Ready to dive in?
When And Why Orchids Need Repotting
How do you know if your orchid is crying out for a fresh start? It’s not always obvious—especially if it’s still throwing out the occasional bloom. But left too long in the same pot, orchids can become rootbound, suffocate in old mix, or struggle with stunted growth. Timing and reasons matter way more than most plant owners realize.
Here’s the thing: repotting isn’t just about shuffling orchids into bigger containers. It’s a crucial health reset. As potting media breaks down (usually within 1-2 years for bark-based mixes), drainage drops and roots risk rot from excess moisture. The American Orchid Society notes that decaying media also attracts fungi and pests—two silent bloom killers if left unchecked.
💡 Pro Tip: If you notice white fuzzy mold or a sour smell when watering, it’s a flashing neon sign your orchid’s potting mix is overdue for replacement—don’t wait for visible root rot.
- Visual signs to watch for: roots spilling over the pot’s edge, faded or wrinkled leaves, growth slowing even during the active season, or flower spikes that don’t develop fully.
- Common triggers for repotting: recently purchased orchids (they’re often in shipping media), annual media expiration, overgrown roots, disease recovery, and after blooming cycles.
When Is The Best Time To Repot Orchids?
| Orchid Type | Ideal Repotting Time | Why Timing Matters |
|---|---|---|
| Phalaenopsis | After flowering (early spring) | Stress recovery and new root growth start here |
| Cattleya | New roots just emerging | Minimizes transplant shock and speeds adaptation |
| Dendrobium | Post-bloom or when roots crowd the pot | Avoids disturbing existing flower spikes |
Picture this scenario: You’ve bought a gorgeous grocery-store orchid in full bloom. It looks perfect—for now. Six months later, it starts losing leaves. That’s when you flip the pot and find a mushy, compacted core that’s choking the roots. Turns out, early repotting could have kept those blooms coming.
And this is exactly where most people make the most common mistake…
Choosing The Right Pot And Mix For Orchids
You may wonder—does the pot and mix you use for your orchid really matter that much? The answer is a resounding yes. The right combo doesn’t just keep your plant upright. It’s absolutely essential for roots to breathe, drain, and grip strong. Here’s the truth: orchids can’t thrive in standard houseplant soil or a pot without great drainage.
Pot and Mix Options for Orchids
| Pot Type | Benefits | Best For |
|---|---|---|
| Clear Plastic | Easy root monitoring, many drainage holes | Phalaenopsis, new growers |
| Terracotta | Porous, dries faster, stable weight | Dendrobium, Cattleya, humid rooms |
| Ceramic (with holes) | Decorative, good airflow if designed with slots | Potted displays, home décor |
- Orchid bark mix: Blends of pine bark, charcoal, and perlite are the gold standard for most orchids, providing chunky structure and great airflow.
- Sphagnum moss: Retains moisture more than bark, great for young or sickly orchids, but needs careful watering to avoid root rot.
- Specialty blends: A few brands such as Better-Gro Orchid Mix and Miracle-Gro Orchid Potting Mix have been tested and recommended by the American Orchid Society. They’re widely available at garden centers.
💡 Pro Tip: Never use traditional potting soil, as it’ll suffocate orchid roots and increase deadly rot risk.
In practice: imagine your window ledge lined with orchids in cheap supermarket pots. Each time you water, the roots stay soggy for days—and leaves start wrinkling. After switching to bark mix in proper vented pots, you’ll notice plumper leaves, stronger roots, and more reliable blooms.
What actually works might surprise you…
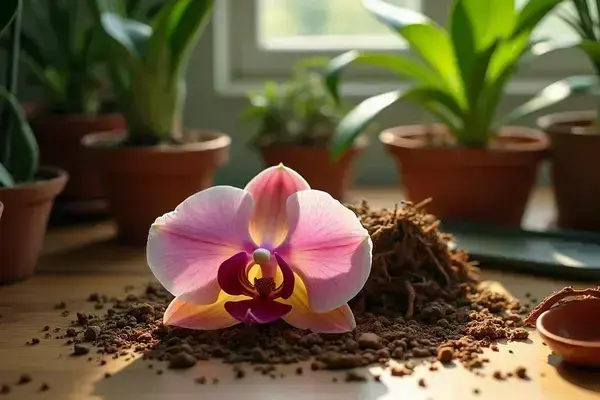
Step-By-Step Guide To Repotting An Orchid
Ever wondered why some orchids bounce back from repotting with fresh leaves and roots—while others sulk or drop blooms? Repotting can be nerve-wracking, but you’ll be fine once you know the right moves. The steps matter even more than the materials.
- Clean scissors or pruners
- Fresh orchid bark or sphagnum moss
- New pot with drainage holes
- Water for rinsing roots
- Sterile gloves (optional, for messy mixes)
How To Repot An Orchid—Step By Step
- Water the orchid a day before — this softens the roots for easier removal.
- Gently remove the orchid from its old pot, tipping sideways if roots cling. Go slow—you don’t want to snap a healthy root.
- Shake off old potting mix and rinse roots with lukewarm water. Look for mushy, black, or hollow roots to trim.
- Trim dead or rotting roots with sterile scissors. Only snip what’s clearly unhealthy—the rest are vital for plant stability.
- Set the orchid in its new pot, spreading the roots over a mound of bark or moss. Pour new mix around the roots, gently filling gaps but never crushing anything.
- Water lightly so the media settles, then place the orchid in bright indirect light. Skip fertilizer for the first two weeks—you want roots, not blooms, to grow.
⚠️ Important Warning: Don’t pull tangled roots apart by force. Damaging too many healthy roots can slow recovery or set bloom cycles back by months, warns the American Orchid Society.
In practice: picture this scenario—you open a new bag of specialty orchid bark and take your time teasing the roots apart. Instead of breaking anything, you find a single rotten root (snip it), settle the plant in a clean pot, and by the following month, bright green root tips are reaching out. That’s the magic of doing it right.
But there’s one detail most owners completely overlook until it’s too late…
Common Mistakes To Avoid During Repotting
Ever felt uneasy right after repotting your orchid—like maybe you did something wrong? The truth is, even seasoned growers slip up sometimes. Most mistakes are easy to fix if you spot them quickly, but some can set your blooming cycle back for months. Let’s get straight to the practical “don’ts.”
- Reusing old or decomposed media: It’s tempting to save money, but old media harbors fungus and bacteria. Fresh, sterile bark or moss makes a huge difference.
- Overtrimming healthy roots: Pruning too aggressively—removing anything that’s not perfectly green—weakens the plant and slows recovery.
- Forcing roots into a too-small pot: This crushes fresh root tips and inhibits air flow, inviting rot. Orchids need room to breathe, not to be wedged tight.
- Burying the crown: If the growth center sits below the media, water collects and rot sets in. Always keep the crown level with or just above the mix.
💡 Pro Tip: When in doubt, go bigger—with pots and chunks of bark. The American Orchid Society recommends erring on the side of chunky, fast-draining media for almost all common orchid types.
Most Common Repotting Pitfalls
| Mistake | Effect | How To Avoid |
|---|---|---|
| Poor drainage | Root rot, stunted growth | Use only pots with multiple drainage holes |
| Wrong timing | Loss of blooms, slow recovery | Repot just after flowering, not during bloom |
| No sterilization | Disease spreads to healthy roots | Clean all tools before use |
In practice: picture this scenario—you rush and pack the pot too tight, or trim every root that looks less than perfect. A month later, new growth falters, and the leaves droop. But after adjusting—using fresher mix, a roomier pot, letting good roots be—the next repotting is a total turnaround.
And this is exactly where most people make the most common mistake…
Caring For Your Orchid After Repotting
What really determines whether your orchid bounces back or sulks after repotting? It’s all about the right care in the first few weeks. Repotting shakes things up, and your plant needs extra support as it settles into its new home.
- Hold off heavy watering: After repotting, wait 5–7 days before watering thoroughly. The transition period helps small root injuries seal and reduces infection risk.
- Skip fertilizer—at first: No feeding for two weeks. Fresh roots are sensitive, and fertilizer burn is a common post-repot blunder.
- Choose indirect light: Place your orchid somewhere bright but out of harsh sunlight. Filtered east-facing windows work best as the roots reacclimate.
- Humidity counts: If you can, keep levels between 40–60%. A basic humidity tray (shallow tray, pebbles, and water) helps—just make sure the orchid’s pot sits above the water, not in it.
- Eyes on the leaves and roots: Droopy leaves or wrinkling is normal for a week or so. Green root tips? That’s your signal things are going well.
💡 Pro Tip: According to the Royal Horticultural Society, gentle air circulation speeds up recovery and prevents mold on fresh potting media—aim for open windows or a small fan nearby.
In practice: picture this scenario—after repotting, you shift your orchid onto a bathroom shelf with diffuse light and higher humidity. You resist the urge to water on day two, and by week’s end, subtle green root nubs peek out, showing the plant’s getting comfortable in its new digs.
Once this is in place, the rest of the routine falls into place naturally.
Your Orchid’s Best Days Ahead
If you take just one thing from this guide, let it be: healthy roots and the right care after repotting make all the difference for long-lasting blooms. From knowing when and why to repot, to picking the perfect potting mix, to giving your plant patient aftercare, every step matters in how to repot orchids.
Before today, repotting might have seemed like a stressful guessing game—messy, risky, and easy to get wrong. Now, you know the warning signs, have a step-by-step plan, and understand what your orchid really needs to bounce back stronger. You’re ready to help your plant thrive instead of just survive.
Which part of your next orchid repotting feels the most exciting—or maybe the most intimidating? Share your thoughts and questions in the comments so we can help cheer you (and your orchid) on!

Ryan James Mitchell is a passionate gardener and plant care enthusiast dedicated to helping everyday people grow food, keep their plants thriving, and connect with nature — one garden at a time. With years of hands-on experience in vegetable gardening, indoor plant care, and seasonal garden planning, Ryan built 3sols to be the practical, honest gardening resource he always wished existed.