You know that moment you spot a plant at a friend’s place and wish you could just take a piece home? Turns out—you can. Propagation isn’t just for expert gardeners with mysterious green thumbs; it’s for anyone who’s ever wanted more plants without spending a dime.
The frustration hits when those pricey nursery visits add up, especially after just a few plants. Or maybe you’ve tried snipping a leaf or stem, only to watch it wilt—and you’re left wondering what went wrong. Frankly, it’s disheartening and makes it all feel out of reach.
But here’s the thing: by the time you finish this how to propagate plants beginners guide, you’ll know exactly how to grow healthy new plants from your favorites—without guesswork or wasted effort. Ready to get your hands (a little) dirty?
Understanding Plant Propagation Methods
Ever wondered why some folks seem to multiply their houseplants with ease, while yours just don’t “take?” Understanding plant propagation methods is the key—no secret green thumb required. This foundation determines how successful your new cuttings, offshoots, or divisions will be, and whether you turn one plant into a dozen over time.
There are several main types of propagation, each suited to different plant species and scenarios. Knowing these methods empowers you to choose the best approach for your particular plant, and to diagnose why something might be failing if your last attempt wilted. According to the Royal Horticultural Society, mastering these can dramatically increase your gardening success rates—regardless of experience level.
💡 Pro Tip: Always check if your target plant is best propagated by seed, leaf, stem, or division. This single step saves weeks of frustration and wasted time.
- Seed Propagation: Start new plants from seeds—ideal for annuals, veggies, and flowers. It’s slow, but opens the door to genetic variety and is often used for species that can’t be easily cloned.
- Cuttings: Take a section from a healthy plant (stem, leaf, or root), encourage it to develop roots, and you’ve got a living copy. Perfect for herbs, succulents, many houseplants, and even shrubs.
- Division: Split an existing plant at the root level—works especially well with perennials like hostas or ferns that grow in clumps. Instant new plants with minimal waiting.
- Layering: Bend a stem down so it touches soil, pin it, and let it root while still attached to the mother. Once roots develop, you cut and replant. Easier than it sounds, and great for vines or climbers.
- Grafting & Budding: A bit advanced, but it combines tissue from two different plants so they grow as one. Used commercially for fruit trees and roses, rarely for beginners.
Comparison of Main Propagation Methods
| Method | Best For | Difficulty |
|---|---|---|
| Seed | Annuals, Vegetables, Wildflowers | Easy (patience needed) |
| Cuttings | Herbs, Shrubs, Houseplants | Moderate |
| Division | Clumping Perennials, Ferns | Easy |
| Layering | Vines, Climbers | Easy |
| Grafting/Budding | Fruit Trees, Roses | Advanced |
Picture this scenario: your friend hands you a mint cutting—snipped right from her windowsill. You root it in water, following her casual advice, and a week later tiny roots appear. That’s stem cutting propagation at work, and it just saved you a trip to the nursery (not to mention a chunk of change).
The American Society for Horticultural Science encourages beginners to try different methods, experimenting with easy plants like pothos, spider plants, and philodendron to build experience. Not every technique will suit every plant, but the sense of accomplishment when you get it right? Pretty unbeatable.
But there’s one detail most new gardeners completely overlook until it’s too late…
Choosing The Right Plants For Beginners
Ever stare at shelves packed with gorgeous plants and wonder which ones won’t let you down? Choosing the right plants for propagation as a beginner isn’t just about what looks pretty—it’s about what’ll actually thrive under your care, multiply quickly, and boost your confidence from day one.
The truth is, some species make new roots effortlessly, while others leave even seasoned gardeners scratching their heads. The key is to select plants with simple needs, fast results, and the ability to recover from the inevitable beginner stumbles. According to guidance from the American Horticultural Society, starting with “forgiving” varieties gives you real, satisfying progress right out of the gate.
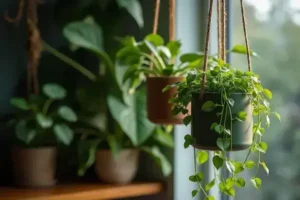
- Pothos (Epipremnum aureum): Nearly impossible to kill, roots in water or soil, and tolerates low light. A favorite for classrooms and offices for good reason.
- Spider Plant (Chlorophytum comosum): Sends out baby offshoots called “pups” that pop off and root in days—makes you feel like a propagation pro with minimal effort.
- Snake Plant (Sansevieria): Virtually bombproof, grows from leaf cuttings or division, thrives even with some neglect. Great air purifier, too!
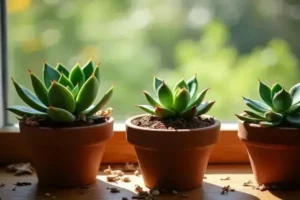
- Succulents (like Jade or Echeveria): Snip a leaf or stem, let it dry, and watch roots form—great for sunny windowsills, but don’t overwater.
| Plant Name | Best Propagation Method | Beginner Friendly? |
|---|---|---|
| Pothos | Stem Cuttings in Water | Yes |
| Spider Plant | Plantlet Division | Yes |
| Snake Plant | Leaf Cuttings/Division | Yes |
| Rose | Stem Cuttings (Advanced) | No |
| Orchid | Division/Air Layering | No |
💡 Pro Tip: When in doubt, ask at your local extension service or garden center for “beginner-friendly” propagation plants—they’ll often point you to pothos, spider plant, or succulents.
Picture this scenario: you’ve just brought home a leggy Pothos. A month later, the single vine fills two windows because each section you snipped and stuck in water turned into its own rooting, thriving baby plant. That sense of progress is powerful—and sets you up to branch out (literally) into more challenging species later.
The Royal Horticultural Society lists beginner-friendly plants and encourages gardeners to track their early wins. Start with easy victories, then grow your collection (and your skillset) at your own pace. But what actually works for beginner propagators might surprise you…
Step-By-Step Guide To Propagating Plants At Home
Worried you’ll mess up your first propagation attempt? Don’t be. Almost anyone can master plant propagation at home—if you follow a proven, beginner-friendly process and trust a little hands-on experimentation. Here’s everything you need to get started, without feeling overwhelmed by jargon or perfection.
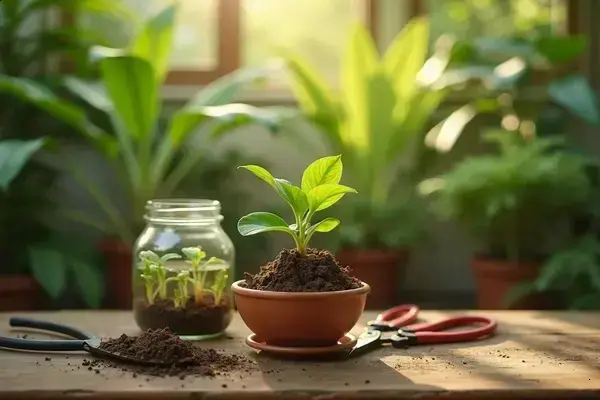
- Sharp sanitized scissors or pruning shears
- Clear glass jars or propagation vases
- Quality potting soil for transplants
- Rooting hormone (optional, but helpful)
- Clean water
- Healthy mother plant
- Select Your Plant: Pick a healthy, disease-free mother plant. For best results, use beginner favorites like pothos, spider plants, or jade (all approved by the National Gardening Association for ease of propagation).
- Take a Cutting: With sanitized scissors, snip a stem 4–6 inches long, making sure it has at least one leaf node (that’s the little bump where roots will emerge).
- Prep Your Cutting: Remove leaves from the bottom third of the cutting. This prevents leaf rot and helps focus the plant’s energy on root development.
- Encourage Root Growth: Dip the cut end in rooting hormone for faster results (skip if unavailable). Place the cutting in water so only the node is submerged, or plant directly into moist soil.
- Wait and Watch: Set the container in bright, indirect light. Change water every few days if rooting in water. After 2–4 weeks, roots typically appear—longer in cooler or darker rooms.
- Pot Up: When roots are at least 1–2 inches long, transplant to a small pot with fresh potting soil. Water gently and keep humidity high for the first week or two.
💡 Pro Tip: Always label your cuttings, especially if you’re propagating several varieties. It’s shockingly easy to mix them up, even for pros!
In practice: imagine you’re working with pothos. You take three cuttings, place two in water and one in soil, then keep them on the kitchen windowsill. Water roots appear within ten days. It’s the kind of visible progress—confirmed by roots actually forming—that keeps even hesitant gardeners motivated.
Estimated Propagation Timeline
| Step | Time Needed | What to Watch For |
|---|---|---|
| Cutting Prep | 10 minutes | Nodes and fresh wound visible |
| Rooting Stage | 1–4 weeks | White roots emerging |
| Transition to Soil | 5 minutes | Roots 1–2 inches long |
| First Potting | 2 weeks post rooting | New leaf growth |
And this is exactly where most people make the most common mistake…
Common Mistakes And How To Avoid Them
Ever spend weeks coaxing a cutting to root—then watch it wither anyway? That frustration is all too familiar, even for seasoned plant lovers. The good news is, most common mistakes in plant propagation are surprisingly easy to fix when you know what to look for.
- Overwatering: New cuttings hate soggy roots. Too much water leads to rot before roots can establish. Stick to lightly moist (never soaked) conditions and refresh water every few days for water propagations.
- Lack of Patience: Rooting can take several weeks. Impatience leads to disturbing cuttings too often, which breaks developing roots before they’re ready.
- Wrong Light Levels: Direct sunlight can scorch delicate starts, while too little light will stunt growth. Place propagating vessels in bright, indirect sunlight for safest results.
- Dirty Tools: Using unsanitized scissors or hands introduces fungi and bacteria. Always wipe cutting tools with alcohol before use, recommended by the American Horticultural Society.
- Skipping Labeling: Forgetting to mark cuttings leads to confusion—especially if you’re working with multiple types at once.
⚠️ Important Warning: Using tap water with high chlorine or fluoride can harm sensitive cuttings. Opt for filtered, distilled, or rainwater when possible.
Quick Mistake & Solution Table
| Mistake | What Happens | How to Avoid |
|---|---|---|
| Overwatering | Root rot, mold | Lightly moist, not soggy |
| Too Little Light | No root growth | Bright, indirect sun |
| Dirty Scissors | Bacterial infection | Sanitize before each cut |
In practice: picture this scenario—your snake plant cutting sits in a jar and turns mushy after a week. After switching to filtered water, and cleaning your tools next time, your next batch stays firm and healthy all the way to potting up.
The Royal Horticultural Society regularly stresses that cleaning tools and using the right light can prevent 90% of beginner disasters. It’s a small investment of effort for a huge return.
And this is exactly where most people make the most common mistake…
Tools And Materials You’ll Actually Need
Confused by the endless gadgets and glossy kits promising miracle results? The truth is, successful plant propagation relies far more on a few essential tools and quality materials than on expensive accessories crowding your cart. Let’s clear the clutter so you’ll only work with what actually leads to healthy, thriving new plants.
- Sharp, sanitized scissors or pruning shears: Crisp, clean cuts prevent plant tissue damage and infection. Always sterilize blades between plants—rubbing alcohol works great.
- Glass jars or propagation vases: Clear sides let you monitor root growth and catch problems early. Recycled food jars are just as effective as specialty glassware sold at garden centers.
- Potting soil (soilless mix): A mix labeled as sterile and well-draining is best for transplanting rooted cuttings. Avoid heavy native soils, which can smother roots.
- Labeling sticks or plant markers: Don’t trust memory—label each cutting to avoid confusion, especially if you’re working with multiple varieties.
- Rooting hormone (optional): This commercial powder or gel speeds up root formation for some fussier plants. Not essential for easy species, but can double your success rate for hardwoods.
💡 Pro Tip: Cheap plastic humidity domes, like those that come with takeout, make perfect mini-greenhouses to help delicate cuttings beat dry indoor air. The American Horticultural Society recommends using them to maintain steady moisture where humidity drops below 50%.
Essential Tools & Materials: Quick Reference
| Item | Purpose | Beginner Friendly? |
|---|---|---|
| Sanitized Shears | Cut stems/roots cleanly | Yes |
| Glass Jars | Monitor rooting progress | Yes |
| Soilless Mix | Transplant healthy roots | Yes |
| Rooting Hormone | Boosts difficult cuttings | Optional |
| Humidity Dome | Maintains moisture | Optional |
In practice: picture this scenario—Sarah uses a thrift-store glass, regular scissors she keeps spotless with alcohol, and a starter tray repurposed from old takeout. She tracks what’s what with popsicle sticks. Her cuttings thrive just as well as those grown with pricier gear.
Most official gardening guides, including the Royal Horticultural Society, stress that you don’t need a big budget to succeed as a beginner propagator. Small steps, repeated consistently, make the biggest difference over time.
Your Garden’s New Beginning Starts Here
If you take just one thing from this how to propagate plants beginners guide, let it be this: anyone can create new, healthy plants with the right method, the right materials, and a little patience. Knowing which species to start with and how to avoid rookie mistakes makes a huge difference.
Not long ago, starting a new plant from a single cutting felt like a mystery. Now, you know how to pick forgiving varieties, set up the perfect conditions, and spot trouble before it starts. You’re about to see your space fill with fresh green life, grown by your own hands. You’ve absolutely got this.
Which plant are you excited to propagate first—or do you have one you’ve already tried? Share your story in the comments so we can all cheer you on!

Ryan James Mitchell is a passionate gardener and plant care enthusiast dedicated to helping everyday people grow food, keep their plants thriving, and connect with nature — one garden at a time. With years of hands-on experience in vegetable gardening, indoor plant care, and seasonal garden planning, Ryan built 3sols to be the practical, honest gardening resource he always wished existed.