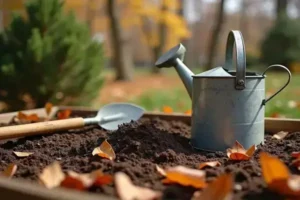
Picture this: you’re staring at a patch of earth, seeds in hand, totally unsure where to start. You want a thriving garden, not a weedy mess—or worse, a big pile of nothing.
Trying to figure out your garden’s layout on the fly leads to wasted seeds, crowded roots, and a lot of frustration. I’ve seen so many would-be gardeners give up because their efforts looked nothing like those neat, lush grids online. It’s discouraging, isn’t it, when chaos grows instead of tomatoes?
By the end of this guide, you’ll know exactly how to plan garden layout using square foot gardening—down to where each carrot goes. Ready to swap confusion for real results? Let’s dig in.
Understanding The Basics Of Square Foot Gardening
Why does square foot gardening pop up in so many gardening forums and guides? It’s not just trendy hype. The method breaks big projects into bite-sized wins—literally one small square at a time. With precise boundaries, you can grow much more in less space and keep weeds under control (yes, really).
At its core, square foot gardening divides your garden bed into equal 1×1 foot blocks, sectioned with wooden slats, twine, or even string. Each square has a unique purpose. Some are packed with carrots, others with bush beans, and a few give lettuce or basil a little elbow room. This isn’t just neat—it’s a high-yield system proven by experts at the National Gardening Association.
💡 Pro Tip: Always use the classic ‘Mel’s Mix’ blend: one-third peat moss, one-third vermiculite, and one-third blended compost. According to Square Foot Gardening Foundation, this custom soil keeps water and nutrients balanced for every type of crop in your grid.
Picture this scenario: you’ve only got a patch of backyard or a sunny patio. You mark out a 4×4 foot raised bed with grid lines. Suddenly you have 16 perfectly organized squares—enough for hundreds of radishes, eight heads of lettuce, a mini forest of basil. It’s empowering to know exactly where every seedling belongs—and to skip the messy guesswork most traditional gardens face.
- Organization: Keeps crops separated for easy rotation—no confusion between varieties.
- Efficient Use of Space: Grows more food per foot, perfect for small urban yards or balconies.
- Low Maintenance: Blocks out weeds naturally and reduces wasted water.
- Adaptable: Works in raised beds, wooden frames, or even deep planters.
This system also minimizes waste. You plant just what you need—saving seeds, water, and energy compared with spreading everything in long, haphazard rows.
| Traditional Rows | Square Foot Gardening |
|---|---|
| Lots of unused space | Every inch optimized |
| Harder weed control | Weeds easy to spot & pull |
| Complicated crop rotation | Simple, one-square changes |
But there’s one detail most owners completely overlook until it’s too late…
How To Choose The Best Location For Your Garden Bed
What’s the secret behind thriving square foot gardens? It starts with location—all the sunlight, drainage, and convenience in one perfect spot. Many beginners underestimate how these factors actually make or break your first season. The truth is: where you place your garden bed impacts how much you’ll harvest and how easy maintenance will be all year.
Here’s how to weigh your options and make a choice you won’t regret mid-season:
- Light: Aim for a minimum of six hours of direct sun per day (eight is even better for heavy feeders like tomatoes). Shade can work for leafy greens, but fruiting veggies demand more light. Don’t guess—observe sun patterns at different times before deciding.
- Drainage: Your bed should be on ground that doesn’t turn swampy after rain. Soggy soil spells root rot and disappointment. Slight slopes are fine as long as water runs away from—not into—your boxes.
- Accessibility: Choose a site close to your main entrance or kitchen. Easy access means you’ll water, weed, and harvest more regularly. Out-of-sight gardens often get ignored.
💡 Pro Tip: Place your bed near a rainwater barrel or hose connection. According to the University of California’s Agriculture & Natural Resources division, proximity to irrigation saves countless hours and prevents drought stress in raised beds.
Picture this scenario: Marissa built her first garden at the far edge of her yard, thinking it needed to be “out of the way.” By midsummer, weeds took over—she just didn’t go check it daily. Her second try? She tucked a new bed just steps from the kitchen door. This time, harvests came almost every morning because it was easy to step out and snip fresh greens.
| Key Criteria | Ideal Choice | Common Pitfall |
|---|---|---|
| Sun Exposure | 6-8 hours direct | Partial shade all day |
| Drainage | Gently sloped or raised | Low spot, soggy after rain |
| Access | Near home or water source | Far back corner, hard to reach |
Don’t forget—soil quality can be adjusted in a raised bed, but nothing beats a location you’ll enjoy visiting daily. And this is exactly where most people make the most common mistake…
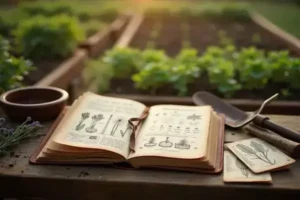
Step-By-Step Guide To Planning Your Grid
Feeling stuck on where to even begin building your square foot garden grid? It all comes down to a stepwise plan—so you don’t waste energy, money, or space. Here’s the thing: the grid isn’t just for looks; it ensures every veggie gets its fair share of room, water, and nutrients. Ready for a how-to you can follow and revisit confidently as you plan?
- Untreated wooden boards or durable plastic slats (for the grid)
- Measuring tape
- String, twine, or wire (as an alternative)
- Garden stakes
- Sharp garden scissors
- Hammer
- Permanent marker
- Raised bed frame (pre-assembled or ready to construct)
- Level and sturdy soil (such as ‘Mel’s Mix’)
- Measure Your Frame. Most square foot gardens use 4×4 foot frames for a balanced grid, but 3×6 or 2×8 beds can work too. Make sure your frame fits your available space and is at least 6 inches deep for healthy root development.
- Mark 1-Foot Intervals. Use a marker and tape measure to draw small marks every 12 inches along each outer edge of your bed frame.
- Lay Out Your Grid. Attach wooden slats or string across the frame, lining up each with the marks. Repeat perpendicular to form perfect one-foot squares. Secure with garden stakes or nails at intersections.
- Double-Check for Level. Press lightly on the slats and run your level across the grid. This helps water reach all squares evenly and prevents low spots from pooling.
- Add Soil and Amendments. Fill the bed with well-blended soil—ideally ‘Mel’s Mix.’ Give it a gentle soak and rake smooth before planting.
💡 Pro Tip: According to the Square Foot Gardening Foundation, using contrasting colored string or painted wood for your grid makes it easier to visually track plant spacing and maintenance throughout the season.
In practice: imagine Anna, whose homebuilt cedar grid snapped after a big storm. She swapped in UV-resistant nylon cord—easy, cheap, incredibly durable. Her squares stayed perfect through heavy rain, and cleanup next year was a breeze.
What actually works might surprise you…
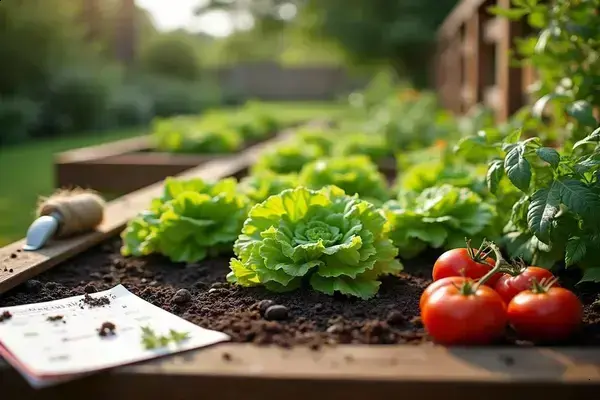
Picking The Right Plants For Each Square
How do you decide what belongs in each square? This is where square foot gardening really shines—you’re forced to get intentional, and that’s the fun (and sometimes baffling) part. The whole point is to give every veggie or herb the exact space it needs—no more, no less—so you get the best possible harvest from every inch.
Let’s break down a few favorites so you can picture your grid:
| Plant | Plants/Sq. Ft. | Spacing |
|---|---|---|
| Tomato | 1 | Center of square, trellised |
| Carrot | 16 | 3 inches apart, 4×4 grid |
| Basil | 4 | Evenly spaced in square |
| Lettuce | 4 | Each corner of square |
| Bush Beans | 9 | 3×3 grid |
What’s the trick? Instead of rows, match each plant’s mature size to its square—small, quick crops like radishes or scallions need little elbow room, while hefty broccoli or pepper plants require their own full square.
- Fast finishers: Radish, spinach, and arugula fill gaps for an early season harvest—then you can replace them with summer crops like peppers or bush beans.
- Heavy feeders: Tomatoes, cucumbers, and squash benefit from premium compost and access to sunlight on the edge or corner squares.
- Companions: Mix flowers like marigold for natural pest control and visual pop (the National Gardening Association often highlights these combos as space and yield boosters).
💡 Pro Tip: According to the University of Minnesota Extension, rotating plant families (leaf, root, fruit, legume) between squares each season reduces disease and boosts soil health.
In practice: Anthony filled his south-facing squares with dwarf marigolds, basil, and bush beans. Not only did it look vibrant, but pest pressure dropped off dramatically and his salad bowl was never empty. But there’s one detail most owners completely overlook until it’s too late…
Smart Maintenance Tips For A Thriving Garden
So you’ve got your squares planted and organized—now what? Here’s the truth: smart maintenance is the only difference between a grid bursting with vegetables and an overgrown disappointment. You don’t need fancy gadgets or endless hours; you just need the right habits in place from the start.
- Consistent Watering: Check soil moisture in each square every other day. Use drip irrigation, soaker hoses, or a simple watering can for pinpoint accuracy.
- Mulching: Add a two-inch layer of straw, shredded leaves, or compost to hold moisture and block out weeds. Mulch keeps soil temperature steady and cuts watering time in half.
- Quick Weeding: Pull weeds while they’re small—usually once a week is all you need with a square foot layout.
- Regular Harvesting: Snip leaves and pick veggies as soon as they’re ready. This encourages more growth and prevents disease from overripe produce sitting in the sun.
- Monitor Pests: Check both sides of leaves for bugs or eggs. Natural solutions (like neem oil or hand-picking) handle most problems fast, according to the University of California Agriculture & Natural Resources.
⚠️ Important Warning: Always double-check your plant spacing after young crops fill in. Crowding can quickly undo your careful grid and increase pest issues. If you’re ever unsure about a plant’s health or a possible infestation, consulting a local extension agent or horticulturist is worth it—especially if food safety is a concern.
In practice: imagine Lisa, who spent ten minutes each morning scanning her squares for weeds and bug signs. Her greens stayed lush and her tomatoes were blemish-free all summer, while her neighbor’s untended bed became a tangle of stems and half-eaten carrots by July.
Once this is in place, the rest of the routine falls into place naturally.
Your Garden Grid Is Ready
If you take just one thing from this guide, let it be: planning your garden layout with intention—light, spacing, and grid—makes every square count. From picking the sunniest spot, to laying out the precise grid, to choosing what grows where, it’s all about setup over guesswork. Consistent, simple maintenance does the rest.
Before, starting a garden could feel overwhelming and messy. You might’ve assumed it would take endless space, time, or green thumbs. But now you see how a square foot garden changes everything. Each crop has its own place. You can relax, enjoy the harvest, and really watch your results grow.
What’s the first edible you’ll plant in your own grid—lettuce, tomatoes, or something else entirely? Share your pick in the comments below!

Ryan James Mitchell is a passionate gardener and plant care enthusiast dedicated to helping everyday people grow food, keep their plants thriving, and connect with nature — one garden at a time. With years of hands-on experience in vegetable gardening, indoor plant care, and seasonal garden planning, Ryan built 3sols to be the practical, honest gardening resource he always wished existed.