Picture this: you step outside and, right in your backyard, there’s a little patch of veggies or flowers growing strong in neat, raised beds. You built it yourself—and honestly, it looks like something out of a magazine.
But if you’ve ever stared at a blank patch of grass wondering how people actually pull this off, you’re definitely not alone. Setting up raised beds can feel overwhelming fast—wrong soil, plants that won’t grow, or that classic frustration: weeds everywhere. It’s enough to make anyone question if those Instagram gardens are even real.
By the time you’re done here, you’ll know exactly how to how to start raised bed garden without second-guessing every step. You’ll get practical answers, some pro tips, and clear steps so you can start planting with real confidence. Ready to dig in?
Choosing The Ideal Spot For Your Raised Bed
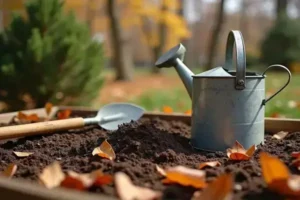
Never underestimate how much the exact location of your raised bed can impact everything—from plant health to how often you’ll need to water. It’s tempting to just plop it anywhere there’s an empty patch, but here’s the truth: a few feet in either direction can make the difference between a thriving garden and a constant struggle with pests or slow growth.
You want your plants to bask in the sun, but not fry all day. Ideally, aim for somewhere that receives at least six hours of direct sunlight. If you’re unsure, spend a Sunday watching where light falls in your yard at different times. Don’t forget—sun exposure changes with the seasons! According to the National Gardening Association, vegetables like tomatoes, peppers, and beans perform best with six to eight hours of sun. Leafy greens and herbs can get by with a bit less, but they still crave morning rays.
- Accessibility matters: Is the spot close enough to a water source? Hauling watering cans loses its charm fast—trust me on that.
- Level ground: Sloped areas cause headaches with soil runoff and uneven moisture. Spend a few extra minutes with a level now to avoid ongoing hassle later.
- Shelter and drainage: Windbreaks (like fences or shrubs) protect delicate seedlings from harsh gusts. And check the soil below—if puddles stick around after rain, look elsewhere.
💡 Pro Tip: Picture this scenario: You set up your dream bed only to realize the neighbor’s tree shades half the plot by midsummer, stunting your peppers. Always track sun and shade patterns through a whole day—snap photos hourly if you need to. It saves loads of frustration down the road.
Comparing Possible Spots Side by Side
| Location | Sun (Hrs/Day) | Water Access |
|---|---|---|
| Next to Patio | 8 | Easy—10 ft from spigot |
| Back Corner | 5 | Difficult—carry by hand |
| Near Fence | 7 | Moderate—hose reaches |
In practice: You might love the idea of hiding your beds out of sight, but gardens that are out of the way often get neglected—plus, easy access encourages more frequent harvests and less guilt when weeding feels like a chore. The Royal Horticultural Society recommends prioritizing convenience for ongoing success.
But there’s one detail most owners completely overlook until it’s too late…
Selecting The Perfect Soil Mix For Lush Growth
If you think any old dirt will do, you’re in for a rude awakening—soil mix is where lush raised beds are made or broken. The ideal blend isn’t topsoil alone, and it’s definitely not what you’ll find in the average bag at a big-box store. Plants in raised beds need loose, nutritious, well-draining material that holds moisture but doesn’t turn into mud or dust.
So, what exactly should you put in your beds? According to the University of California Master Gardener Program, the gold standard for raised bed soil is a mix of one-third compost, one-third peat moss or coconut coir, and one-third vermiculite or coarse sand. Each component plays a critical role—compost feeds, peat (or coir) retains water, and vermiculite creates air pockets roots love.
- Start with compost: Choose organic compost from vegetable scraps, leaves, or from a local supplier—avoid manure that isn’t well-aged, as it can burn roots.
- Add peat moss or coconut coir: Peat is classic, but coir is a more sustainable alternative that’s gaining ground—both keep your beds moist (but never soggy).
- Incorporate vermiculite or coarse sand: These keep the mix airy and prevent compaction, even after spring rains.
- Something extra? A small scoop of worm castings (vermicompost) can boost nutrients naturally, while a dusting of organic fertilizer at the start helps hungry crops thrive all season.
- Mix thoroughly: Shovel everything together directly in the bed, and break up all clumps for a fluffy, even base—precision pays off here!
Picture this scenario: You fill your first bed with bargain topsoil. By midsummer, veggies look stunted and dry out quickly—the water runs right through. After swapping to a proper blend, plants perk up, lettuce is crisp, and tomatoes fill out beautifully. Real gardeners see the difference in days, not months.
💡 Pro Tip: Test soil pH before filling your bed. Most veggies and flowers thrive best in slightly acidic to neutral soil (pH 6.0–7.0). Home soil test kits are cheap insurance against mystery plant problems.
| Ingredient | Primary Benefit | Potential Drawback |
|---|---|---|
| Compost | Rich nutrients, improves texture | Quality varies by batch |
| Peat Moss/Coconut Coir | Holds moisture, reduces compaction | Peat isn’t renewable; coir can be pricey |
| Vermiculite/Coarse Sand | Boosts aeration and drainage | Too much = very fast drying |
And this is exactly where most people make the most common mistake…
Building And Setting Up Your Raised Bed—Step By Step
Wondering how to craft a raised bed that’s both sturdy and functional? Building your own can be surprisingly straightforward, even if you’re not a carpenter—plus, you can tailor it to your space, your crops, and your budget. Before you grab your tools, let’s break down what you actually need and each step to get it right the first time.
- Untreated lumber (cedar, redwood, or pine are best)
- Galvanized deck screws or corner brackets
- Measuring tape, saw, cordless drill
- Staple gun
- Landscape fabric or cardboard (for weed barrier)
- Level
- Compost-rich soil mix (as outlined earlier)
- Measure and choose your size: Standard beds are 4×8 feet, but even a 3×6 ft or square fit small spaces—aim for no wider than 4 feet so you can reach the center.
- Cut your boards: Use untreated wood to prevent harmful chemicals. Cedar lasts longest; pine is less expensive but may only last several seasons.
- Assemble the frame: Secure corners with galvanized screws or brackets—double-check it’s square by measuring diagonals.
- Level your ground: Clear grass, rocks, and debris. If your soil is uneven, rake and tamp it down so the frame sits flat, helping water drain correctly and soil stay put.
- Add a weed barrier: Lay landscape fabric or cardboard inside the frame before soil. This blocks weeds but lets water drain—just trim it to fit.
- Fill with soil mix: Layer in your fresh soil, breaking up clumps and raking it level. Don’t skimp—fill nearly to the top, allowing a little space so water won’t flow over.
- Optional extras: Staple mesh on the underside to keep out burrowing critters, or add hoops at the corners if you want to install row covers later.
💡 Pro Tip: Picture this scenario: You rush to build and forget to check if the bed is level. Water pools in one corner, roots suffocate, and your harvest suffers—a five-minute level check means months of less frustration. The Oregon State University Extension Service strongly recommends this step for long-term success.
Give yourself about 2-3 hours for a standard build—faster if you’ve got a helper. Materials are available from local hardware stores or garden centers, and most major cities offer untreated boards as a safer route for food crops.
What actually works might surprise you…
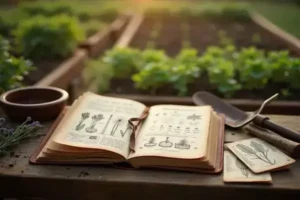
What To Plant First For Maximum Success
Choosing your first crops shouldn’t feel like a gamble—you want beginner wins, not frustration. But the truth is, not every vegetable or herb will thrive right out of the gate. The secret? Picking resilient, fast-growing varieties that match your season and climate. That way, you see real results fast (and get hooked on the process).
The National Gardening Association recommends starting with proven winners for raised beds: leafy greens (like spinach, lettuce, and kale), quick-root veggies (radishes, carrots, beets), bush beans, and beginner-friendly herbs such as basil and parsley. These crops germinate reliably, don’t need fussing, and reward you with visible progress in just weeks.
Best First Crops at a Glance
| Crop | Days to Harvest | Why It’s Reliable |
|---|---|---|
| Radish | 24–30 | Germinates fast, easy to spot growth |
| Lettuce | 30–50 | Cut-and-come-again; grows fast and steady |
| Bush Beans | 50–60 | No support structure needed, high yield |
| Basil | 60–70 | Prolific with basic warmth and water |
| Carrot | 60–75 | Works well in loose raised bed soil |
Picture this scenario: A new gardener sows tomatoes and melons first thing in spring—only to watch them fizzle out as temperatures stay cool. Compare that to another who starts with a mix of quick greens, radishes, and hardy beans. Within a month, salads and harvests roll in, building confidence and skill for future plantings.
- Radish and lettuce: Space seeds every inch, keep soil moist, and expect sprouts within 7 days.
- Bush beans: Wait until soil is warm (55°F+), then plant directly. They bring big returns without stakes.
- Basil: Tuck in after last frost; pinch tops to promote bushy growth.
- Carrots: Sow seeds thinly—don’t overcrowd, and keep the topsoil damp to ensure even germination.
💡 Pro Tip: Plant in succession—stagger sowings by 2-3 weeks for greens and radishes so you never run out. The Old Farmer’s Almanac consistently champions this technique for small-space gardens.
And this is exactly where most people make the most common mistake…
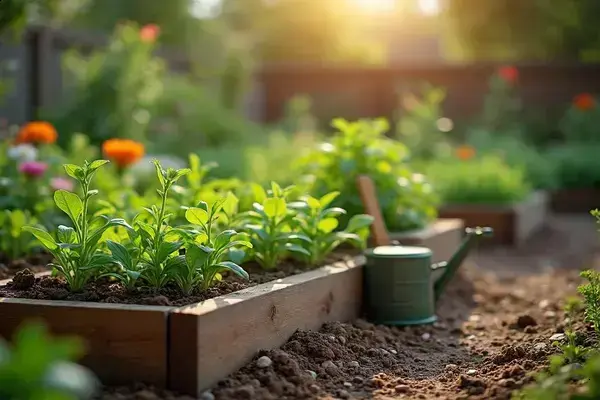
Essential Maintenance To Keep Raised Beds Thriving
Here’s the thing: a raised bed garden doesn’t run on autopilot. Even the healthiest setup still needs a bit of attention to keep everything lush and productive. The best news? A little smart maintenance beats major rescue efforts down the road—by a mile.
- Consistent watering: Raised beds dry out faster than in-ground plots. Check moisture every other day, and water early in the morning for best results.
- Mulching: Add a two-inch layer of straw, shredded leaves, or bark. This keeps moisture in, smothers weeds, and moderates temperature swings. The Cornell University Cooperative Extension recommends mulching as a top strategy against both weeds and water stress.
- Fertilizing: Even topsoil gets exhausted. Use a slow-release organic fertilizer at the start of each season—look for balanced products like 5-5-5 NPK (Nitrogen-Phosphorus-Potassium) to support steady growth.
- Pest vigilance: Scout for signs like chewed leaves or wilting in the morning. In practice: Many new gardeners catch cutworms early and save entire crops by running a quick finger-sweep under the leaves during weekly checks.
- Periodic soil refresh: In early spring or fall, rake in additional compost to replenish nutrients and keep soil structure loose.
💡 Pro Tip: Rotate your crop locations each season—even within the same bed. This simple trick helps disrupt pest and disease cycles, reducing the need for chemical controls and improving soil health over time.
Year-Round Maintenance Checklist
| Task | How Often | Why It Matters |
|---|---|---|
| Watering | 2–4 times per week | Consistent moisture, bigger yields |
| Mulching | Once per season | Suppresses weeds, retains water |
| Fertilizing | 1–2 times per season | Keeps growth strong and balanced |
| Pest Inspection | Weekly | Action before problems spread |
| Add Compost | Spring + Fall | Soil stays rich, loose, and alive |
Picture this scenario: You let things slide all summer, and by August, half the bed is choked with weeds and tomatoes have stopped producing. But with five minutes of weekly care—watering, a quick pest scan, and occasional mulch—your beds stay productive and beautiful without heroic weekend disasters.
Once this is in place, the rest of the routine falls into place naturally.
Your First Harvest Is Closer Than You Think
If you take just one thing from this guide, let it be: building a thriving raised bed is about getting the sun, soil, and timing right—the rest is just fine-tuning as you grow. Start with a good location, use a nutrient-rich mix, plant resilient crops, and keep up with simple care. That’s the real secret behind every lush raised bed garden.
Before, it might’ve felt like gardening was too complex or only for seasoned pros. But now? You know the steps, understand the must-do’s, and can spot common mistakes before they happen. Small steps really do lead to real results—fresh greens, easy harvests, and a patch you can be proud of. You’re absolutely ready to get your hands dirty.
What’s the first thing you can’t wait to plant in your new raised bed—lettuce, radishes, or maybe bold tomatoes? Share your pick in the comments below!

Ryan James Mitchell is a passionate gardener and plant care enthusiast dedicated to helping everyday people grow food, keep their plants thriving, and connect with nature — one garden at a time. With years of hands-on experience in vegetable gardening, indoor plant care, and seasonal garden planning, Ryan built 3sols to be the practical, honest gardening resource he always wished existed.