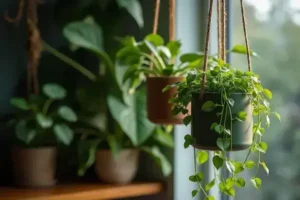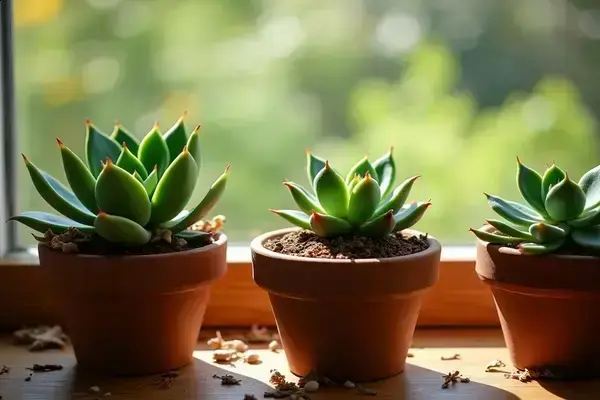
Picture this: you finally check your succulents after months of chilly neglect, and—oh no—those plump leaves look wrinkled, maybe even a little mushy. Sound familiar?
It’s frustrating to see your once-healthy plants struggling just as you’re ready to enjoy spring’s burst of life. If you skip the right recovery steps, you might end up with even more damage, lost growth, and that sinking feeling when a favorite plant bites the dust.
By the end, you’ll know exactly how to revive and strengthen your plants with succulent care after winter, side-stepping the usual mistakes. Ready to give your collection a fresh start? Let’s dig in.
Assessing Winter Damage And Identifying At-Risk Succulents
Succulents might look tough, but harsh winter conditions can do a number on them—sometimes in subtle ways you don’t spot right away. Are your beloved Echeverias or Jades less plump? Maybe there are strange dark spots or a slightly translucent look on leaves? Here’s the thing: catching early winter damage is the difference between a healthy spring comeback and a disappointing loss.
The most common signs you’ll see after a cold season include wrinkled foliage, mushy stems, brittle or yellowed leaves, and brown or black spots. Each symptom comes from a specific problem—cold snaps, rot, dehydration, or even hidden pests that sneak in while your plants are dormant. The American Society for Horticultural Science notes that frost damage typically shows up as water-soaked, squishy zones that spread fast, especially if you react too slowly.
⚠️ Important Warning: Never remove mushy leaves if the temperature is still below 50°F—an open wound just invites more rot. Wait until warmer days for major grooming!
Picture this scenario:
Your Aloe looks shriveled and dull. Dig a bit: the roots are dry, and a few lower leaves crunch in your fingers. Instead of tossing the plant, you trim off the soft leaves, check for hidden mealybugs near the base (a real winter risk), and set it in a spot with good airflow. It recovers—slowly, but steadily—because you spotted the problems before they got out of hand.
- Wrinkled leaves: Usually dehydration or cold stress. These can rehydrate with the right care.
- Mushy, blackened stems: Likely frostbite or rot. Act fast—remove all affected tissue above healthy growth.
- Pale or yellow patches: Early signs of sunscald during post-winter repositioning.
- Brown tips or crispy edges: Often a dehydration issue, sometimes high salt build-up from irregular winter watering.
| Symptom | Likely Cause | Immediate Action |
|---|---|---|
| Mushy leaves | Frost or rot | Remove affected leaves, increase airflow |
| Wrinkled, thin foliage | Underwatering | Resume gradual watering, avoid overwatering |
| Pale patches | Sunburn | Move to indirect light |
But there’s one detail most owners completely overlook until it’s too late: root damage often lurks unseen below the surface, ready to sabotage your next revival steps…
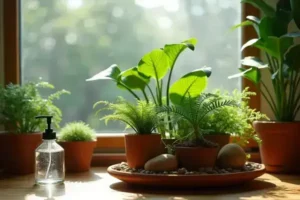
How To Safely Resume Watering In Early Spring
So your succulents survived the winter chill—now comes the million-dollar question: when and how should you start watering again? It’s not just about splashing on some water and hoping for the best. Getting this wrong can lead to rot, stunted growth, or a collection that’s limping along by June.
According to the Cactus and Succulent Society of America, the safest route is to revive watering gradually as temperatures stabilize above 50°F (10°C) and daylight hours increase. Most damage after winter happens when eager plant parents overcompensate, pouring too much water onto roots that aren’t yet ready to absorb it fully. The transition is a balancing act—timing, technique, and moisture monitoring all matter.
- Clean watering can (with narrow spout)
- Room-temperature water (not cold tap)
- Moisture meter (optional, but helpful)
- Chopstick or wooden skewer
- Well-draining soil (already in place)
- Observe the soil: Wait until the top 2 inches feel completely dry before even thinking about watering. Don’t trust your eyes—use a finger, chopstick, or moisture meter.
- Check the weather: Water only on days above 50°F (indoor or outdoor). Humidity matters too. Succulents transition best with gentle warmth and steady light.
- Water deeply—slowly: Pour water at the soil base, not on the leaves, until just a trickle comes out the drainage hole. Don’t rush this with a heavy hand.
- Allow drainage: Never let pots sit in runoff water. Use saucers only to catch excess, then discard after 15 minutes.
- Wait and reassess: Repeat only when the soil is fully dry again. Early spring usually requires less frequent watering than you expect.
💡 Pro Tip: Still unsure? Insert a wooden skewer near the root ball—if it comes out clean and dry, it’s time to water. If damp soil sticks, wait another few days. This trick, recommended by the Royal Horticultural Society, takes the guesswork out of the process.
In practice: picture returning to your shelf of Haworthias and Graptopetalums in late March. You test the soil and realize only one pot needs water. You resist the urge to drench everything at once. That patience means fewer problems and stronger plants heading into true spring. But there’s another key to revived growth most hobbyists forget at this stage…
Pruning And Cleaning For Healthy New Growth
Wondering if hacking away at damaged succulent leaves can really help your plant bounce back? Here’s the truth: proper pruning and cleaning fuel healthy new growth and prevent rot or pest outbreaks in spring. It’s not just aesthetic—it’s an insurance policy for your collection’s recovery.
- Sharp, clean pruning shears or scissors
- Soft bristle brush or small paintbrush
- Isopropyl alcohol (for tool sterilization)
- Disposable gloves (optional, for sensitive skin)
- Small bin or tray for discarded plant matter
- Sanitize your tools: Wipe blades with isopropyl alcohol for 30 seconds to prevent disease spread between plants.
- Remove dead leaves: Pluck away wilted, shriveled, or blackened leaves by hand—support the stem so you don’t tug too hard.
- Trim damaged stems: For mushy or brown stems, make a clean cut just above a healthy node, at a 45-degree angle for faster healing.
- Brush away debris: Sweep soil crumbs, cobwebs, and dried leaves from crevices with a soft brush. This stops fungus gnats and mold from taking hold.
- Dispose responsibly: Seal and remove all dead tissue, keeping your work area tidy. Don’t compost diseased parts—they can spread problems to the rest of your garden.
💡 Pro Tip: Always let freshly cut surfaces dry out of direct sun for 1–2 days before watering. The International Succulent Society recommends this as the best way to avoid stem rot in spring—especially for Echeverias and Crassulas.
In practice: after pruning away faded leaves on a Kalanchoe, you notice dozens of tiny offsets—those new baby plants—hiding underneath. With the mess cleared, sunlight reaches the base, and growth takes off. It’s one of those moments where a little cleanup unlocks a burst of vitality you didn’t know was waiting there.
And this is exactly where most people make the most common mistake…
Soil Refresh: When And How To Repot Post-Winter
When’s the best time to refresh your succulent’s soil after winter? The answer is sooner than most people think—right as spring’s warmth returns, before roots awaken fully. Waiting too long may leave your plants struggling in compacted, nutrient-depleted mix, unable to fuel their rebound. The National Gardening Association recommends early spring for repotting, when stress is lowest and new roots are ready to grow.
| Old Soil Condition | Repot Timing | Benefit |
|---|---|---|
| Compacted, poor drainage | Immediate (early spring) | Prevents rot, boosts oxygen |
| Salty residue, musty smell | As soon as detected | Removes toxins, promotes growth |
| Healthy but overgrown | Spring, before new growth | Gives room for roots, offsets |
Here’s what you’ll need to repot safely:
- High-quality cactus & succulent mix (well-draining, with perlite or pumice)
- New pot with drainage hole (ceramic or unglazed clay recommended)
- Transplanting trowel or small spade
- Stiff brush for cleaning roots
- Gloves (optional, for thorny varieties)
- Water your plant lightly the day before—this reduces transplant shock without risking soggy roots.
- Tip the pot gently and remove the plant. Tap or brush away old soil; inspect roots for rot, pests, or dryness.
- Trim off any blackened, mushy, or dry roots with sterilized shears.
- Add fresh mix, holding the plant so the crown sits above the soil line. Fill in and gently tamp down.
- Wait 2–3 days before your next watering session—succulents need time for cut roots to callus and avoid rot.
⚠️ Important Warning: Never reuse old soil that smells sour or looks moldy—even for other succulents. It’s a fast track to fungus gnat infestations and root problems, warns the Royal Horticultural Society.
In practice: picture repotting a tired-looking Jade from dense, sour-smelling earth into a new terracotta home with fluffy, mineral-rich mix. You trim mushy roots, notice new white feeder tips, and set the plant aside for a few days—all before spring watering begins. What actually works might surprise you…
Essential Light And Temperature Adjustments For Recovery
How much sunlight is too much after winter dormancy—and when does a sudden warmth become a risk? Here’s the thing: your succulents need gradual, carefully timed shifts in both light and temperature to recover and thrive. Skipping this step can undo all your hard post-winter work.
| Condition | Adjustment | Why It Matters |
|---|---|---|
| Etoliated/stretchy growth | Increase light gradually by 30 mins daily | Prevents shock and sunburn |
| Soft, pale leaves | Move closer to a bright window or use grow lamp | Rebuilds color and firmness |
| Frost risk at night | Keep above 50°F with a heat mat | Reduces tissue damage risk |
For indoor growers, morning sun is your secret weapon. Place pots near an east-facing window and watch for early signs of sunburn—red, brown, or faded blotches on leaves. Outdoor keepers must be even more patient: transition from deep shade to dappled light, then full sun over 2–3 weeks.
💡 Pro Tip: The American Horticultural Society recommends rotating plants a quarter turn every few days in early spring to avoid lopsided growth and ensure all sides get even exposure. This tiny tweak beats expensive grow lights for hobbyists on a budget.
- Invest in a thermometer that records daily highs/lows—succulents hate surprise frost.
- Use fluorescent or LED grow lights on short winter days, with timers set for 10–12 hrs only.
- Raise pots off cold windowsills or outdoor patios with cork trivets or wooden blocks to insulate roots.
- Skip placing pots directly above heat vents or radiators—dry air stresses plants and saps color.
In practice: picture this scenario—your Graptopetalum sits near a frosty window. You boost its resilience by sliding it two feet closer to the sun’s path, leaving a sheer curtain for gentle diffusion. By mid-April, it’s flush with vibrant, compact growth, not a stretched, pale survivor. Small tweaks make huge differences here. The right habits in place now make everything easier from here.
Your Succulents Are Ready to Thrive
If you take just one thing from this guide, let it be: gentle, stepwise care after winter gives your succulents the strongest shot at recovery. By checking for hidden damage, easing into watering, pruning with care, repotting in healthy new soil, and gradually boosting light and warmth, you’ll help your plants thrive with less risk. That’s what succulent care after winter is all about.
Not long ago, spring was a stressful time for you and your succulents—uncertain, sometimes full of setbacks. Now, step by step, you’re building a routine that grows confidence and lush new leaves. It feels way less overwhelming when you know what comes next. Your shelf is about to look brighter than you thought possible.
Which of these spring revival tips are you most excited to try with your own succulents? Share what you’re tackling first in the comments below!

Ryan James Mitchell is a passionate gardener and plant care enthusiast dedicated to helping everyday people grow food, keep their plants thriving, and connect with nature — one garden at a time. With years of hands-on experience in vegetable gardening, indoor plant care, and seasonal garden planning, Ryan built 3sols to be the practical, honest gardening resource he always wished existed.