Your favorite houseplant looks a bit dusty—and suddenly, it’s not as vibrant as you remember. Ever run your finger over a leaf just to see a trail of grime? It sneaks up, doesn’t it?
Here’s the thing: dirty plant leaves don’t just look bad, they actually block sunlight and slow your plant’s growth. That layer of dust can stunt new leaves, attract pests, and make your home feel less fresh. It feels weird when you love your plants but they still fade, no matter how well you water them.
By the time you’ve scrolled through this article, you’ll know how to clean plant leaves so they’re dust-free, glossy, and healthy. If you’ve ever wanted your indoor jungle to thrive—not just survive—you’re in exactly the right place.
Why Clean Plant Leaves Matters For Growth
If you’ve ever wondered why your thriving plant suddenly seems tired, ask yourself: when was the last time you wiped down its leaves? It’s easy to assume a little dust can’t do much harm — after all, it’s just surface level, right?
The truth is, dusty leaves don’t just look neglected. They act like a barrier, blocking your plant from absorbing sunlight efficiently. That means slower photosynthesis, weaker growth, and, over time, a plant that just can’t reach its lush potential. When a plant’s leaves stay dirty, it’s like walking around in sunglasses during a rainstorm — barely seeing the light that’s essential for survival.
💡 Pro Tip: The Royal Horticultural Society reports that regular leaf cleaning is linked to stronger growth rates and better resistance to common pests, especially in indoor environments where air movement is low.
Let’s dig into why clean leaves drive healthy, vibrant plants. When leaves are clear of dust and debris, each tiny pore (called a stoma) breathes easily. This is crucial for gas exchange — essentially, letting the plant “inhale” carbon dioxide and “exhale” oxygen. Dirty stomata get clogged, and the whole energy process slows down.
In practice: Picture this scenario — your beloved Monstera is fading, even though you’re watering it on schedule. You check the soil, try new fertilizer, and rotate its pot. Still, the old leaves yellow. Finally, you slide a finger across a leaf — a gray film appears. After one gentle wipe-down session, you notice brighter leaves and perkier stems within days. Maintenance makes the difference.
- Improved Photosynthesis: Unblocked leaves mean more sunlight absorbed and more energy produced.
- Pest Prevention: Bugs love hiding in grime — a regular wipe takes away their cozy hiding places.
- Better Humidity: Clean leaves transpire (release water) more effectively, supporting a healthier microclimate around each plant.
| Benefit | Impact on Growth | How Fast You’ll Notice |
|---|---|---|
| Sunlight Absorption | Lush, quicker new growth | 7-14 days |
| Pest Defense | Fewer infestations | Ongoing |
| Respiratory Efficiency | Bounce-back when stressed | Immediate to few days |
But there’s one detail most owners completely overlook until it’s too late…
Common Causes Of Dirty Or Dusty Leaves
What’s really behind those layers of dust on your favorite plant? It isn’t just laziness — sometimes, dirty leaves reveal a lot about your home’s air, your cleaning habits, and even your plant placement. Airborne particles settle everywhere, but your leafy friends are more sensitive than you think.
- Indoor Air Quality: Dust from HVAC systems, pet dander, and open windows all land on leaf surfaces faster than you might imagine. High-traffic rooms create more airborne debris, especially if you live near a city, construction, or pollen zones.
- Mineral Residue: Hard water leads to white spots and filmy build-up, particularly after misting or watering. That crusty outline isn’t a cosmetic flaw — it’s mineral deposit, mostly calcium and magnesium.
- Sticky Exudates: Some plants, like Ficus and Schefflera, naturally release sap or “honeydew,” which can trap dust, making leaves feel tacky.
- Cooking Oils & Smoke: Kitchen plants face the double whammy of airborne grease and micro-smoke — even if you run a vent, particles settle on anything green near the stove.
- Pests and Fungal Spores: Invisible at first, fine webs from spider mites or powdery mildew not only look bad but make it easier for new grime to stick.
⚠️ Important Warning: According to the United States Department of Agriculture (USDA), plants with persistent sticky residue or sooty leaf surfaces might signal the presence of pests or disease. Always investigate before cleaning, as improper treatment could actually worsen plant health.
In practice: Imagine you’ve got a peace lily perched by the kitchen window. Over several weeks, you notice dull leaves and faint gritty buildup. First, you blame your cleaning skills — but then realize the culprit: frequent cooking releases fine oil particles and steam that latch on to every surface, especially foliage. Once you move the plant farther from the stove and start wiping leaves, things change fast.
| Source | Look For | Quick Fix |
|---|---|---|
| Airborne Dust | Grayish, dry film on top leaves | Damp cloth wipe |
| Hard Water | White spots or crusty edges | Distilled water rinse |
| Pests/Sap | Sticky or shiny residue | Isolate and check for bugs |
And this is exactly where most people make the most common mistake…
Best Methods To Safely Clean Different Leaf Types
Do you ever stand in front of your plants and wonder, “Is it safe to just wipe this leaf down, or am I about to make it worse?” That anxiety? Totally normal. The truth is, not all leaves are alike — and if you treat a fuzzy African violet the way you’d handle a rubber plant, you could do more harm than good.
- Gather your tools: You’ll need a soft microfiber cloth, a bowl of room-temperature distilled water, soft paintbrush, plant-friendly spray bottle, and (for extra dust) a handheld air blower. Skip household cleaners!
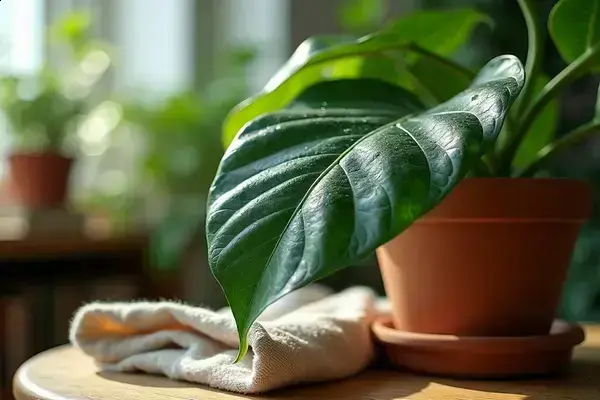
- Waxy, broad leaves (Ficus, Monstera): Dampen a cloth in water, wring it nearly dry, and gently wipe each leaf top and bottom. Avoid letting water drip down stems.
- Delicate/fuzzy leaves (African violet, Calathea): Never use a wet cloth. Instead, lightly dust with a soft, dry makeup or paintbrush. For stubborn dirt, use a hand air blower — never spray water directly on the surface.
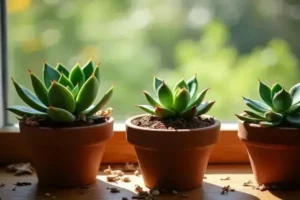
- Succulents and cacti: Use a dry, fluffy brush to clear dust around spines and between leaf clusters. For stuck-on debris, try a can of compressed air held several inches away. Minimal handling is key — these plants hate extra water.
- Fine-leaved ferns and palms: Mist the leaves lightly with distilled water, then let them drip-dry naturally away from direct sun. If drooping, support fronds while you clean.
💡 Pro Tip: According to the National Gardening Association, always test any cleaning technique on a single leaf before working on the whole plant. Some species react to even mild stress, so watch leaves for any immediate spots or droop.
- Time required: Most plants take 10–20 minutes to clean fully.
- Prerequisites: Clean hands, tools, and a location away from direct hot sun or wind.
In practice: Picture this scenario—a peace lily with broad glossy leaves in your living room is gathering dust. You grab the microfiber cloth, making it barely damp, and wipe in gentle circles. The leaf shines instantly. Next, you spot a fuzzy Streptocarpus nearby and resist the urge to use water; instead, you grab a soft brush and carefully dust the tiny fibers. By mixing up your method, each plant gets the care it actually needs—not just what’s convenient.
| Leaf Type | Best Tool | Key Tip |
|---|---|---|
| Broad & Waxy | Microfiber cloth | Wipe top & bottom, don’t soak |
| Fuzzy/Delicate | Soft brush | Never use water spray |
| Succulent/Thick | Dry brush/compressed air | No misting, minimum contact |
What actually works might surprise you…
Mistakes To Avoid When Cleaning Plant Leaves
Ever finish cleaning your plant leaves only to see spots, damage, or a sad-looking stem a few days later? It’s frustrating. The truth is, most cleaning mishaps aren’t about the tools you use—they’re about overlooked details and common missteps.
- Using Tap Water (Especially Hard Water): Minerals in regular tap water can leave stubborn white spots behind. Always opt for distilled or filtered water for a flawless finish.
- Over-Misting or Over-Wetting Leaves: Too much moisture—especially when pooled in leaf crevices—can encourage fungal growth and rot. Go for a lightly damp (not soggy) cloth, and avoid water pooling at the leaf base.
- Scrubbing or Rubbing Too Hard: It’s tempting to scrub sticky residue, but plant leaves—especially delicate or fuzzy types—bruise and tear easily. Gentle, circular motions win every time.
- Ignoring Leaf Undersides: Most pests and dust settle underneath. If you skip this step, you’re not really cleaning—you’re letting problems linger where you can’t see them.
- Using Household Soaps, Detergents, or Alcohol: These can strip protective waxes, burn tissue, and trigger stress responses. Only use plant-safe solutions and never harsh chemicals.
⚠️ Important Warning: According to the University of Florida IFAS Extension, chemicals not specifically designed for plants can cause irreversible leaf spotting or defoliation—even if damage doesn’t show up right away.
In practice: Picture this scenario—a new plant owner excitedly polishes every leaf with window cleaner and tap water. Within a week, brown spots spread, and the plant’s new growth curls. If only they’d known: plain distilled water and patience prevent most drama. Sometimes, less is truly more.
| Mistake | Impact | Simple Fix |
|---|---|---|
| Tap Water Spots | Mineral staining, dull appearance | Switch to distilled water |
| Excess Moisture | Leaf rot, fungal issues | Wring out cloth, dry gently |
| Harsh Chemicals | Leaf burn, tissue loss | Use plant-safe solutions |
And this is exactly where most people make the most common mistake…
How To Keep Your Plants Clean Longer
Ever wish your freshly cleaned plants could stay spotless longer—without turning you into their personal maid? The secret isn’t in nonstop wiping, but in building a healthy routine that actually protects your plants from grime and dust in the first place.
- Find the Right Spot: Place plants away from high-traffic walkways, air vents, and especially kitchens, where airborne oils love to cling to leaves.
- Use a Room Air Purifier: A HEPA air filter quietly catches dust before it lands on broad foliage. According to the EPA, these purifiers help reduce particulate buildup in closed rooms by over 60%.
- Rotate Plants Regularly: Turn pots a quarter each week. This prevents any one side from becoming a dust magnet and keeps sunlight exposure balanced—great for growth, too.
- Dust Surfaces Nearby: Wipe tables, window sills, and shelves often. Clean surroundings mean less debris settling on your plant collection.
- Check Leaves During Watering: Make a habit of quickly inspecting leaves for dust or sticky residue every time you water. Those thirty seconds save you hours—literally—down the line.
💡 Pro Tip: For collections with several large plants, use a gentle oscillating fan on low for a few hours a day. As the American Society for Horticultural Science notes, air movement discourages dust buildup and even keeps pests at bay.
In practice: You set up an air purifier in your living room, dust the side table weekly, and spot-wipe leaves during every Sunday watering. Suddenly, that dull film that used to appear in days doesn’t show up for weeks. Tiny shift, huge results.
| Habit | How Often | Why It Works |
|---|---|---|
| Wipe Leaves | Every 2-4 weeks | Removes buildup before it harms |
| Dust Surfaces | Weekly | Prevents transfer to plants |
| Rotate Plant | Weekly | Even sun, dust protection |
Small steps, repeated consistently, make the biggest difference over time.
Your Plants Are Ready To Shine
If you take just one thing from this guide, let it be: giving your plants clean, dust-free leaves is the single easiest way to boost their health and beauty. Remember to clean different leaf types safely, avoid common cleaning mistakes, and set up routines that keep leaves clear longer — these three steps change everything for your indoor garden.
Maybe you used to stress every time you saw grimy leaves or worried about hurting a plant with the wrong wipe. Now you know simple, science-backed strategies for keeping foliage lush and resilient. Things stay fresh longer, and your plants bounce back faster. It feels good to see real results with just a few mindful tweaks. You’ve totally got this.
Which cleaning tip or routine do you want to try first on your favorite plant? Tell us in the comments — and share your progress!

Ryan James Mitchell is a passionate gardener and plant care enthusiast dedicated to helping everyday people grow food, keep their plants thriving, and connect with nature — one garden at a time. With years of hands-on experience in vegetable gardening, indoor plant care, and seasonal garden planning, Ryan built 3sols to be the practical, honest gardening resource he always wished existed.